Receive Fund is the form where the user can record as Approve/Reject the transferred fund. The Receive fund forms can be accessed from HO and Branch.
Receive fund is the second option under the Fund transfer menu. With this menu, user can record the transferred fund as Reject or Approve. Both the reject and approve options are included in it and user can record the required one for each transfer. When the user click on Receive fund menu, it redirects to Receive Fund Search page and it shows the list of received fund details from HO/Branch.

Key features

The Receive Fund search page shows the details of different funds received.
|
FIELD |
DESCRIPTION |
|
# |
Serial number |
|
Date |
The fund received date will be shown on this field. It is the date when the payment is received from the Branch |
|
Branch |
This column shows details of From account. From account is the account in which the fund is transferred |
|
Narration |
It shows the narration regarding the received fund |
|
Transaction type |
This column shows the transaction type or instrument type of the transferred fund |
|
Status |
In this column, the user can access the current status of the receiving fund and the status may be pending, canceled or received. |
|
Amount |
This column shows the total amount of a particular fund transfer |
|
Total |
The total amount of all the received fund transactions shows at the bottom of the table. |
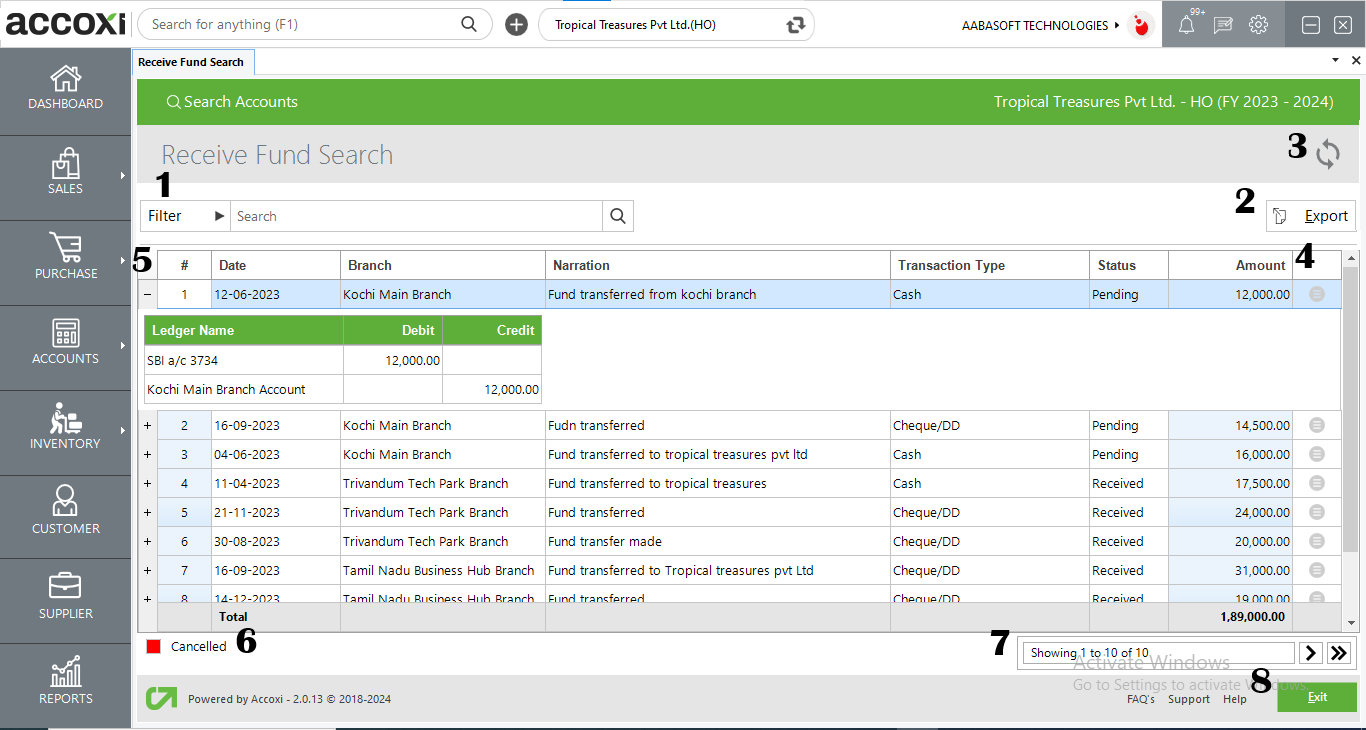
The user can filter the receive fund details in two ways. Either can directly enter from account in to the Search Bar near Filter Option or by clicking the Filter menu. By clicking on the Filter menu, filter tab will open and it includes three options to filter the data. User can filter the data by selecting From branch or By date option and by selecting a particular status. After selecting/entering the filter details user needs to click on Apply button to filter the data and the data will open based on the details entered.
The Fund Received data can be Export to Excel format. Click On the Export button at the top right corner. Select the file location and click on Save.
If the latest data is not displayed then click on the refresh option
More options include two additional options, which are Receive and Cancel. User can approve the received fund by using the Receive option and can reject it by using the Cancel option.
A + icon is given on the left side of the data table and it helps the user to access the journal view of the particular receive fund transaction. When the user clicking on the icon, a new tab will open and it shows the ledger, debit and credit amount details of the particular transaction.
Cancelled receive fund details are displays with color format. Red color indicates the Cancelled transfers.
It controls the page navigation and the page size. Page size can be set to 10, 20, 50 or 100. By giving page number in the box and clicking on Go button, user can jump to the intended page
If the user wants to exit from the current page click on the "exit" option, then it redirects to the previous page.
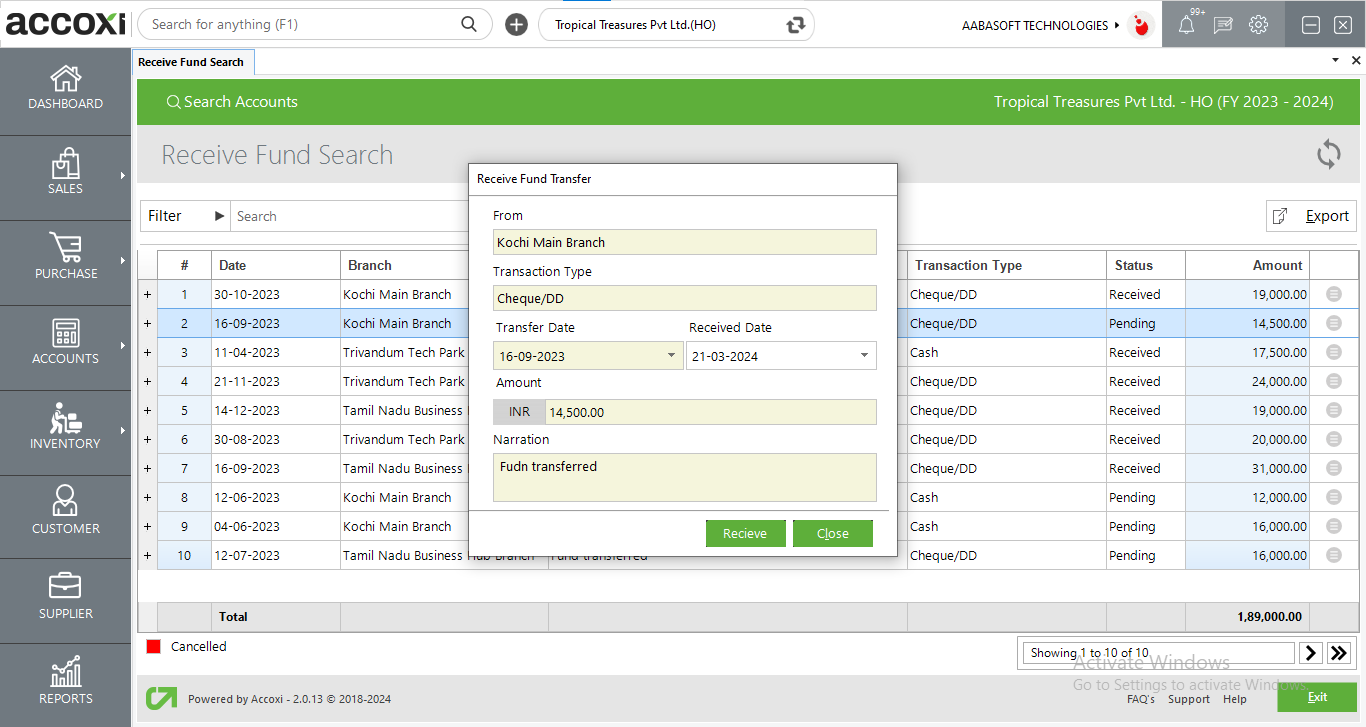
Steps to Accept/Cancel new received fund
|
Field |
Description |
|
From |
This field shows the name of the branch from where the fund id transferred. |
|
Transaction Type |
Shows the type of the transaction such as, cheque/DD, cash etc.. |
|
Transfer Date |
Shows the date of transfer. |
|
Received Date |
Fund received date can be set in this field. Current date is shown in default. |
|
Amount |
Amount of fund transfer is showing here. |
|
Narration |
Narration provided while transferring fund is showing here. |
|
Receive |
After set the received date, fund received process can be completed by clicking the Receive button. |
|
Close |
To close the current window, close button can be used. |
Yes, you can filter Receive Fund by using the following steps
Yes. You can take the printout of the transfer fund form by the following steps,