Accoxi enables the admin to set the type of users of software. Types may be like accountants, managers, auditors etc.
In its role as accounting software, ACCOXI recognizes the diverse roles within a business by allowing administrators to assign different user types. These user types may include roles such as accountants, managers, auditors, and more. By configuring user types, the admin gains the ability to define specific permissions for each user on the software. This includes the ability to set menu and report permissions tailored to the user's role, providing a customized and secure access level for individuals based on their responsibilities within the organization.

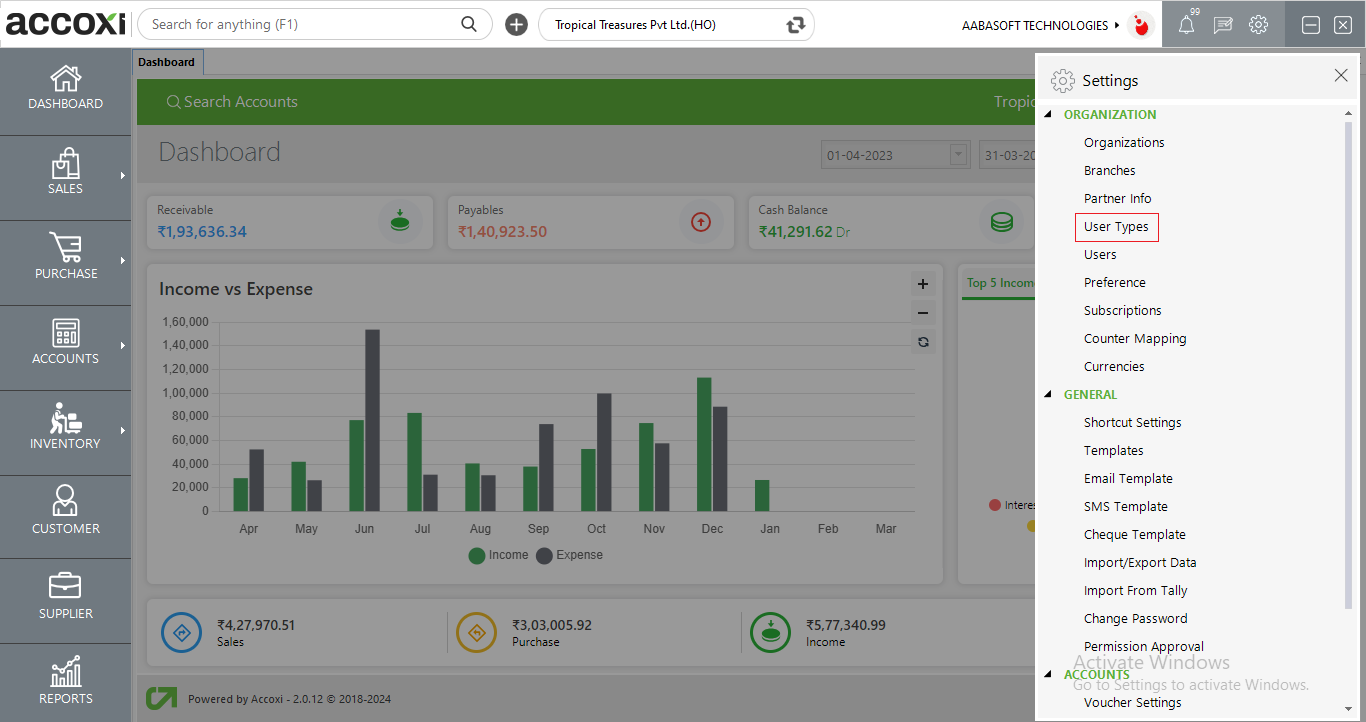
The user type menu can be found within the settings.
Within the settings, navigate to "Organization" and then select "User Type" from the menu.
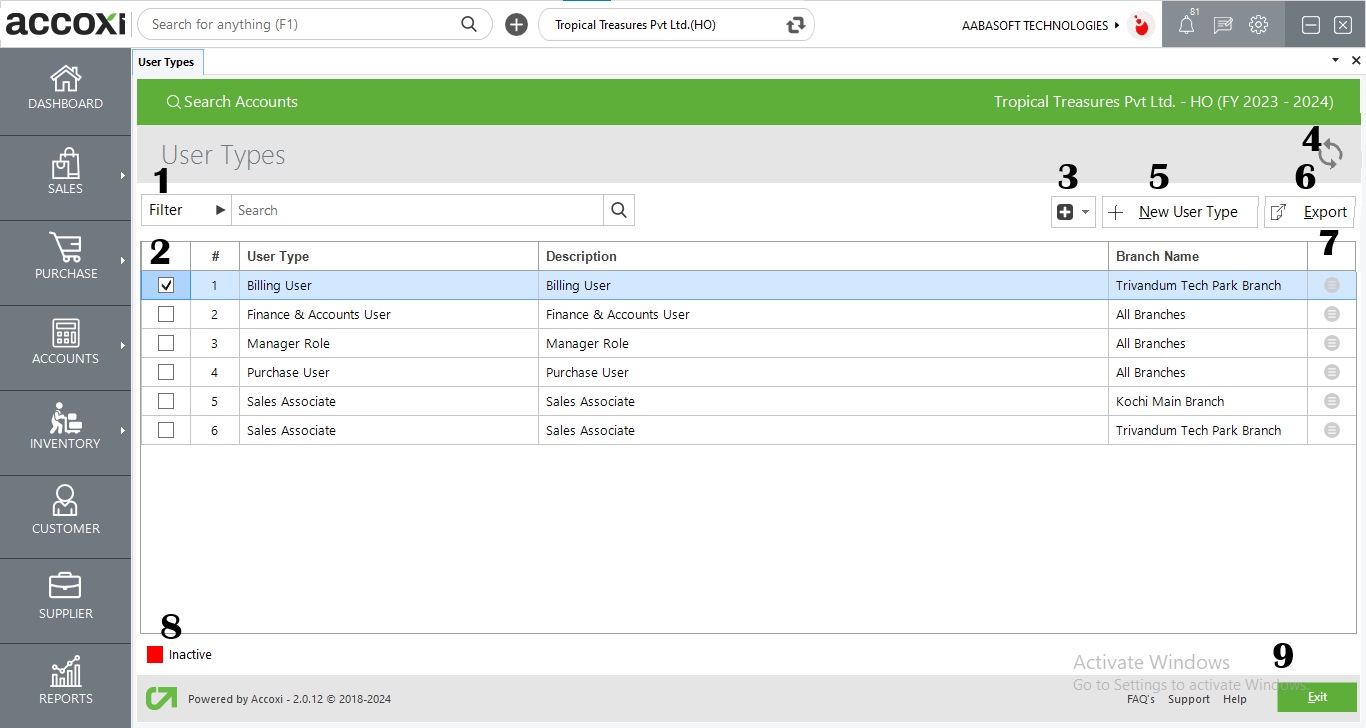
Menus Available in User Type Search
|
Field |
Description |
|
1. Filter |
To search a user type, you can make use of the filter option, offering you the flexibility to narrow down your search based on various criteria. You can filter by user type, description, or status. Upon applying any of these conditions, the user type list will be displayed accordingly, streamlining the process of finding the specific information you are looking for. |
|
2. Checkbox |
The deactivate button will become visible upon clicking the checkbox. |
|
3. Deactivate |
This dropdown offers a functionality to deactivate the chosen user type. Upon selection, a confirmation popup message will appear to verify the deactivation process. |
|
4. Refresh |
The "Refresh" icon, located right top corner, facilitates the listing of newly created user type. |
|
5. New User Type |
To create a new user type, users can click on this button, which will then redirect them to the user type creation screen. |
|
6. Export |
The user type list is exportable to Excel format. When the export button is clicked, a confirmation message prompts the user with the question, "Would you like to export?" Two choices, yes or no, are presented. Choosing "yes" redirects the user to the save-as screen, where they can specify a filename and save the file. Opting for "no" will terminate the export process. |
|
7. More Option |
Within the "More Options" button, you can utilize various features, including create duplicate, edit and delete.
|
|
8. Color Filter |
Red color is denoted to indicate an inactive user type. |
|
9. Exit |
You can navigate out of the user type search page by selecting the "Exit" button positioned at the lower right corner of the screen. |
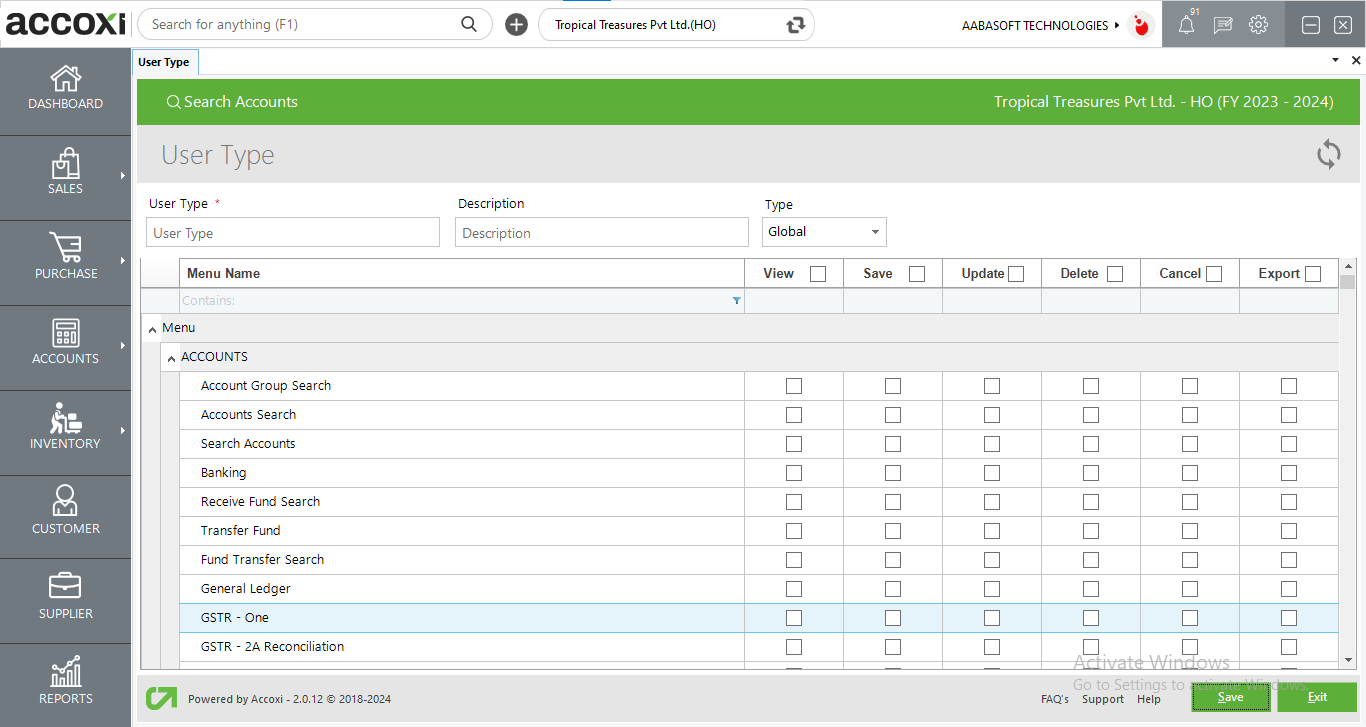
Upon clicking the "+ New User Type" button, you will be directed to the user type creation window. From this creation screen, users can assign both report and menu permissions to the user type.
|
Field |
Description |
|
User Type |
You can enter the user type name in this designated field. |
|
Description |
You can input a description related to the user type in this field. |
|
Type |
The "Type" field includes a dropdown with the options "Global" and "Local." Choosing "Global" ensures that the created user type is accessible across all branches. Opting for "Local" restricts the user type to the selected branch only. When selecting "Local," a dropdown field for branch selection will appear. |
|
Branch |
The "Branch" option offers a dropdown list of created branches, allowing users to choose the specific branch to which the user type should be assigned. This field becomes visible only when the selected "Type" is set to "Local." |
|
Menu Name |
Various menus and reports are displayed in this column. The Admin has the ability to search for a specific menu or report using the search bar, and permissions can be granted to the user type accordingly. |
|
Permissions |
The Admin can grant menu and report permissions to the user type by specifying actions such as view, save, update, delete, cancel, and export. To grant permission, the checkboxes for each respective action need to be selected. |
|
Save |
After entering all the details and selecting the permissions, clicking the "Save" option allows the user to successfully create a new user type. |
|
Exit |
The "Exit" option is provided for navigating to the previous page without saving the user type. |
Filter option is available below the User Type search bar at the left hand side. User type can be filtered based on user type and description. Either you can give any of the said criteria directly into the search bar near filter option or by clicking the filter down arrow option you can give the details into the fields directly.
Select the User Type search window. At the right hand end of the each User Type there is a delete icon which represents delete. Click on the icon to delete the corresponding user type.