step-by-step guide in the creation and management of customers in Accoxi

A customer is an individual or business that purchases another company's goods or services. Customers are important because they drive revenues- without them, businesses have nothing to offer.
In ACCOXI, you can add and create customers involved in your business for creating sales transactions like invoices, Sales Orders, etc.

This video illustrates how to create a customer account on Accoxi, Accounting Software for Small Business. A customer is an individual or business who purchases another company's goods or services. Customers are important because they drive revenues- without them, businesses have nothing to offer. Accoxi enables the users to add customers involved in your business. You will have to add customers for creating sales transactions like invoices, Sales Orders etc.
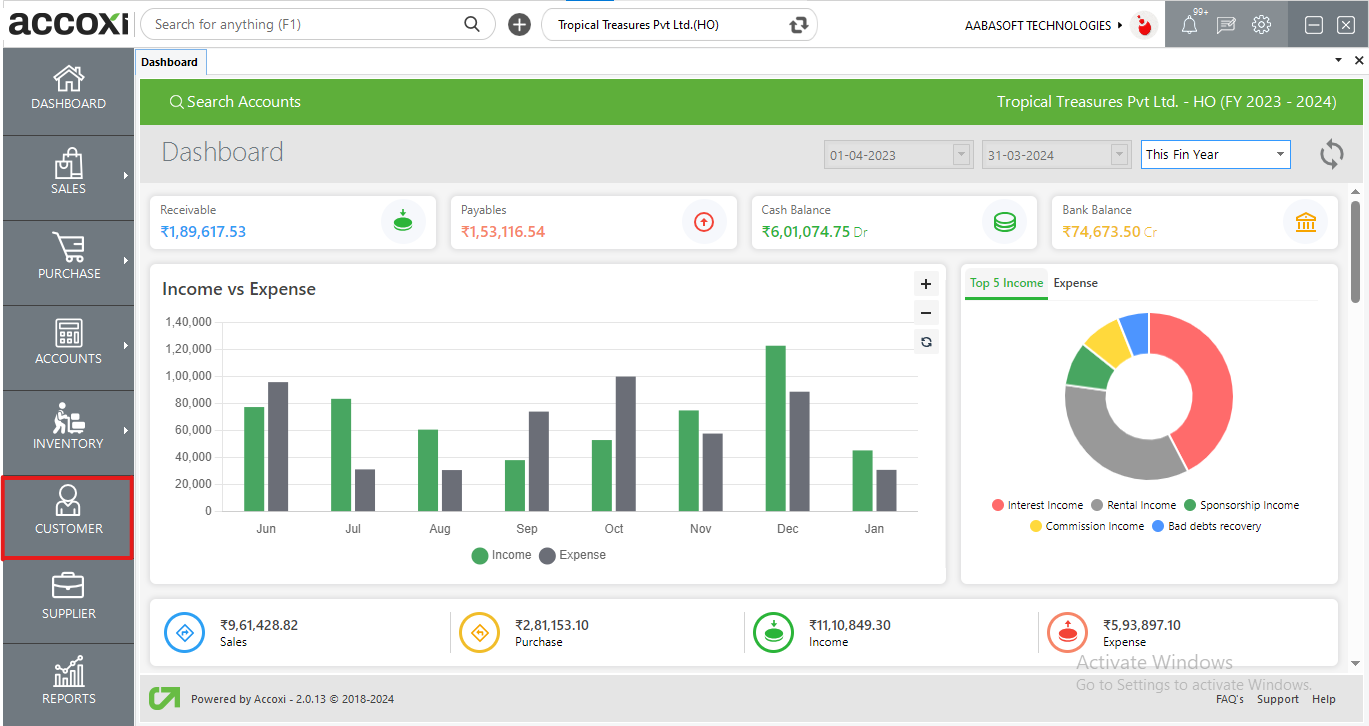
When we click on the Customer Module, it opens into Customer Search.
Customer search consists of various menus and it displays the details of the customer added to the business.
Data available in customer search table:
|
Field |
Description |
|
# |
The serial number of the data in the table |
|
Customer name |
The name of the customer created Is displayed in this column |
|
Contact name |
The contact name of the customer created Is displayed in this column |
|
Phone no. |
The phone number of the customer created Is displayed in this column |
|
GSTIN |
The GST number of the customer created Is displayed in this column |
|
GST treatment |
The GST treatment of the customer created Is displayed in this column |
|
Branch name |
The branch name where the customer is created is shown in this section |
|
Route |
The customer route taken by the organization is displayed here. |
|
Balance |
The balance amount of the customer which might be receivable/payable. The closing balance of the Customer is represented either in red or green to denote payable or receivable respectively |
Menus available in customer search
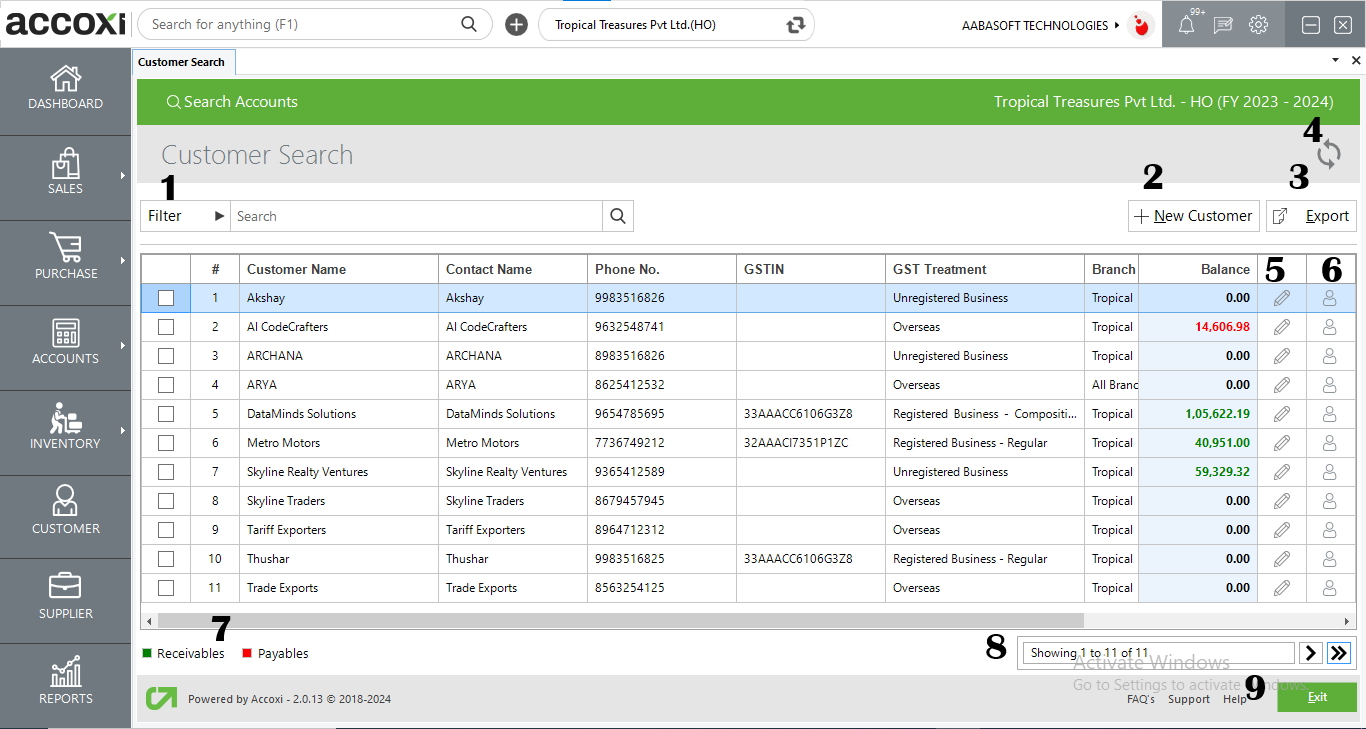
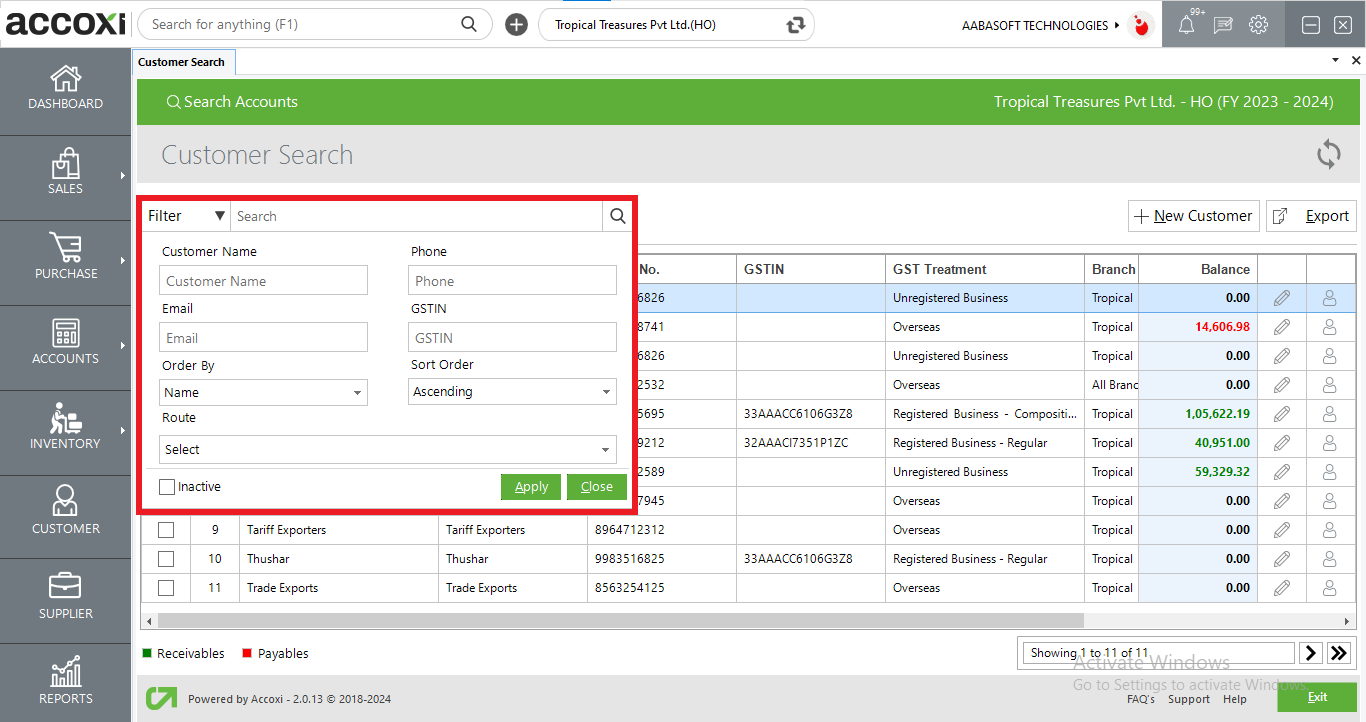
1.Filter option
2. New Customer
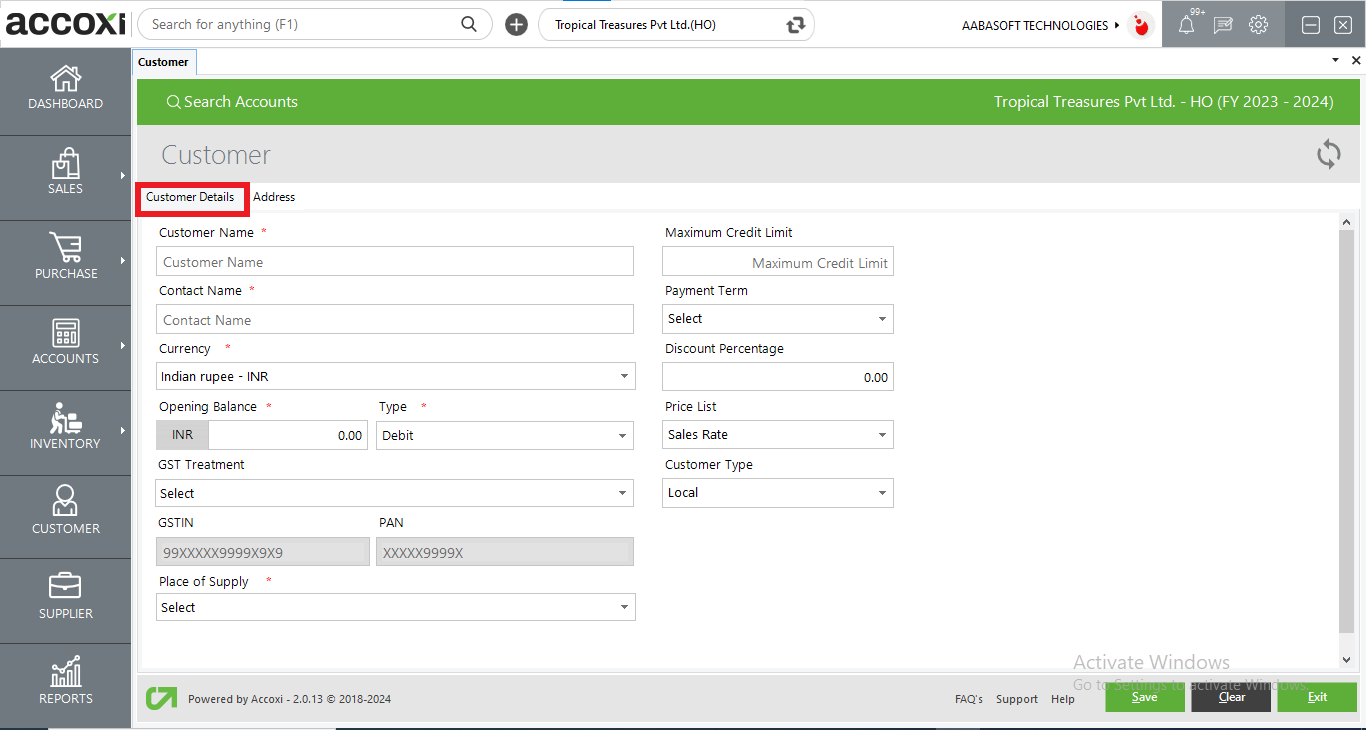
The New Customer button opens into the Customer Form where the user can add New Customers. Compulsorily fields are marked in red.
Steps to create a new Customer
|
Fields |
Description |
|
Customer Name |
Enter the name of the Customer |
|
Contact Name |
Enter the contact person’s name |
|
Currency |
User can select the Currency of the customer as per the currency used for transaction. |
|
Opening Balances |
You can add the opening balance of the Customer if any. If there is no opening balance then you can set it as “0” |
|
Account Type
|
The opening balance can be set as credit or debit amount. From the drop down menu of account type you can choose the appropriate field. |
|
GST Treatment |
Select the GST treatment from drop down menu |
|
GSTIN |
If the Customer is Registered Business or Special economic Zone, Enter the GSTIN number For the Customers whose GST treatment is Overseas or Unregistered party the GSTIN field turns inactive. |
|
PAN |
If the Customer is Registered Business or Special economic Zone, Enter the PAN number For the Customer whose GST treatment is Overseas or Unregistered party the PAN field turns inactive. |
|
Place of Supply |
Based on the Customer GST number this field automatically identifies the state. In case of Customer who does not have GST number like unregistered party or overseas, user can choose the state from the drop down list. |
|
Maximum credit limit |
Here you can set the maximum credit limit allowed to your customer. If your sales to this particular customer cross this limit, a warning message will appear. |
|
Payment Terms |
Here you can set the payment terms and the said term will appear in the sales invoice. Based on this payment term, the status of the invoices like overdue, unpaid etc. are decided. |
|
Transaction Nature |
If the selected GST treatment is Overseas or SEZ, a new field for selecting transaction nature will appear with values of LUT/Bond, Taxable and Zero rated. |
|
Price List |
Price list enables the user to assign a different sales rate for a customer based on business requirements. Price lists can be changed in Settings=> preference=> Sale invoice. |
|
Customer type |
The customer type can be specified in this field. User can differentiate customers as global as well as local. |
|
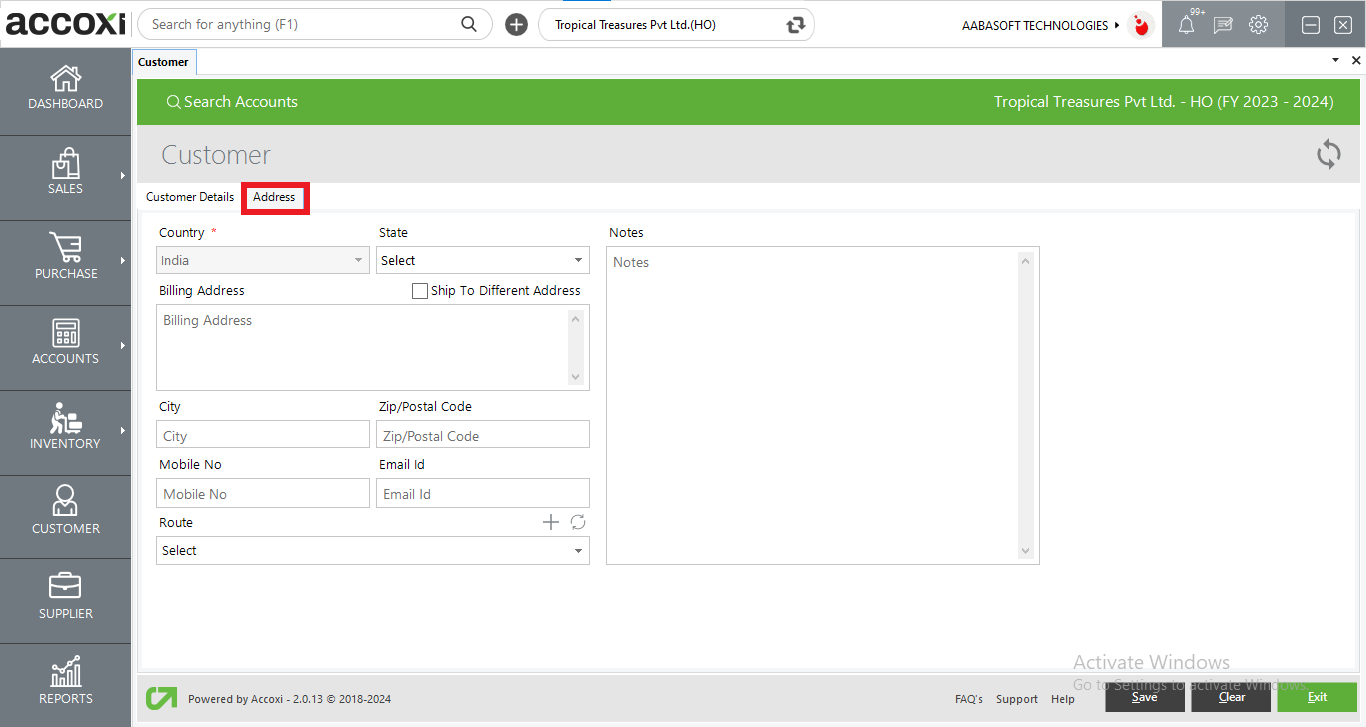
Country
|
Other than Overseas GST treatment, the country name is set as India. You cannot choose any other country If GST treatment is overseas, the country drop down option becomes active and you can choose the required country |
|
State |
Other than Overseas GST treatment of Customer, you can set the state from the drop down option But the state field turns inactive for the overseas Customers |
|
Billing Address |
Enter the Customer address. User can add different customer address into the data by choosing ship to different address option |
|
Ship to Different Address |
This is a check box and selection of this will opens another tab to mention shipping address of the customer. Multiple shipping address can be provided for a customer. |
|
City |
Enter the City of the customer |
|
Pin Code |
Enter the Pin code/ZIP code of the customer locality |
|
Mobile No |
Enter the mobile number |
|
|
Enter the email id of the Customer |
|
Route |
User can choose the customer route or click on the plus sign on the Route bar to create new customer route. |
|
Notes |
Any additional information pertaining to the customer can be given as Notes. |
|
Save |
The entered customer data can be saved by clicking Save button. |
|
Clear |
To Clear the data entered |
|
Refresh |
To refresh the window |
|
Exit |
To exit from the window |
3.Export
The Customer list can be exported to Excel format. Click the Export button at the top right corner near the +New button. Select the file location and click Save. The fields that can be seen in export file are Customer Name, Contact Name, Phone Number, GSTIN, GST Treatment and Balance.
4.Refresh
If your latest data is not displayed, click on the refresh icon on the top left corner of the page to fetch the new data.
5.Edit
You can edit the customer details if required using the Edit icon. By clicking this icon the Customer Form opens. You can see the entered details and you can update the new details as per your requirement.
6. Customer Info
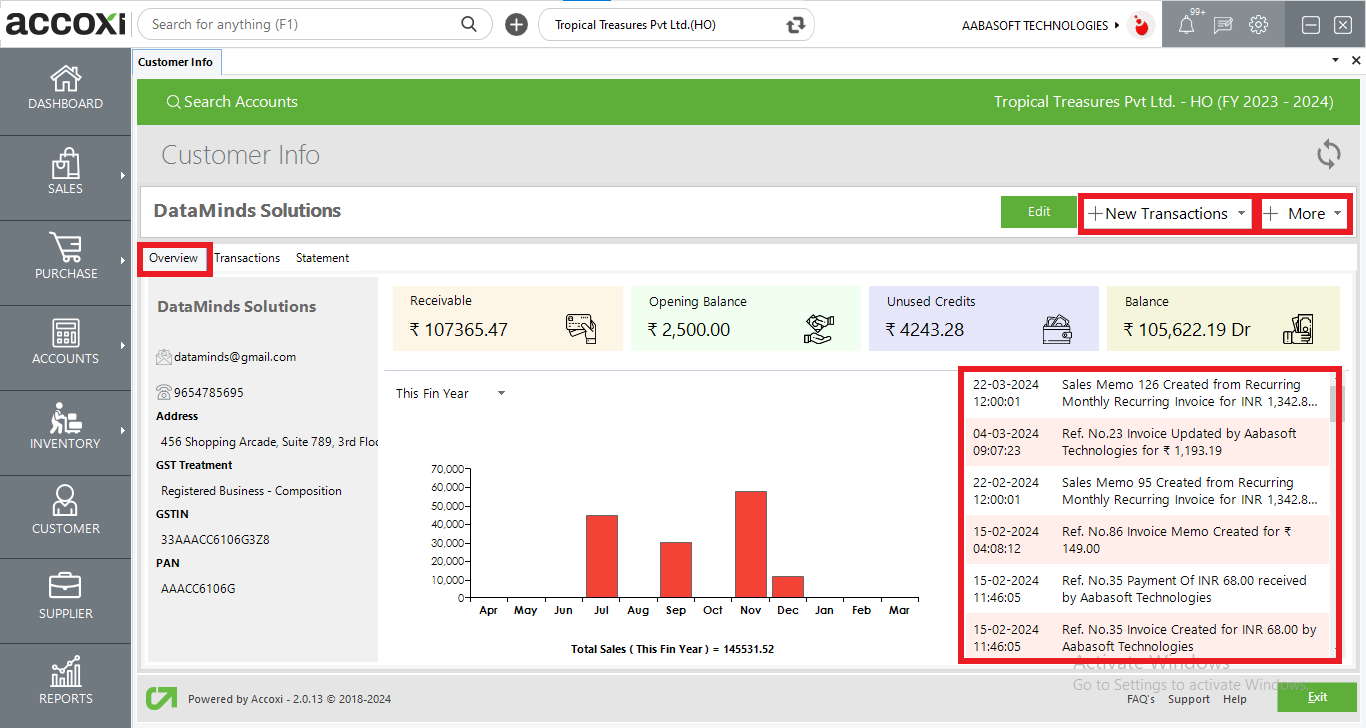
Customer info provides a detailed analytical report of the specified customer chosen by the user and it provides a crisp trail of all the transactions between the customer and the organization. The customer info option in Accoxi displays the transactions, balance, statements of specified customer.
The Overview page shows an eagles view of the customer’s basic information and activity. A mini dashboard displaying the customer’s balances, unused credits and receivables. A graph is present showing the sale activity of the customer.
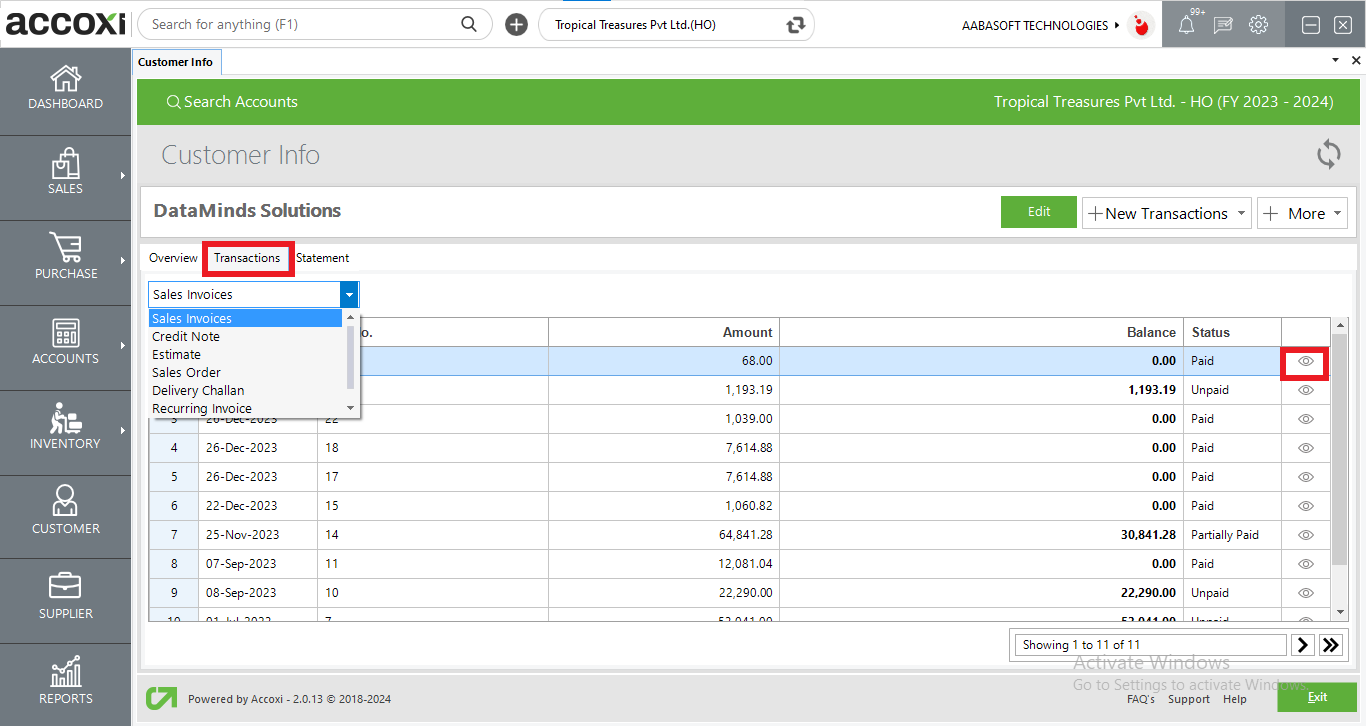
The Transaction tab displays a detailed list of transaction done by the customer and the user can filter the transactions with the drop down option. User can also view the invoice from the view option.
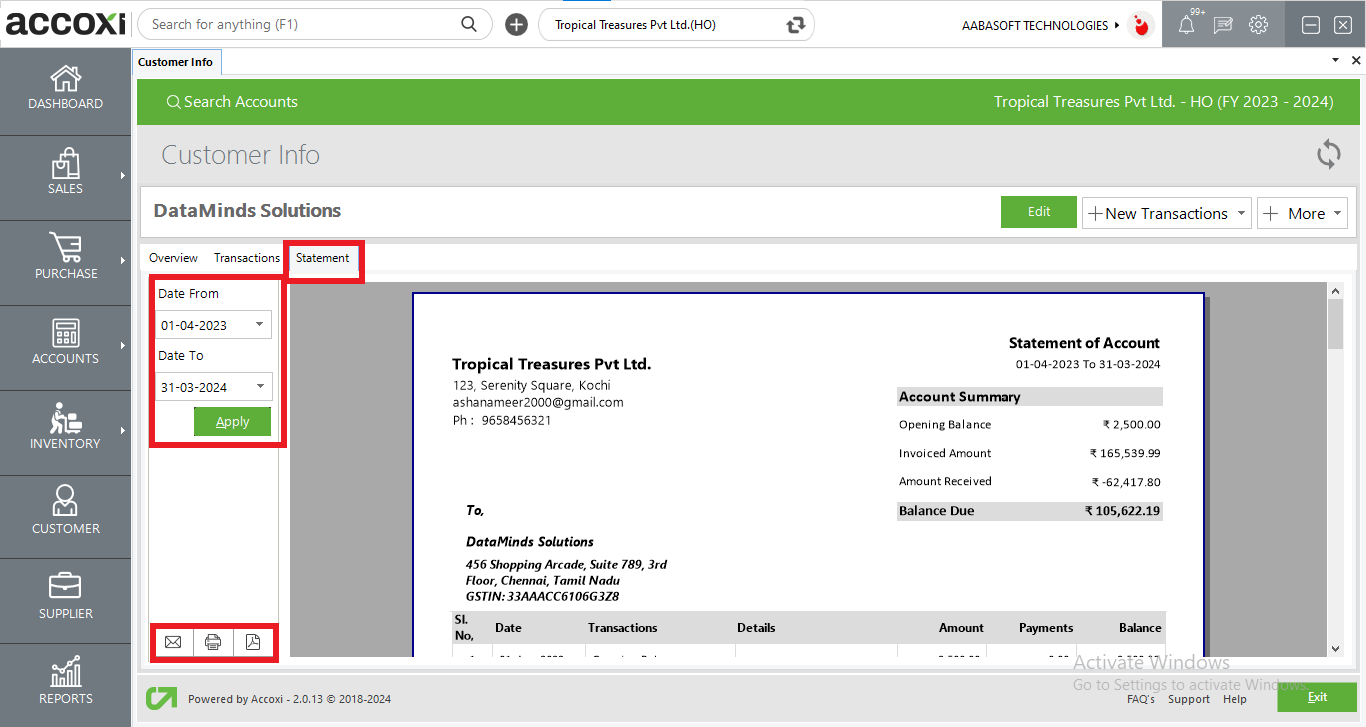
The statement module produces a statement regarding the invoice and payment received from the customer with date, transaction type, Details, Amount, Payments and balance. A statement is shown with the customer’s balance due after all transactions shown.
User can Filter the Statement based on timeframes and can email, print or save as PDF from the options present in the bottom left corner.
7. Colour Filter
The closing balance of the Customer is represented either in red or green to denote payable or receivable respectively.
8.Pagination Control
It controls the page navigation and the page size. Page size can be set to 10, 20, 50 or 100. Enter page number in the box and click on Go button so that the user can jump to the intended page.
9.Exit
Below the pagination control, there is an Exit button. If you want to exit the Customer Search Page, click Exit button.
The user will be launched to Shipping Address window. Enter the address.
A single customer can have up to three shipping addresses. This can be done by selecting New Click (indicated by ‘+’ in the dashboard) in Customer Module and clicking the Ship to Different Address check box. Enter the address in the field provided in the Shipping Address window.
No, the duplicate of customers with same display name is not allowed.
In Customer Details form, there is a field named Payment Term in which eight set of predetermined values like NET 7, NET 15, On Receipt, Specific Date etc. will be available. From the drop down option in Payment Term select the appropriate value and Save the customer details.
Select the Customer Module. At the right hand end of the each customer there is a Pencil icon which indicates edit. Click on the icon to make required changes and select Save button.
No, customer can only be edited not deleted.
Select the Customer module. The Customer Search window opens. Click on the Export button at the top right corner near the New button. Select the file location and click on Save.
While saving the Customer, if you get a warning message saying Please enter Opening balance, In the opening balance column give the amount as Zero and then save the Customer data.
GST treatment decides how the transaction to be accounted for. Based on the GST treatment , the automated journal is created as Interstate,Intra state ,overseas etc.