User can categorize the product according to category name and number.

Category in ACCOXI is used to enter the category of a product. Users can categorize the product according to category name and number. It can be created and viewed from the Inventory Module of the ACCOXI.
The Inventory and Software division of Accoxi takes care of managing the various categories in the Billing and Inventory segment. The categories can be added, deleted, and edited based on the discretion of the user, and managing the categories in this efficient Billing and Inventory software wins your accounting games hands down.

OPTIONS AVAILABLE IN CATEGORY MENU:
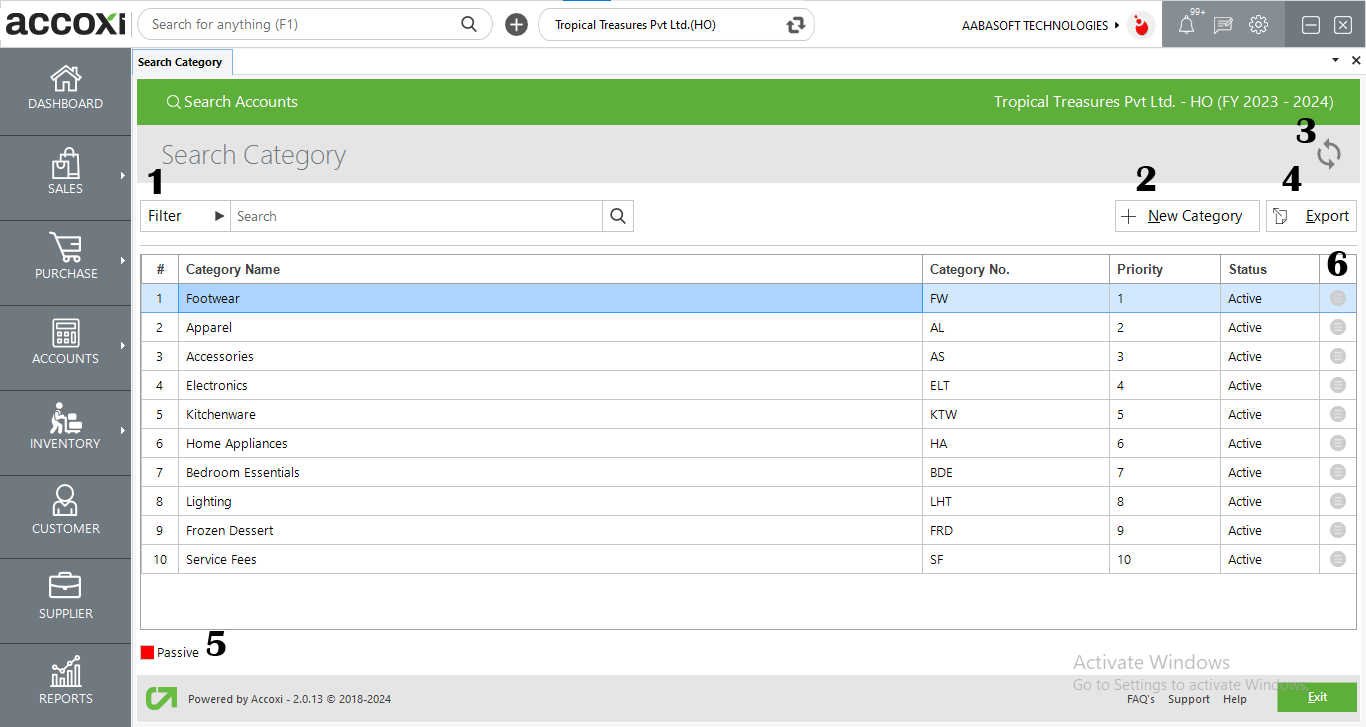
By clicking inventory module and selecting CATEGORY menu user will be redirected to a category window where the user will be able to view all the categories created for the products.

1. FILTER
The filter option in the category search window helps the user to filter the category
2. NEW
A new category can be created by clicking on the new category option.
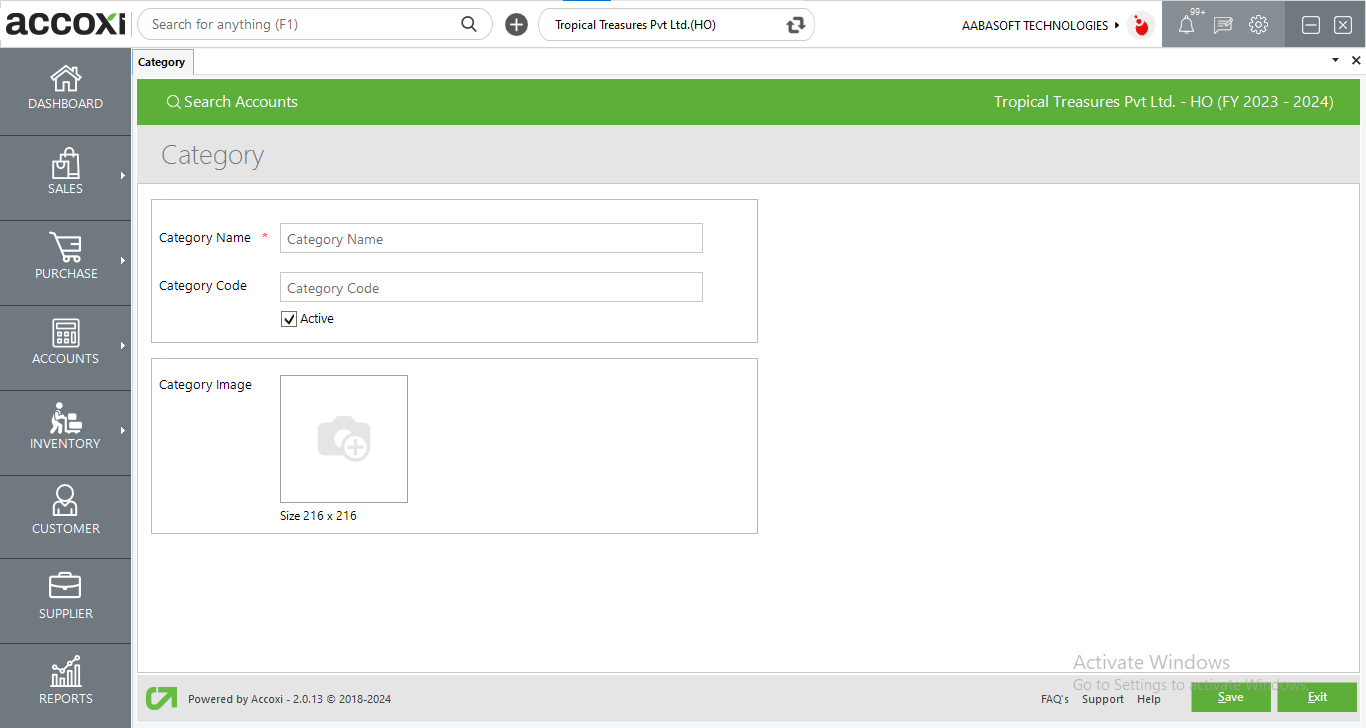
Steps to add a NEW CATEGORY:
DATA AVAILABLE IN THE CATEGORY SEARCH TABLE
|
FIELD |
DESCRIPTION |
|
# |
The serial number of the data in the table is displayed here |
|
CATEGORY NAME |
The name of the category created is shown in this column |
|
CATEGORY NO. |
The category number of the category created is displayed in this section |
|
PRIORITY |
Priority is set up in E-commerce use to prioritize the categories shown on the website. users can drag the categories to set and change the priority |
|
STATUS |
The status of the category is shown in here i.e. active or inactive |

DATA AVAILABLE IN THE CATEGORY CREATION TABLE
|
FIELD |
DESCRIPTION |
|
CATEGORY NAME |
In This Field, The User Can Input Or Provide The Name Of The Category. |
|
CATEGORY CODE |
Users Can Enter Or Provide The Category Code In This Column. |
|
ACTIVE |
In This Column, Users Can Specify The Status Of The Category By Selecting Either "Active" Or "Inactive." |
|
CATEGORY PHOTO |
The User Can Upload A Photo Belonging To The Specified Category. |
3. REFRESH
If your latest data is not displayed, click on the refresh icon on the top left corner of the page to fetch the new data.
4. EXPORT
The Category list can be exported to Excel format. Click on the Export button at the top right corner near the +New button. Select the file location and click Save.
5. COLOUR FILTER
The inactive Category will appear in the search in red color.
6. More Option
More Option is provided with edit and view feature. To edit the Category data this option can be easily accessed and it will redirect the user to change the Category name column. ser can update the Category name, number, and status of the Category.
7. Pagination Control
It controls the page navigation and the page size. Page size can be set to 10, 20, 50, or 100. By giving the page number in the box and clicking on the Go button, the user can jump to the entered page.
8. Exit
Below the pagination control, there is an exit button. If you want to exit the Category search page click on exit button.
You cannot delete Category data once created. It can only be edited.