Shelf in Accoxi is used to enter the shelf details where the product is aligned.

Shelf in ACCOXI is used to enter the shelf details where the product is aligned. User can arrange the product in a shelf. It can be created and viewed from inventory module -> SHELF.
Shelf in Accoxi helps the user to enter shelf details where the products are arranged. A proper alignment of each products in various shelves can be easily created and viewed through this option. It will minimize perplexities of users regarding the products and its arrangement. By selecting Shelf menu, user can view all the products data created and it will reduce many complexities.

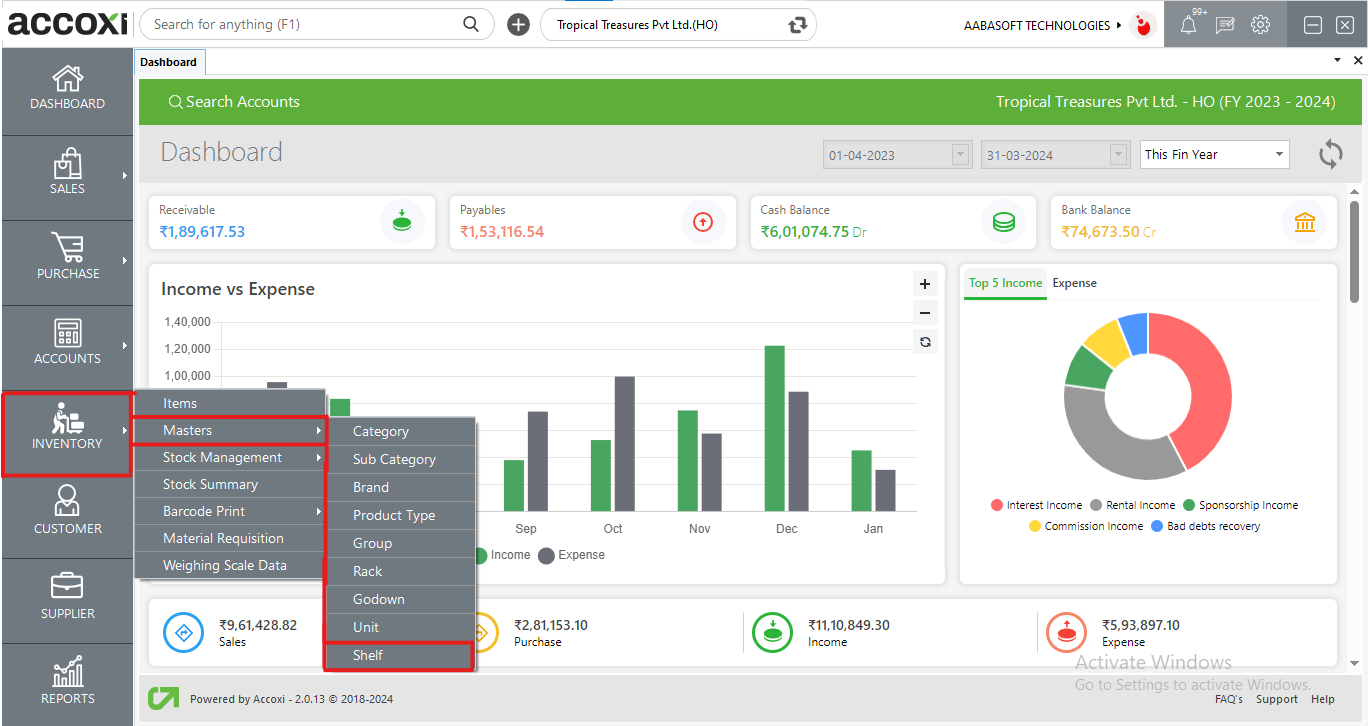
By clicking Inventory Module and selecting Shelf menu, user will be redirected to a Shelf window where the user will be able to view all the products Shelf data created.
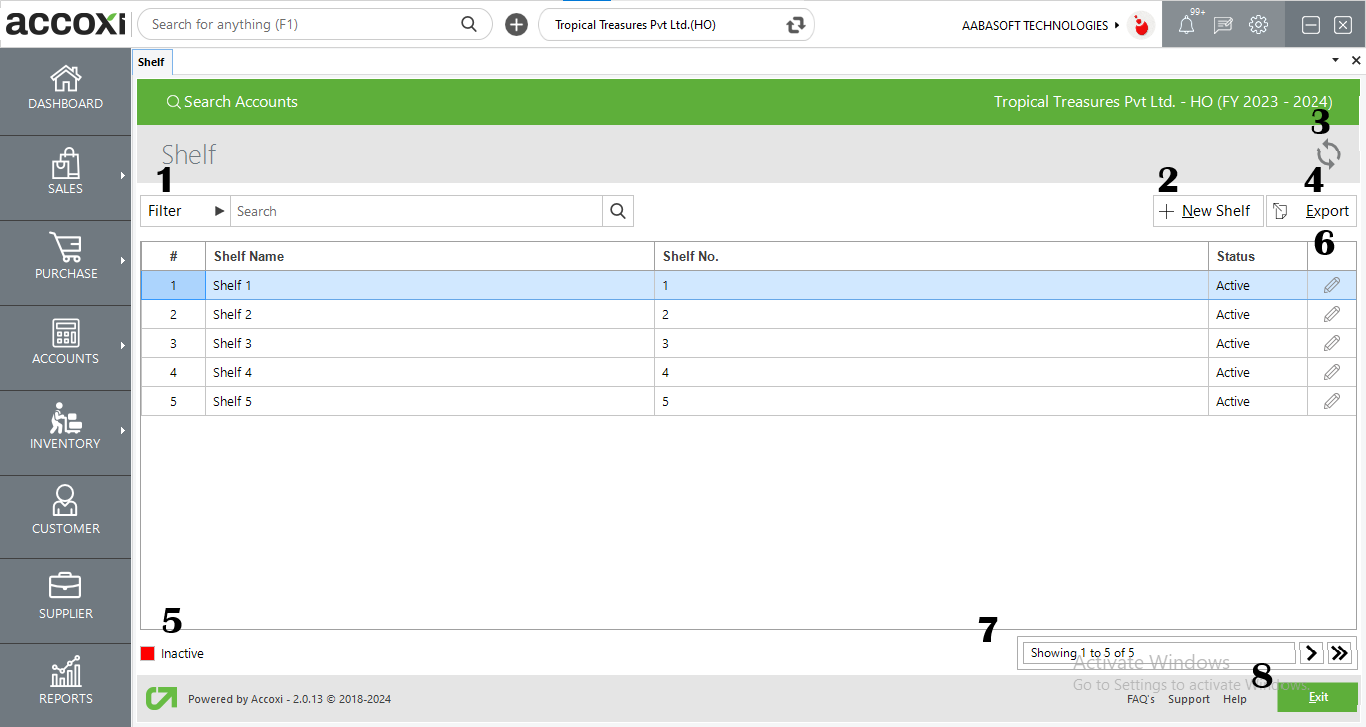
The filter option in the shelf search window helps the user to filter the shelf data
The filter of Shelf search can be done in two ways- either the user can directly enter the Shelf name into the search bar near the filter option or by clicking the filter drop-down. Users can filter the data by entering the Shelf name, Shelf number, and Shelf status which is Active or Inactive.
2. NEW
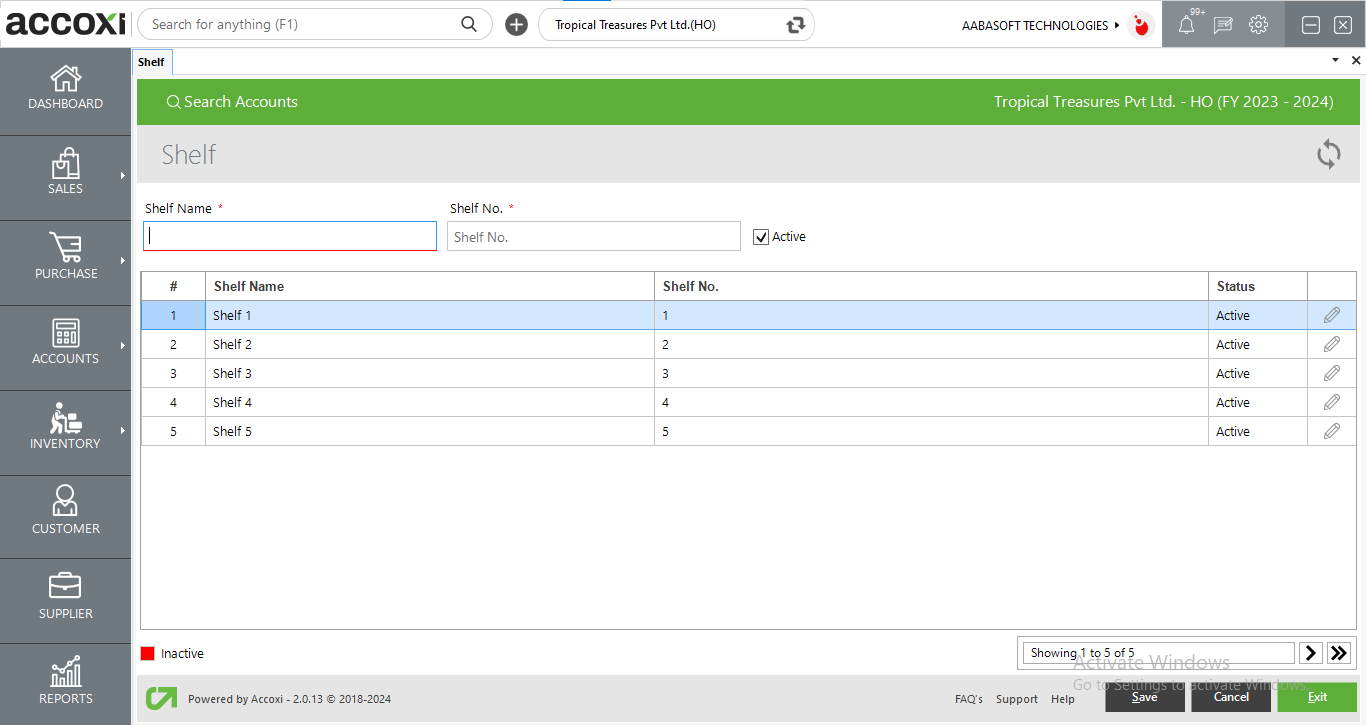
A new shelf can be created by clicking on the New Shelf option.
Steps to add a NEW RACK:
|
FIELDS |
DESCRIPTION |
|
Shelf name |
To enter the name of the Shelf |
|
Shelf number |
To enter the Shelf number |
|
Active |
To activate or deactivate the Shelf status |
|
# |
Shows the serial number of the data in the table |
|
Shelf name in the table |
Shows names of previously entered Shelf |
|
Shelf no. in table |
Shows Shelf number of previously entered Shelf |
|
Status |
Shows the status of previously entered Shelf data |
|
Edit |
Can be used to edit previously entered Shelf data |
|
Color filter |
Color codes are used so that user can easily identify whether the Shelf is Active or Inactive |
|
Pagination Control |
It controls the page navigation and the page size. Page size can be set to 10, 20, 50 or 100. By giving page number in the box and clicking on Go button, user can jump to the intended page. |
|
Save |
To save the new Shelf created |
|
Cancel |
To cancel the data entered in new Shelf window |
|
Exit |
This button exits from whole Shelf window. |
DATA AVAILABLE IN SHELF SEARCH TABLE
|
FIELD |
DESCRIPTION |
|
# |
The serial number of the data in the table is displayed here |
|
SHELF NAME |
The name of the SHELF created is shown in this column |
|
SHELF NO. |
SHELF number of the SHELF created is displayed in this section |
|
STATUS |
The status of the SHELF is shown in here i.e. Active or Inactive |
3. REFRESH
If your latest data is not displayed, click on the refresh icon on the top left corner of the page to fetch the new data.
4. EXPORT
The Shelf list can be exported to Excel format. Click on the Export button at the top right corner near the +New button. Select the file location and click on save.
5. COLOUR FILTER
The inactive Shelf will be appear in the search in red color.
6. Edit
To edit the Shelf data this option can be easily accessed and it will redirect the user to change the Shelf name column and user can update Shelf name and status of the Shelf
7. Pagination Control
It controls the page navigation and the page size. Page size can be set to 10, 20, 50 or 100. By giving page number in the box and clicking on Go button, user can jump to the entered page.
8. Exit
Below the pagination control, there is exit button. If you want to exit the Shelf search page click on Exit button.
You cannot delete shelf data once created. It can only be edited.