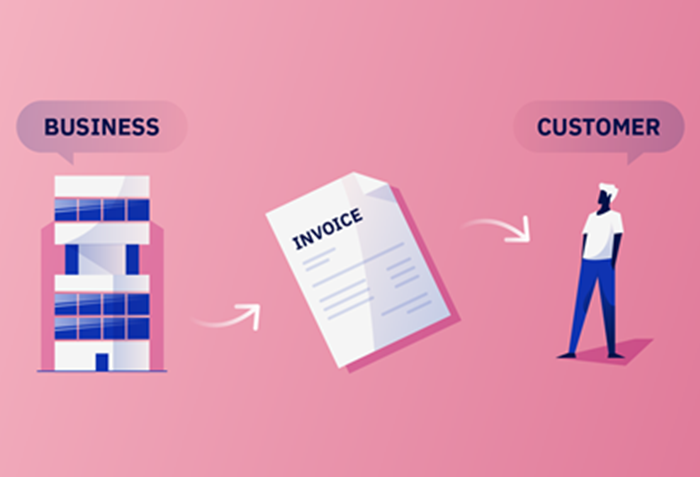
A recurring invoice is an automated invoice that is sent to the same customer at regular intervals, containing the same invoice details.
Recurring sales invoices are provided to customers who make regular intervals of purchases from our business. These invoices automate the process of generating invoices for customers, eliminating the need to manually create invoices for each sale.

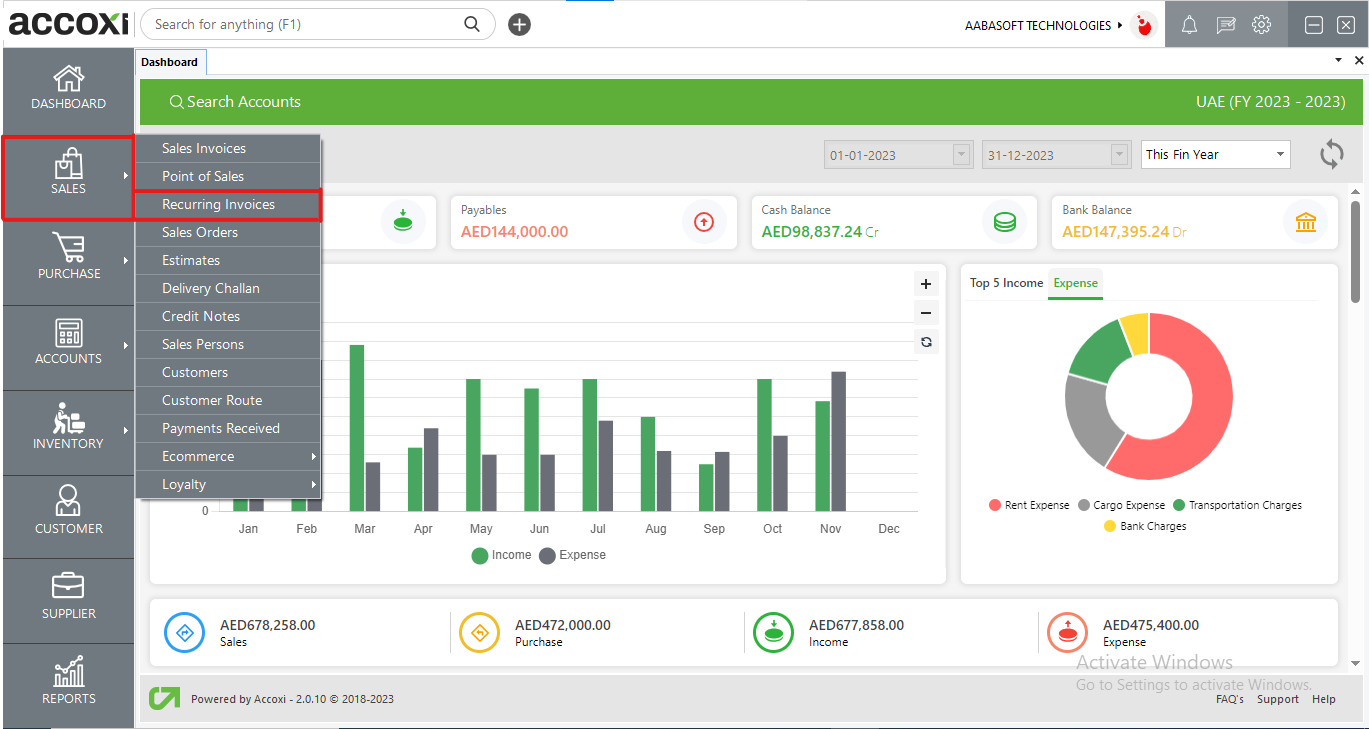
In Accoxi, recurring invoices empower users to generate invoices for sales that occur at regular intervals by fixing a period of frequency, effectively eliminating the need for manual invoice creation each time.
The recurring sales search window provides users with information about all the recurring sales transactions within the business.
Menu available in Recurring sales search
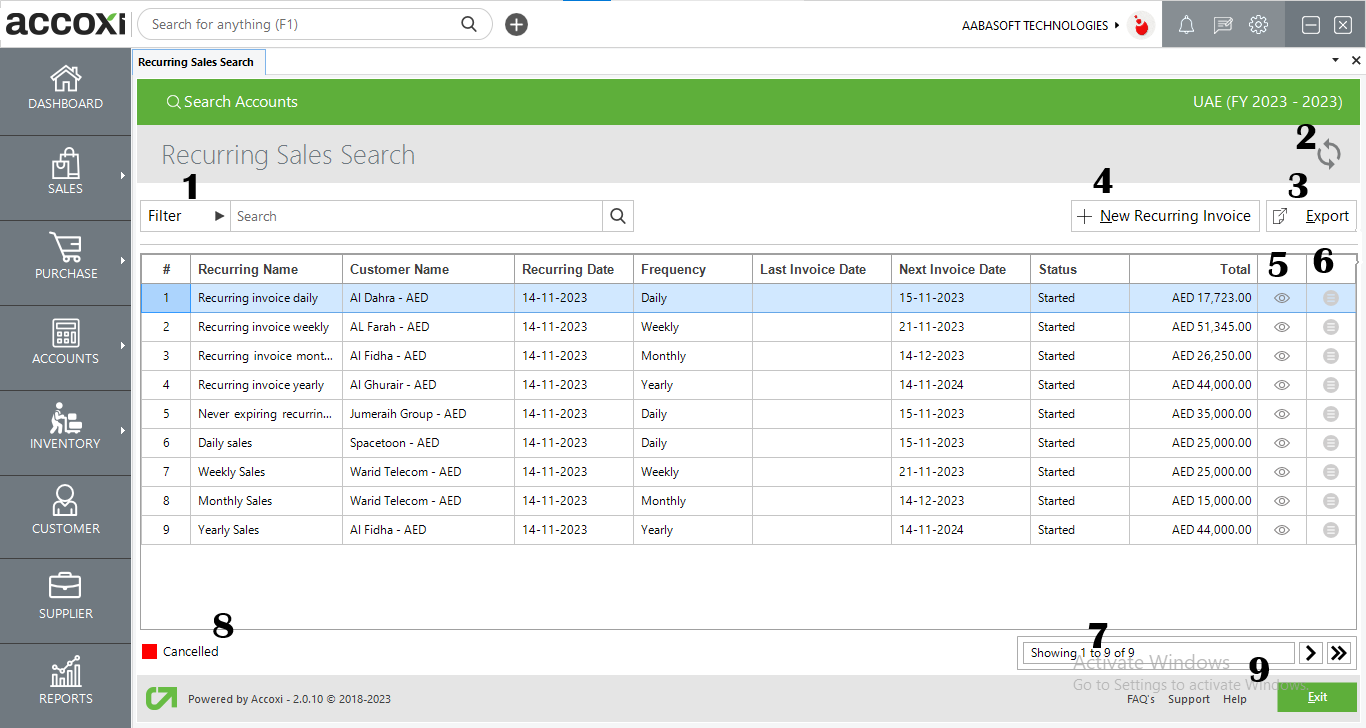
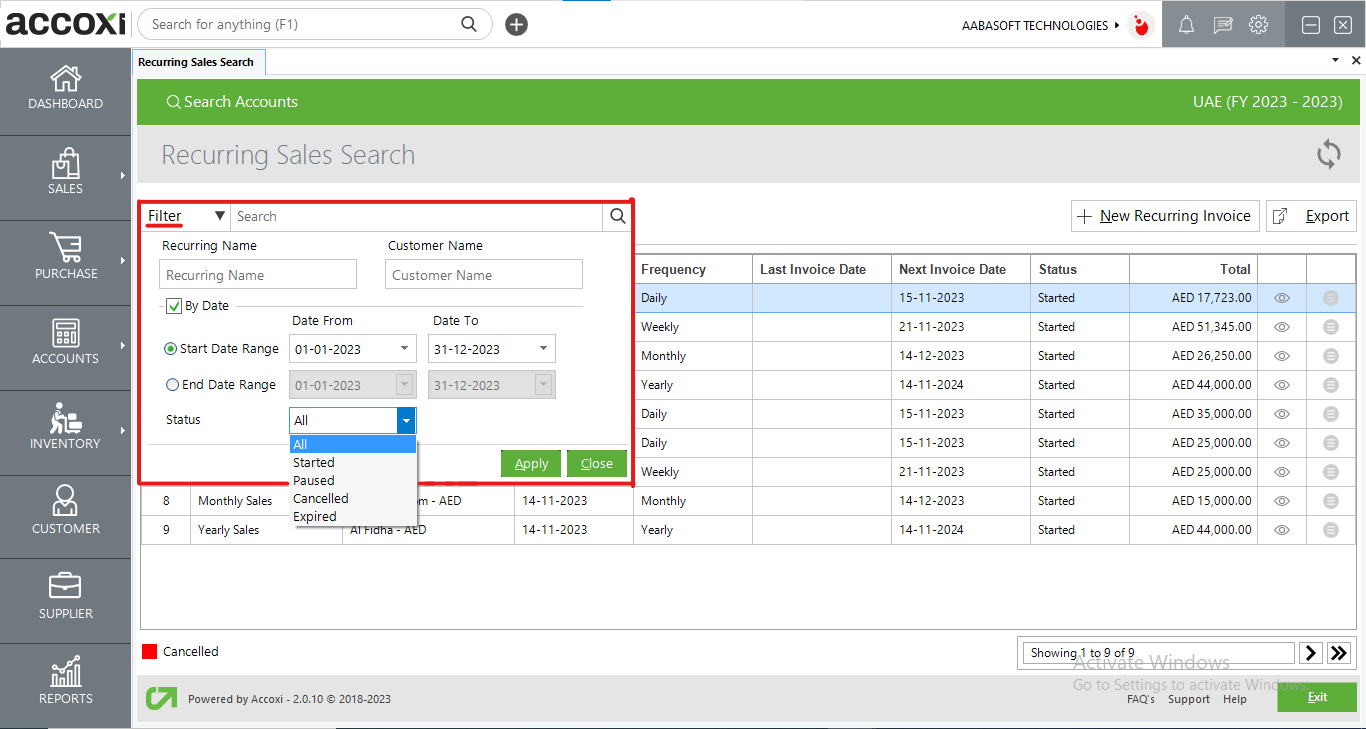
1. Filter Option
The filter option in the recurring sales window enables users to refine the displayed data.
a. Direct Search
Users can directly enter the recurring name into the search bar near the filter option for a quick search.
b. Filter Drop-Down
Clicking the filter drop-down provides two filtering methods: by recurring name or customer name.
c. Date Filtering
Users can filter data by selecting the date range, specifying the starting and ending dates of the invoice.
d. Status Sorting
The option to sort by status allows users to organize data based on the invoice/bill status, including started, paused, expired, and canceled.
2. Refresh
If the latest data is not visible, utilize the refresh icon located at the top left corner of the page to retrieve the most recent data.
3. Export
To export the recurring sales invoice list to an Excel format, click on the Export button positioned at the top right corner near the +New button. Choose the file location and click save.
4. New Recurring Invoice
Initiate the creation of a new recurring sales entry by selecting the "New Recurring Invoice" button.
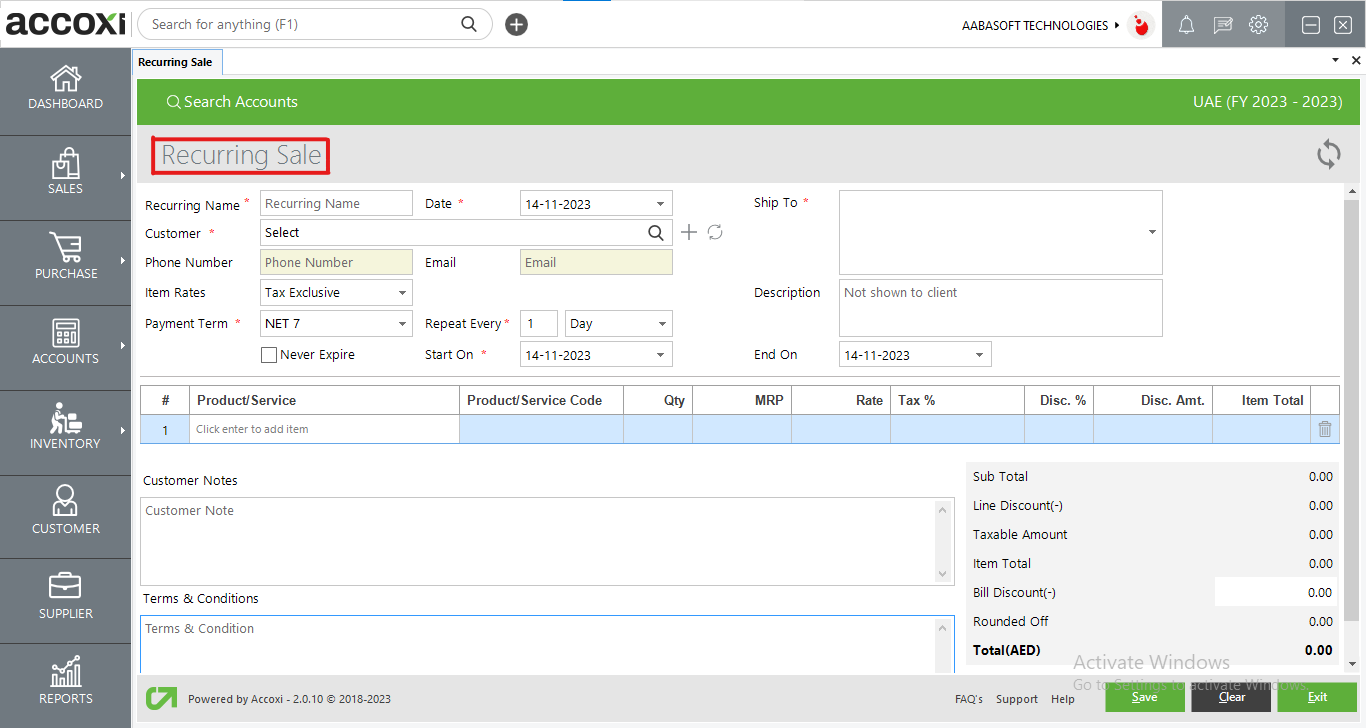
Here are the steps to create a recurring sales invoice
|
Field |
Description |
|
Recurring Name |
provide the name for the recurring sales. |
|
Date |
Input the date for the recurring invoice. However, it's important to note that by default, the date will be set as the current date |
|
Customer |
Choose the customer from the options available in the drop-down menu. |
|
Phone Number |
The information will be automatically populated upon selecting the customer. |
|
|
The details will be filled in automatically upon selecting the customer. |
|
Item Rates |
Choose whether it is inclusive of tax or exclusive of tax. |
|
Repeat Every |
Input the necessary interval for the recurring invoice, such as daily, weekly, monthly, or yearly. |
|
Never Expire |
Permits invoices to generate continuously at regular intervals without any expiration. |
|
Start On/End On |
Input the dates indicating when the invoices should start and finish. |
|
Payment Term |
The existing payment term set with the customer will be displayed. You have the option to modify the term if needed. |
|
Description |
Input any description for the recurring sale if applicable. |
|
Customer Note |
Enter customer notes, if applicable. |
|
Terms And Conditions |
Input any terms and conditions associated with recurring sales transactions, if applicable. |
|
Product Or Service |
Input the product details here. Pressing the Enter key will provide you with information on all the products you've entered. |
|
Batch |
Choose the product batch by clicking on the "Batches" column. |
|
QTY |
Input the quantity of the products for sale. |
|
MRP |
The MRP (Maximum Retail Price) of the chosen product will be displayed here. |
|
Rate |
The item sales rate will be displayed here, or you have the option to modify the rate if needed. |
|
Tax % |
Displaying the VAT percentage for the product. |
|
Item Total |
The total amount for the item is displayed here. |
|
Discount |
The user can activate the discount allowed on the recurring invoice in this column. These discounts may include discounts applied after tax, before tax, etc. |
|
Round Off |
This column is utilized for rounding off minor amounts, and the rounding method—whether it is downward, upward, or to the nearest—is determined in the Preferences Menu under Organization Settings. |
|
Save |
Upon clicking "Save," the recurring invoice is generated, and the user will be directed to the recurring invoice view window. |
|
Clear |
This option allows the user to clear the data entered in the New Recurring Invoice window. |
|
Exit |
Clicking this button allows users to exit from the invoice window. |
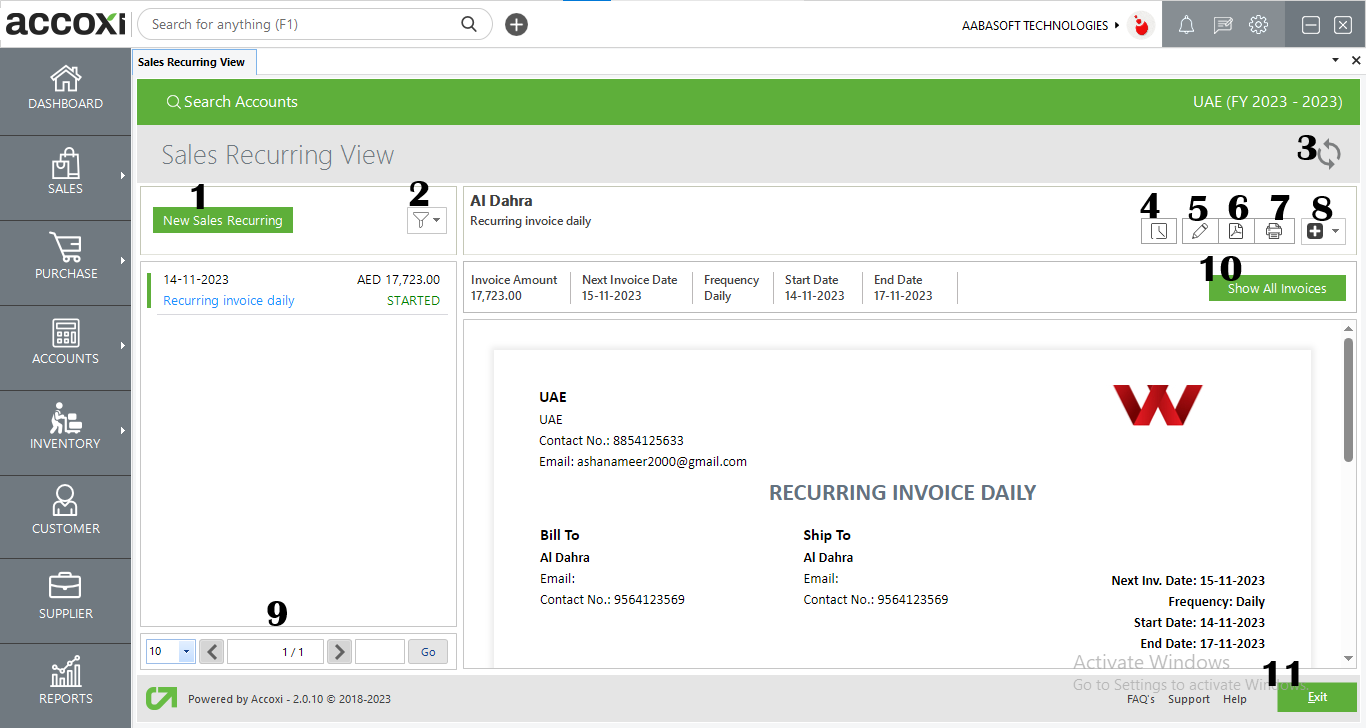
Menu available in the Recurring sales view
After saving the new recurring sales, the user will be redirected to the recurring sales view window. In this window, users can utilize various features such as filtering data, editing, printing, mailing, and exporting.
|
Field |
Description |
|
1. New Sales Recurring |
The "New Sales Recurring" button directs the user to the window for creating a new recurring sales entry. |
|
2. Filter |
The filter option categorizes recurring invoices based on different statuses such as All, Started, Expired, and Cancelled. |
|
3. Refresh |
If the most recent data is not visible, simply click on the refresh icon located in the top-left corner of the page to retrieve the updated information. |
|
4. History |
The recurring invoice displays the history and comments of the transactions made, showcasing all edits and alterations along with the respective dates. Users also have the option to add comments to these changes if desired. |
|
5. Edit |
This option grants the user permission to edit the invoice if necessary. |
|
6. Export To PDF |
If the user wishes to convert the recurring invoice to PDF format, the "Export to PDF" option is available. Upon clicking "Export to PDF," a "Save As" directory option will appear, allowing the user to choose the location for saving the PDF file. |
|
7. Print |
The "Print" menu assists the user in printing the created recurring invoice if needed. Upon clicking the print button, it redirects to print options where the user can choose the printer, the number of copies to print, and other settings. |
|
8. More Features Option |
Create Duplicate: The "Create Duplicate" function serves as a convenient tool to replicate recurring invoices. It redirects you to the New Sales Recurring window with the same data previously entered.
Cancel Invoice: The "Cancel Invoice" option is designed to nullify the recurring invoice you created. When the user clicks the Cancel button, a cancel window appears by default, displaying customer details such as the customer's name, transaction invoice number, and amount. The user must enter the reason for the cancellation and click "OK" to confirm the cancellation of the transaction. |
|
9. Pagination Control |
This feature manages page navigation and page size. The page size can be configured to 10, 20, 50, or 100. By entering the desired page number in the box and clicking the "Go" button, the system navigates to the specified page. |
|
10. Show All Invoices |
Once recurring invoices are configured, when the recurrence takes place, the system will save it as a draft (if specified). Users can then convert this draft into an invoice. Given the repetitive nature of these sales, the "Show All Invoices" option can be employed to view all the sales made through the recurring setup. |
|
11. Exit |
To close the Recurring Sales View window, the user can simply click on the close button. |
5. View icon
The "View" icon redirects the user to the Sales Recurring Invoice View window.
6. More options
Utilizing the "More" icon, you can edit, view, export to PDF, and print recurring invoice details if needed.
EDIT: This option redirects the user to the recurring invoices window, allowing them to update the data in the recurring invoices.
View: The "View" option redirects the user to the detailed view of recurring invoices, where they can inspect the entered details.
Export to PDF: If desired, the user can convert recurring invoices to PDF format using the "Export to PDF" option.
Print: The "Print" menu assists the user in printing the created recurring invoices if necessary.
7. Pagination Control
It manages both page navigation and page size. The page size can be adjusted to 10, 20, 50, or 100. By entering the desired page number in the box and clicking the "Go" button, it navigates to the specified page.
8. Color filter
Cancelled recurring sales invoices will be visible in the recurring sale search window, distinguished by their red color, facilitating easy identification for the user.
9. Exit
Beneath the pagination control, there is an exit button. To leave the sales recurring view page, click on the exit button.
CONVERSION OF DRAFT TO INVOICE
Draft Invoice notification
On the day of generating the recurring invoice, the user will receive a notification regarding the creation of a draft invoice. Upon clicking the notification, the user will be directed to the sales invoice view where the invoice will be marked as a draft, allowing the user to convert it into a finalized invoice.