In Accoxi user can create branches of their business and record accounting data of the same.

A branch office is a location, other than the main office, where a business is conducted. Most branch offices consist of smaller divisions of different aspects of the company such as human resources, marketing and accounting. A branch office will typically have a branch manager who will report directly to, and answer to, a management member at the main office. In ACCOXI user can create branches of their business and record accounting data of the same. A new branch can be accessed from the Settings Menu Create Branch
BRANCH SEARCH
Create Branch option redirects the user to Branch Search window where the user can view all the branches created. User can create new branch from this window as well as edit the existing branch details.
DATA AVAILABLE IN BRANCH SEARCH TABLE
|
FIELD |
DESCRIPTION |
|
# |
The serial number of the data in the table is displayed here |
|
Branch name |
Shows the name of the branches created |
|
Address |
The address of the branches created will be displayed here |
|
Email ID |
The email of the branches created will be displayed |
|
Contact number |
Displays the contact number of the branches created |
|
Registration date |
The registration date of the branches created will be displayed in this column |
|
Status |
Indicates the active/inactive status of the branches created |
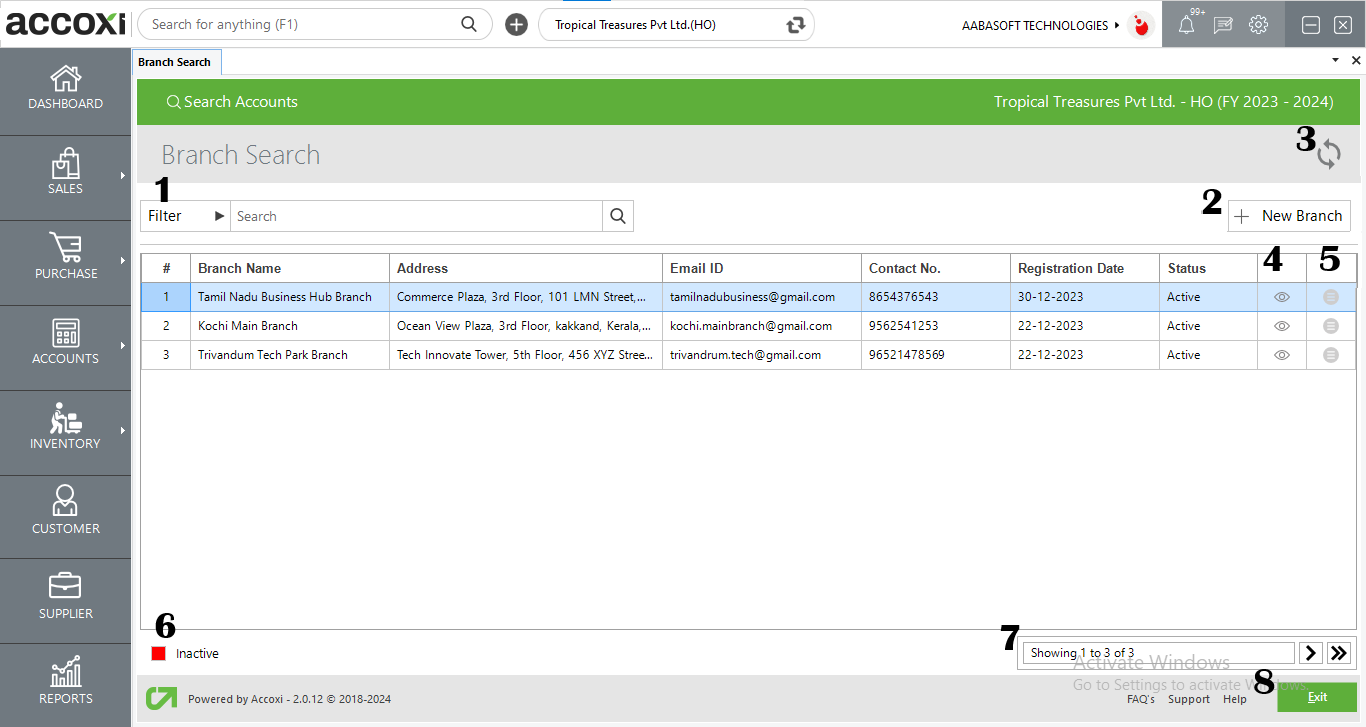
1.Filter :
The filter option in branch search window helps the user to filter the branch data shown in the window
2.NEW BRANCH:
A new BRANCH can be created by clicking on the new branch option.
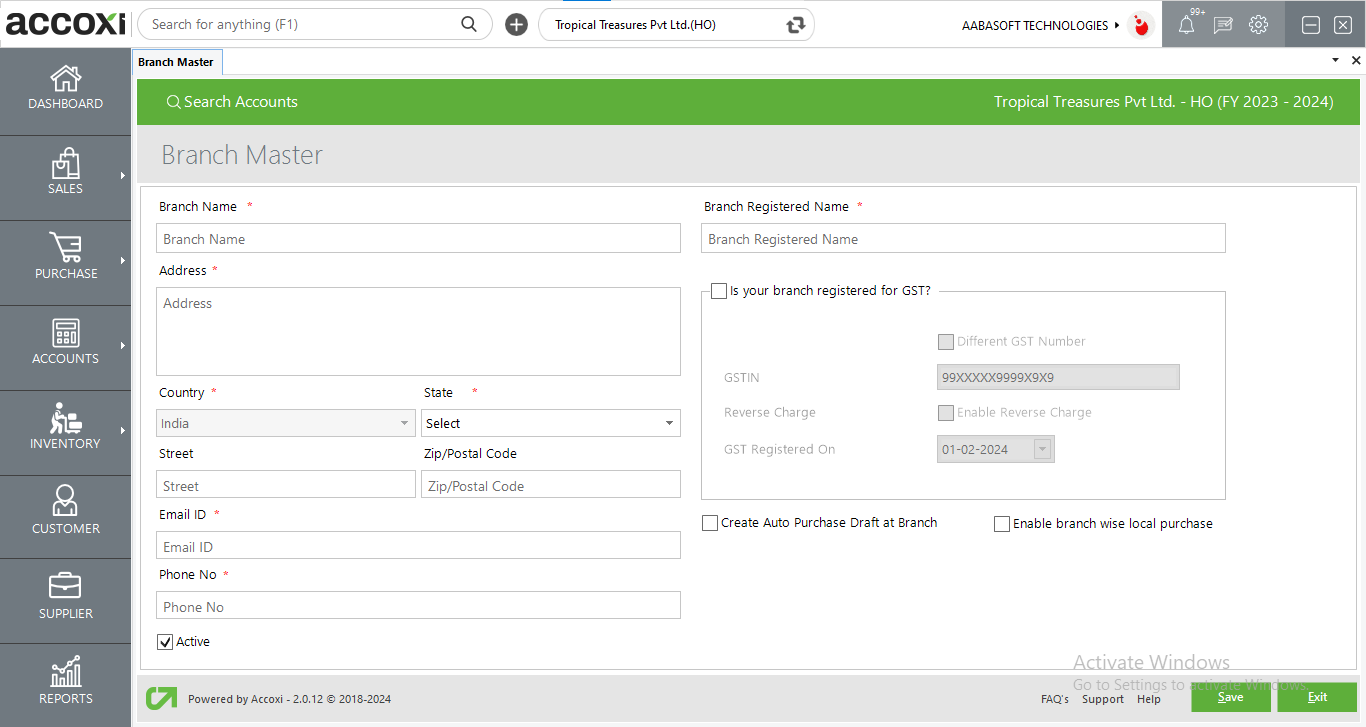
Steps to add a NEW BRANCH:
|
FIELDS |
DESCRIPTION |
|
Branch name |
The branch name should be entered in this column |
|
Address |
The address of the branch to be created should be mentioned in this column |
|
Country |
The country where the branch is located should be added here |
|
State |
The state where the branch is located should be added here |
|
Street |
The street where the branch is located should be added here |
|
ZIP/Pin code |
The zip or pin code of the place where the branch is located should be added here |
|
Email id |
The official email id of the branch should be given in this column |
|
Phone number |
The official phone number of the branch should be given in this column |
|
Active |
This option should be used to activate or deactivate the branch status |
|
Branch registered name |
The branch's official registered name should be given in this section |
|
Is Your Branch Registered For GST? |
You can enable or disable this option. If your branch is registered under GST, then enable the option. |
|
Create Auto purchase draft at branch |
By enabling this option, an automatic purchase draft will be generated at the branch during sales from HO to branch |
|
Enable branch wise local purchase |
By enabling or disabling this option users can decide whether branches are able to make purchases or not. |
|
Save |
To save the new branch created save button can be used |
|
Exit |
This button exits the user from the whole branch master window. |
3.REFRESH
If your latest data is not displayed, click on the refresh icon on the top left corner of the page to fetch the new data.
4.View branch option:
User can view the data of the created branch by clicking in the view button. But the user is restricted to make any changes in the view window.
5.Edit :
To edit the branch data this option can be easily accessed and it will redirect the user to branch master window and user can update branch details.
User can also make changes to the default card payment account from this window.
6.COLOUR FILTER
The inactive branch will be appear in the search in red color.
7.Pagination Control
It controls the page navigation and the page size. Page size can be set to 10, 20, 50 or 100. By giving page number in the box and clicking on Go button, user can jump to the entered page.
8.Exit
Below the pagination control, there is exit button. If you want to exit the branch search page, click on exit button.
Filter option is available below the branch search bar at the left hand side. Branch can be filtered based on branch name, contact number and EMAIL. Either you can give any of the said criteria directly into the search bar near filter option or by clicking the filter down arrow option you can give the details into the fields directly.
The inactive branches are denoted in red mark.