It allows users can arrange the product in a rack wise manner.

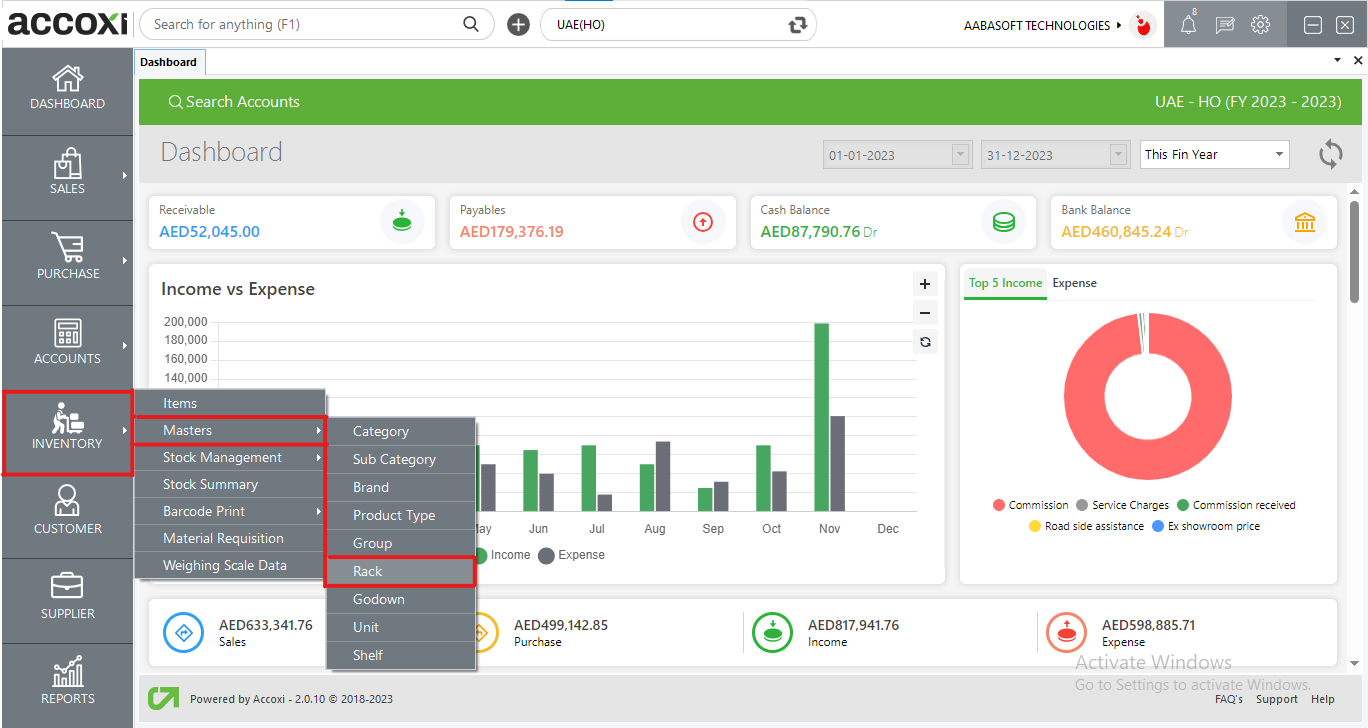
In ACCOXI, the Rack feature is employed to input the Rack Name for a product. This allows users to organize products in a rack-wise manner. The creation and viewing of racks can be done through the Inventory Module in ACCOXI.
Key features include:
OPTIONS AVAILABLE IN RACK MENU
Upon clicking the inventory module and selecting the "RACK" menu, users will be redirected to a dedicated "RACK" window. In this interface, users can conveniently view all the created rack data for products, providing a centralized and organized overview within ACCOXI.
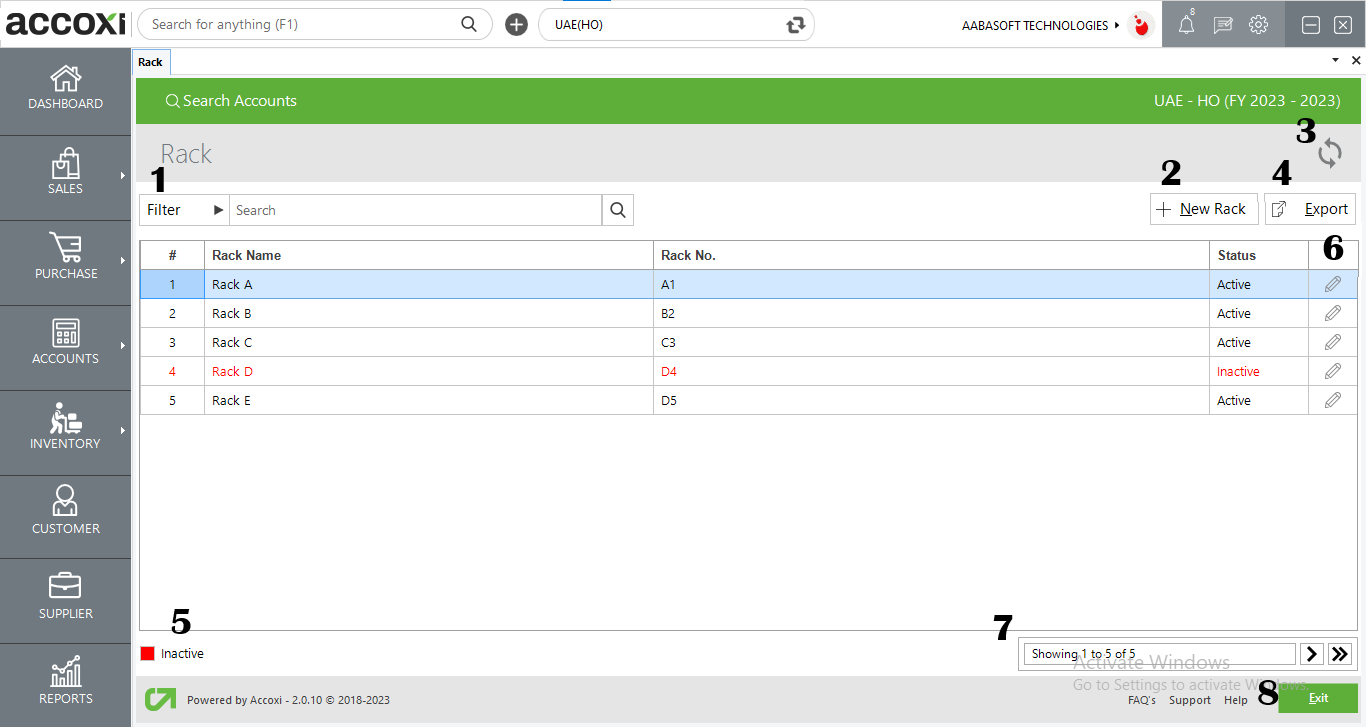
1. FILTER
The filter option in the RACK search window facilitates users in refining the displayed RACK data.
RACK filtering can be executed in two ways. Firstly, users can input the RACK name directly into the search bar near the filter option. Alternatively, by clicking the filter drop-down, users can further narrow down the data by entering details such as the RACK name, RACK number, and RACK status.
2. NEW
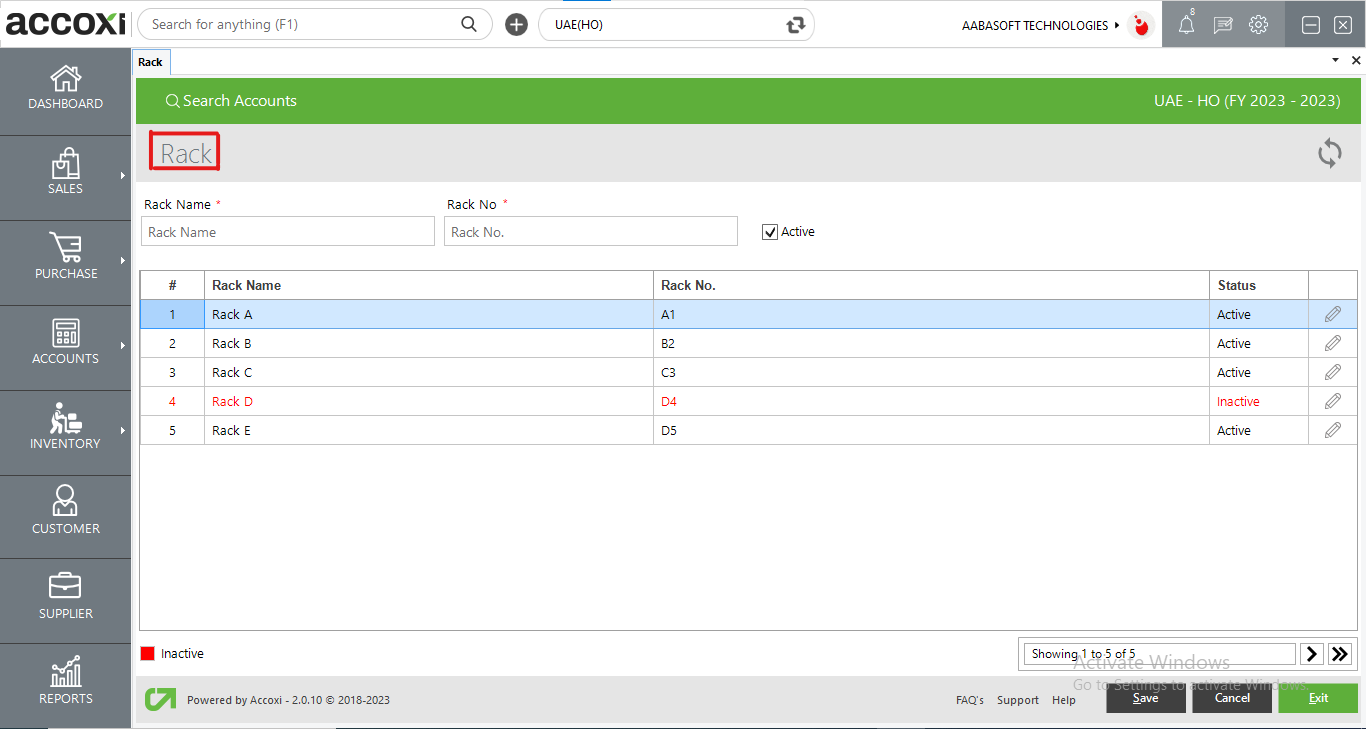
The creation of a new RACK is initiated by selecting the "New Rack" option.
Steps to Add a New Rack:
|
Field |
Description |
|
Rack Name |
Input the name of the rack in the designated field. |
|
Rack Number |
Provide the rack number by entering it into the designated field. |
|
Active |
To enable or disable the status of the rack, use the activation or deactivation option. |
|
# |
Displays the serial number of the data in the table. |
|
Rack Name In Table |
Displays the names of previously entered racks. |
|
Rack No. In Table |
Indicates the rack numbers of previously entered racks. |
|
Status |
Indicates the status of previously entered rack data. |
|
Edit |
Allows for the editing of previously entered rack data. |
|
Color Filter |
Highlights inactive racks in red color, facilitating easy identification of active and inactive racks for users. |
|
Pagination Control |
Manages page navigation and size. The page size can be set to 10, 20, 50, or 100. By entering the page number in the designated box and clicking the "Go" button, the user can navigate directly to the specified page. |
|
Save |
Use the "Save" button to save the newly created rack. |
|
Cancel |
To discard the entered data in the New Rack window, you can use the "Cancel" button. |
|
Exit |
This button allows you to exit from the entire Rack window. |
DATA AVAILABLE IN RACK SEARCH TABLE
|
Field |
Description |
|
# |
The serial number of the data in the table is presented here. |
|
Rack name |
The name of the created rack is displayed in this column. |
|
Rack NO. |
The RACK number of the created rack is displayed in this section. |
|
Status |
The status of the rack, whether it's active or inactive, is indicated here. |
3. REFRESH
If the most recent data is not displayed, click on the refresh icon at the top left corner of the page to fetch the updated information.
4. EXPORT
Export the rack list to Excel format by clicking the Export button at the top right corner near the +New button. Choose the file location and click save.
5. COLOUR FILTER
Inactive racks will be displayed in red within the search results.
6. EDIT
To modify rack data, easily access the Edit option. It redirects the user to update the rack name column, allowing for changes to the rack name and status.
7. PAGINATION CONTROL
Manage page navigation and size with the Pagination Control. Adjust the page size to 10, 20, 50, or 100. Enter a page number in the designated box and click the Go button to navigate directly to the specified page.
8. EXIT
Located below the pagination control, the Exit button allows you to leave the rack search page. Click on Exit if you wish to exit the current page.