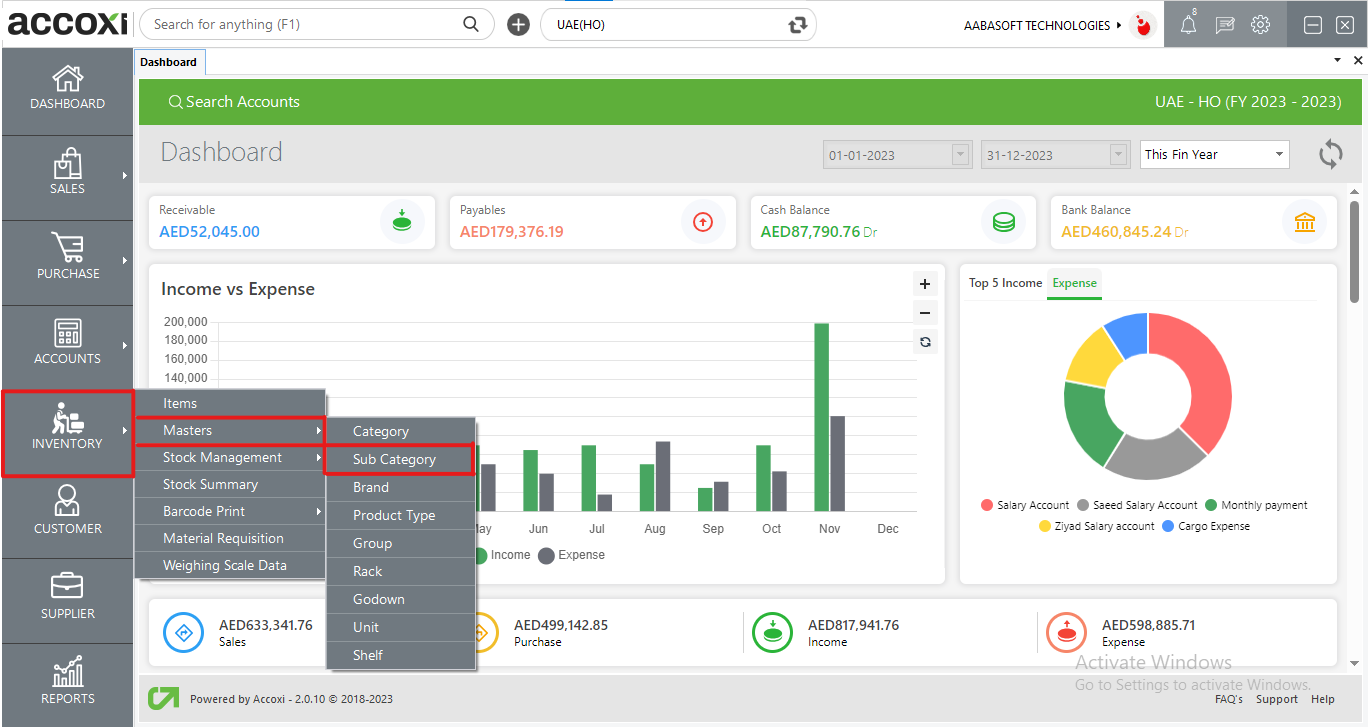
In ACCOXI user can create sub categories for a product under a category.
Within ACCOXI, users have the capability to create subcategories for products under a primary category. They can classify products under the designated category and generate new subcategories with accompanying subcategory images. This functionality is accessible and manageable through the Inventory module of ACCOXI.

Key features include:
OPTIONS AVAILABLE IN SUB CATEGORY MENU:
Upon clicking the "Inventory" module and selecting the "SUB CATEGORY" menu, users will be seamlessly redirected to a dedicated "Search Subcategory" window. In this interface, users can conveniently view and manage all the subcategories created under different categories.
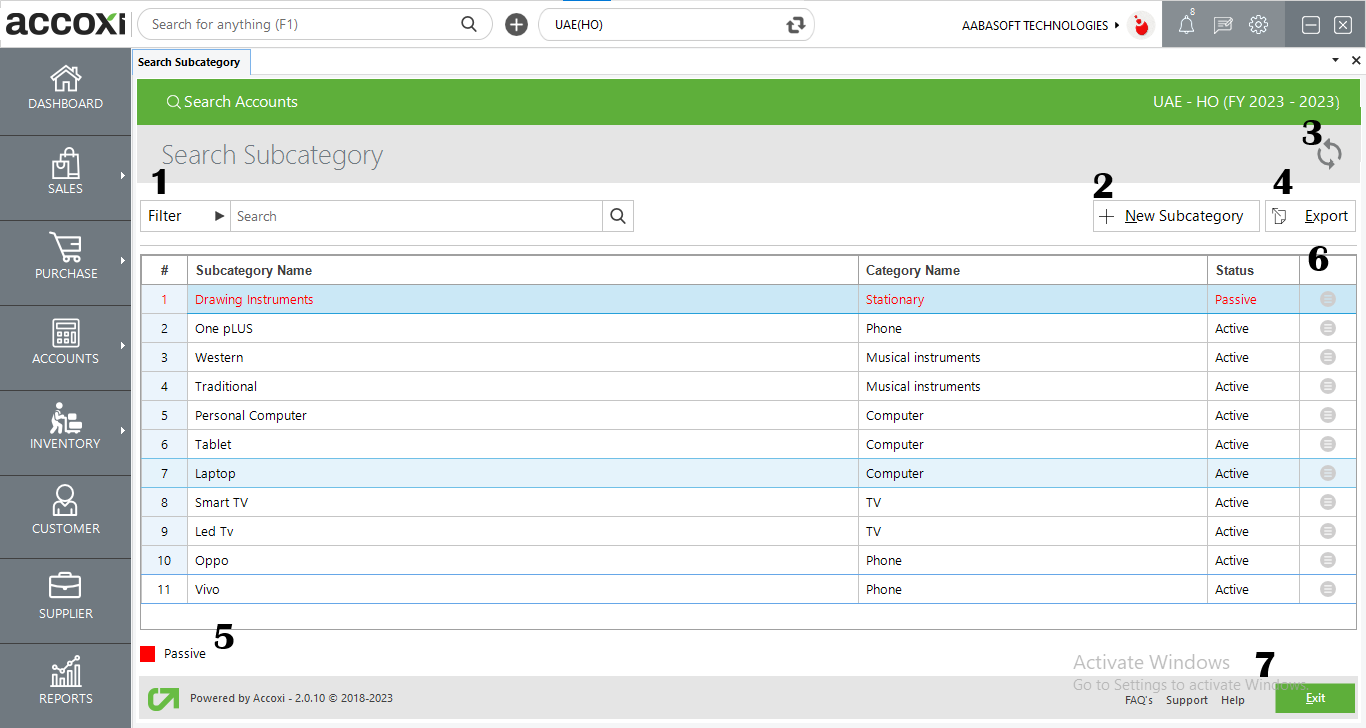
1. FILTER: The filtering feature in the subcategory search window allows users to refine the displayed subcategory data efficiently.
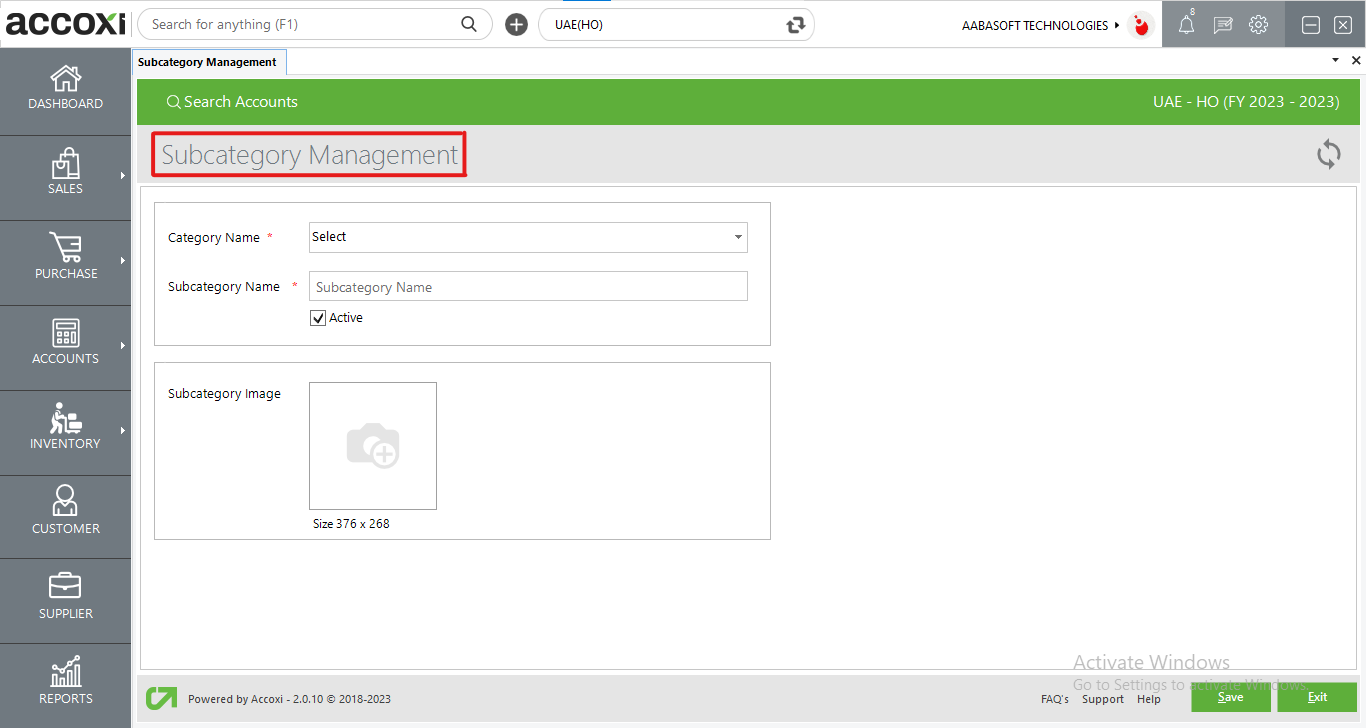
2. NEW: Users can easily create a new subcategory by following these steps:
|
Field |
Description |
|
Category Name |
Choose the category from the dropdown menu. |
|
Sub Category Name |
Input the name of the subcategory here. |
|
Active |
To enable or disable the status of the subcategory. |
|
Sub Category Image |
Upload an image for the subcategory. |
|
Save |
To keep the recently generated subcategory, use the "Save" button. |
|
Exit |
Utilize this button to exit the current window. |
|
Field |
Description |
|
# |
The serial number for the data in the table is presented here. |
|
Sub Category Name |
This column displays the name of the created subcategory. |
|
Category Name |
The section here displays the category name under which the subcategory is created. |
|
Status |
The status of the subcategory, whether it is "Active" or "Inactive," is indicated here. |
|
More Option |
Users have the option to edit and view the created subcategories through the "More" option. |
3. REFRESH: If the latest data is not displayed, click on the refresh icon located at the top left corner of the page to retrieve the updated information.
4. EXPORT: The subcategory list can be exported to Excel format. Click on the Export button positioned at the top right corner, near the +New button. Select the file location and click on save.
5. COLOUR FILTER: Inactive subcategories will appear in red color in the search results.
6. More Option: For editing and viewing subcategory data, the More option provides easy access. It redirects the user to the subcategory management window, where the user can update the subcategory image and status.
7. EXIT: Beneath the pagination control, there is an exit button. If you wish to leave the subcategory search page, click on the exit button.