Guide on creating and Adding users in Accoxi

While operating an accounting software, organizations tend to have different users using Accoxi and it is the super admin's duty to manage these users. ACCOXI enables to add users to the software. Before adding a user, user type should be defined and in user creation, one can define a user according to user type.
|
Field |
Description |
|
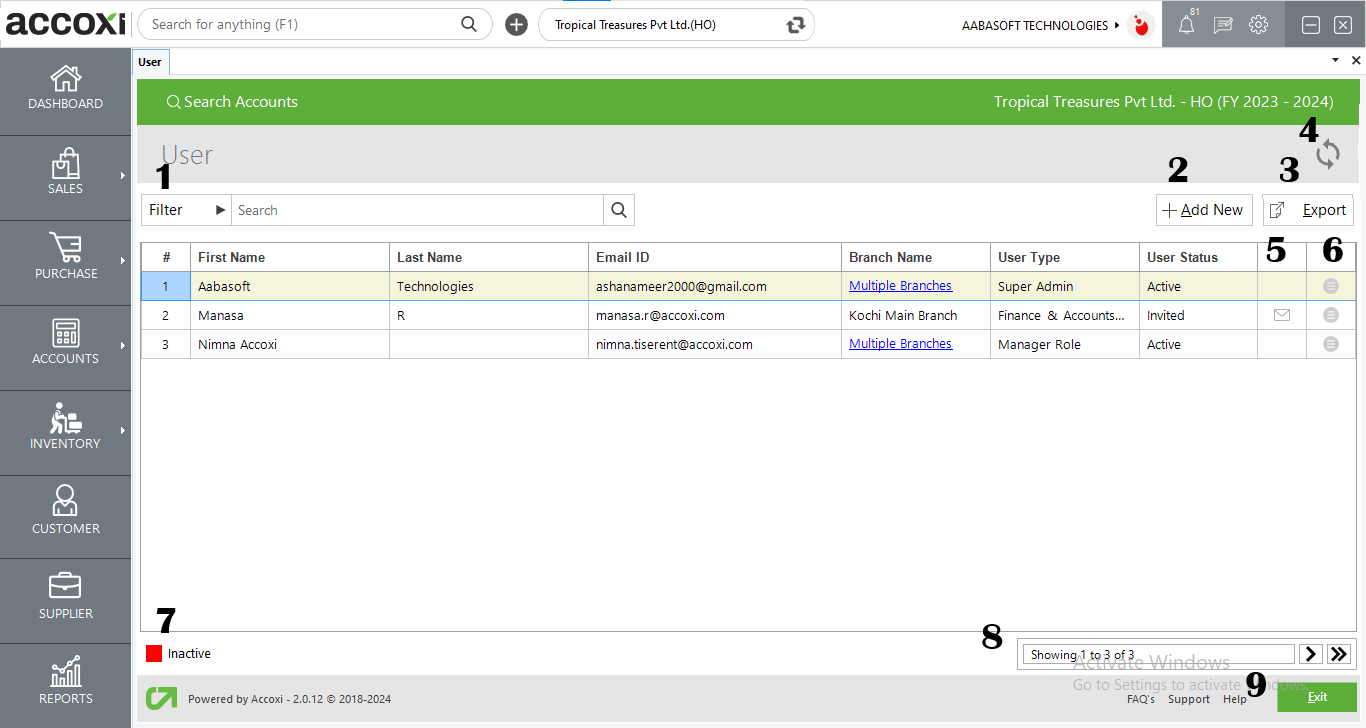
# |
Serial number of table data is shown in this column |
|
First name |
The first name of the user created is shown here |
|
Last name |
The last name of the user created is shown here |
|
Email id |
The email id of the user created is shown here |
|
Branch name |
The name of the branch in which the user is allotted is shown in this column. for super admins multiple branches option is available |
|
User type |
The user type defined for the user is shown in this column. |
|
User status |
The user status which is active, inactive or not invited is displayed in this column. |
User can search the user data by entering user type first/last name or email in the search bar . There is an additional filter option where the user can filter the user data according to user first/last name, email, user type, and status of the user which is active or inactive
Using this button user can create a new user. By clicking this button user will be redirected to a new user form.
|
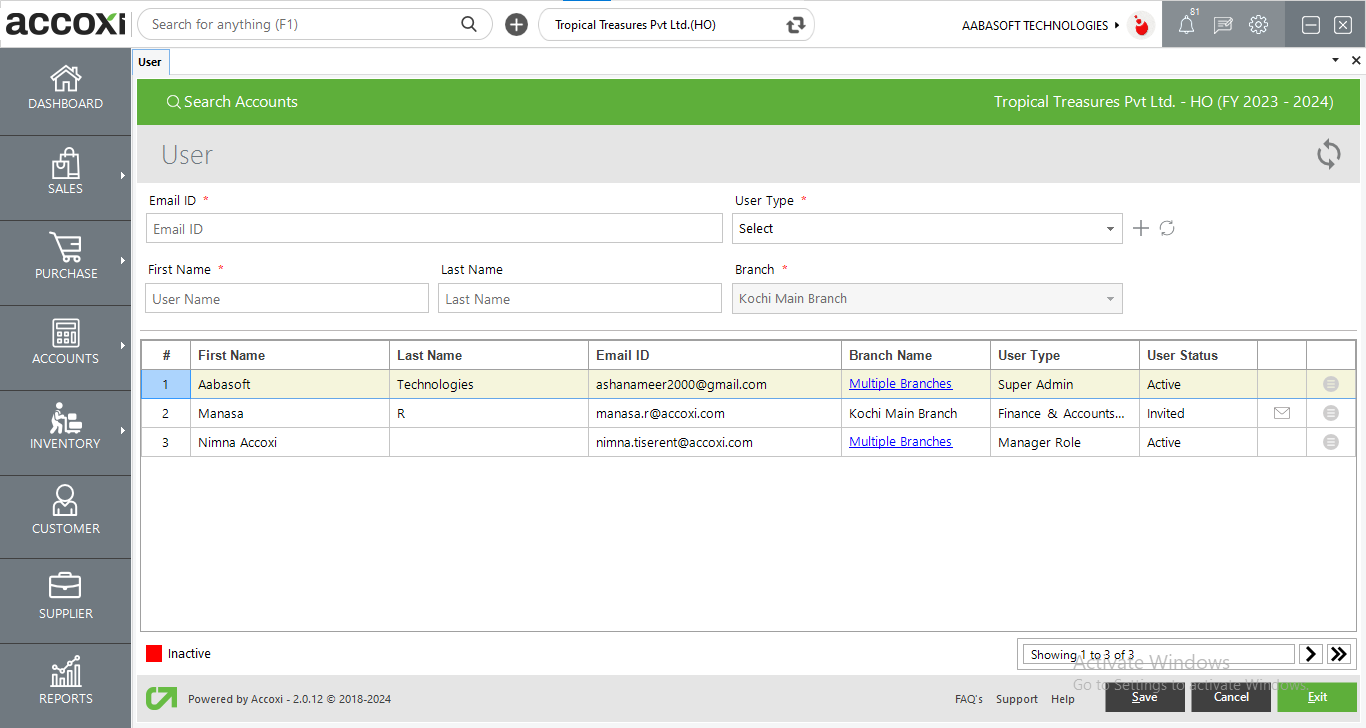
FIELD |
DESCRIPTION |
|
First name |
Here user's first name can be entered |
|
Last name |
Here user's last name can be entered |
|
User type |
The user type in which user belongs to can be selected from the drop down menu => The + button enables to add user type from here. It will be redirected to new user type window where you can create the user type for the user => The refresh button helps to refresh the user-type data. => This button is to view the menu permissions given to the user type. It will be redirected to the menu permission window. |
|
Branch |
User can allot user to available branches of the business. |
|
Email id |
The email id of the user should be added here |
|
# |
The serial number of data in the table |
|
First name |
The first name of previously entered user data |
|
Last name |
The last name of previously entered user data |
|
|
The email of previously entered user data |
|
User type |
The user type of previously entered user data But by default, the details of the person who registered in the ACCOXI will be shown as super admin in this column
|
|
User status |
The user status of previously entered user data Active users will be in blue color and inactive users will be in red color. |
|
Send invitation mail |
Newly added users can be invited to ACCOXI through mail By clicking mail icon user will be invited.
|
|
More option |
=>By clicking the more option, one can edit the details of the user and they can make the user active or inactive using this. =>By clicking view permission column user will be redirected to the menu permission window where one can see the permissions given to the user. =>Allocate branch gives the super admin the power to assign and allocate a user in a specified branch of the organization. (only shown when Branch Accounting is enabled.) =>Active sessions display the types of devices the user has used to login into Accoxi. =>The user log logs the time we logged in and out of Accoxi on a daily basis. |
|
Save |
To save the created new user click on the save button |
|
Cancel |
To cancel the created new user click on the cancel button |
|
Exit |
To exit from the created new user without saving click on the exit button |
The user list can be exported to Excel format. Click on the Export button at the top right corner near the +New button. Select the file location and click on save.
If your latest data is not displayed, click on the refresh icon on the top left corner of the page to fetch the new data.
Newly added users can be invited to ACCOXI through mail by clicking mail icon user will be invited.
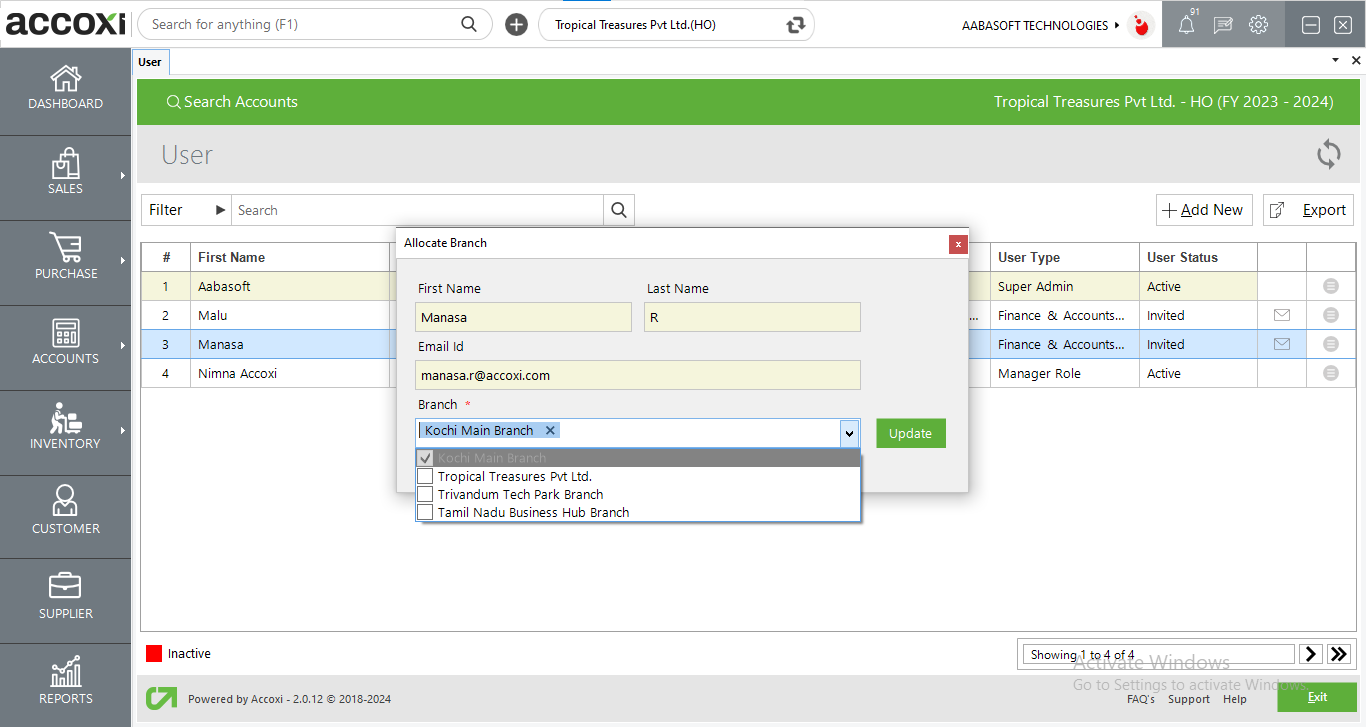
Allocate branches option is only available for users who have access to branch accounting.
Allocate branch gives the super admin the power to assign and allocate a user in a specified branch of the organization. User can allocate branch to other users such that these users will be available in other branches as users of the allocated branch. Once the super admin allocates the branch, click update to save the changes.
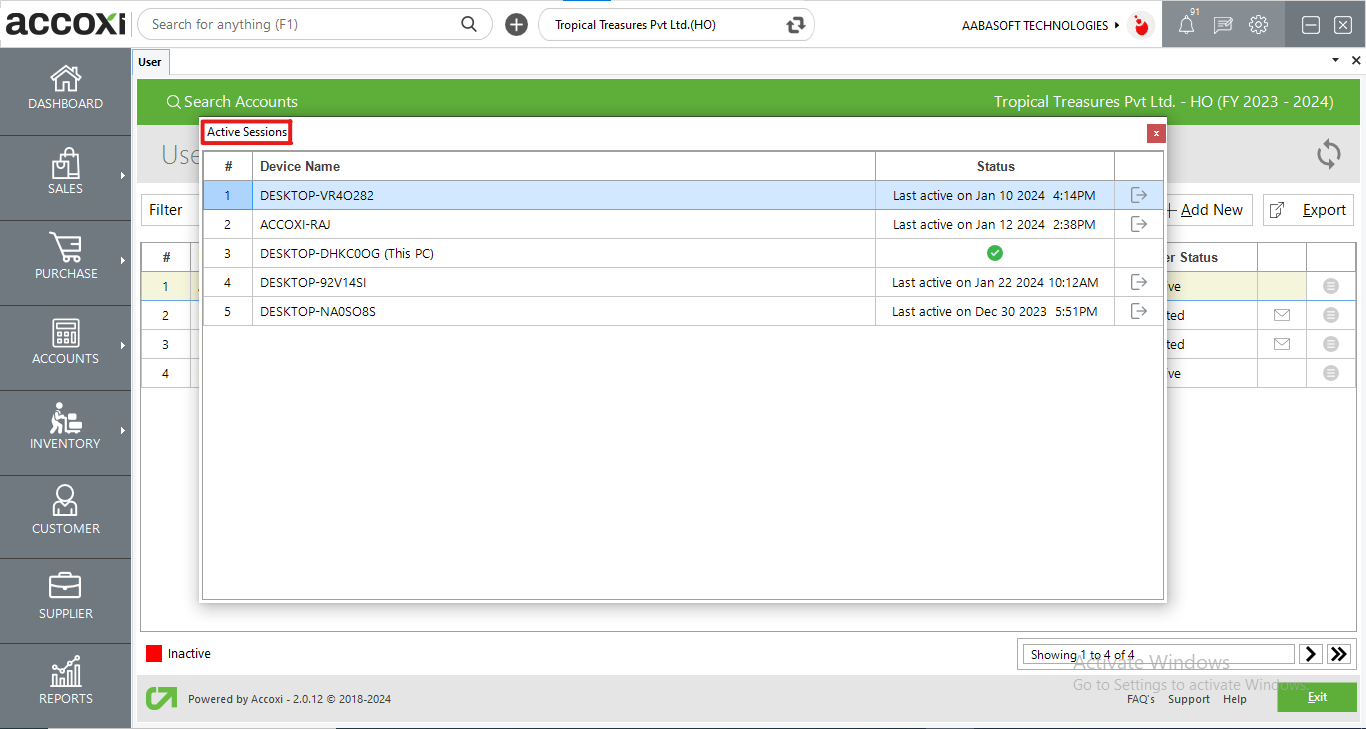
Active sessions displays the types of devices the user has used to login into Accoxi and the status column shows the last active time of user using the respective device. The icon on the right side allows the user to log out from devices.
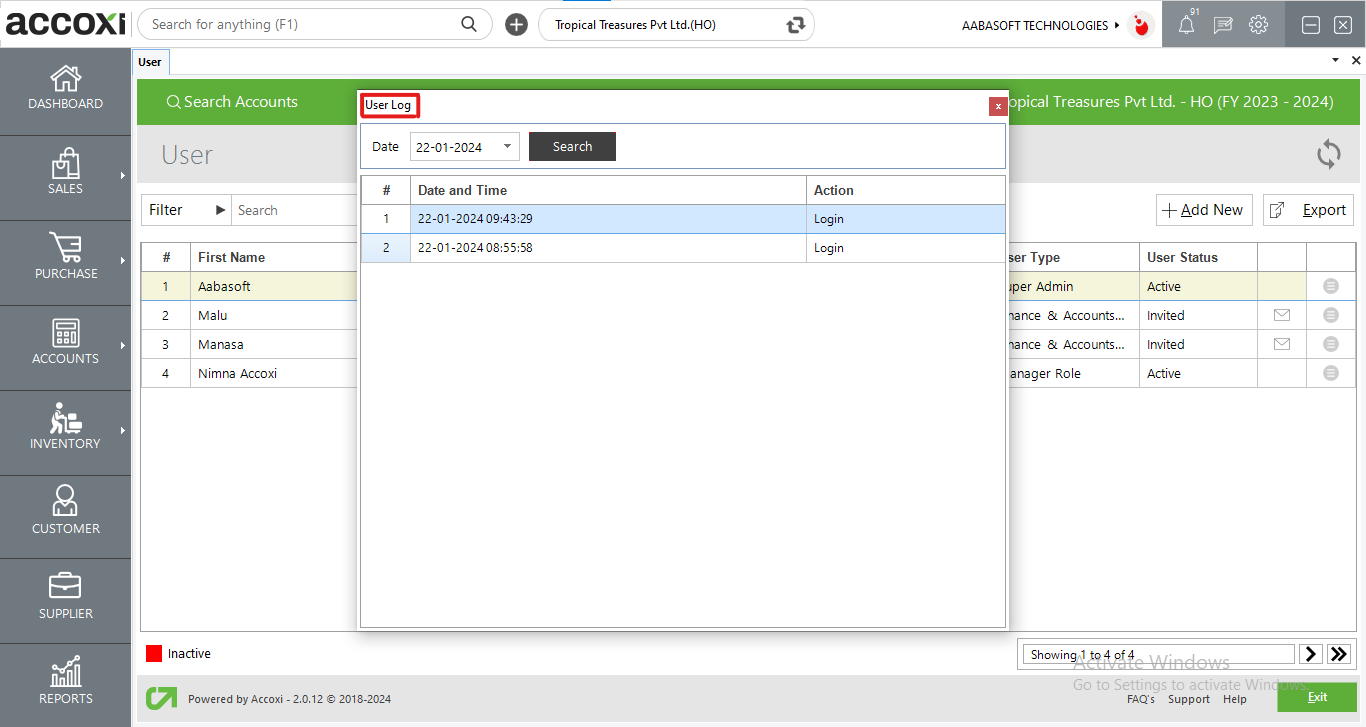
The user log logs the time we logged in and out of accoxi on a daily basis. The search option helps us to choose a date to verify our log sessions in accoxi.
The inactive user will appear in the search in red color.
It controls the page navigation and the page size. Page size can be set to 10, 20, 50 or 100. And by giving page number in the box and clicking on Go button. It jumps to the said page.
Below the pagination control, there is exit button. If you want to exit the user search page click on exit button.
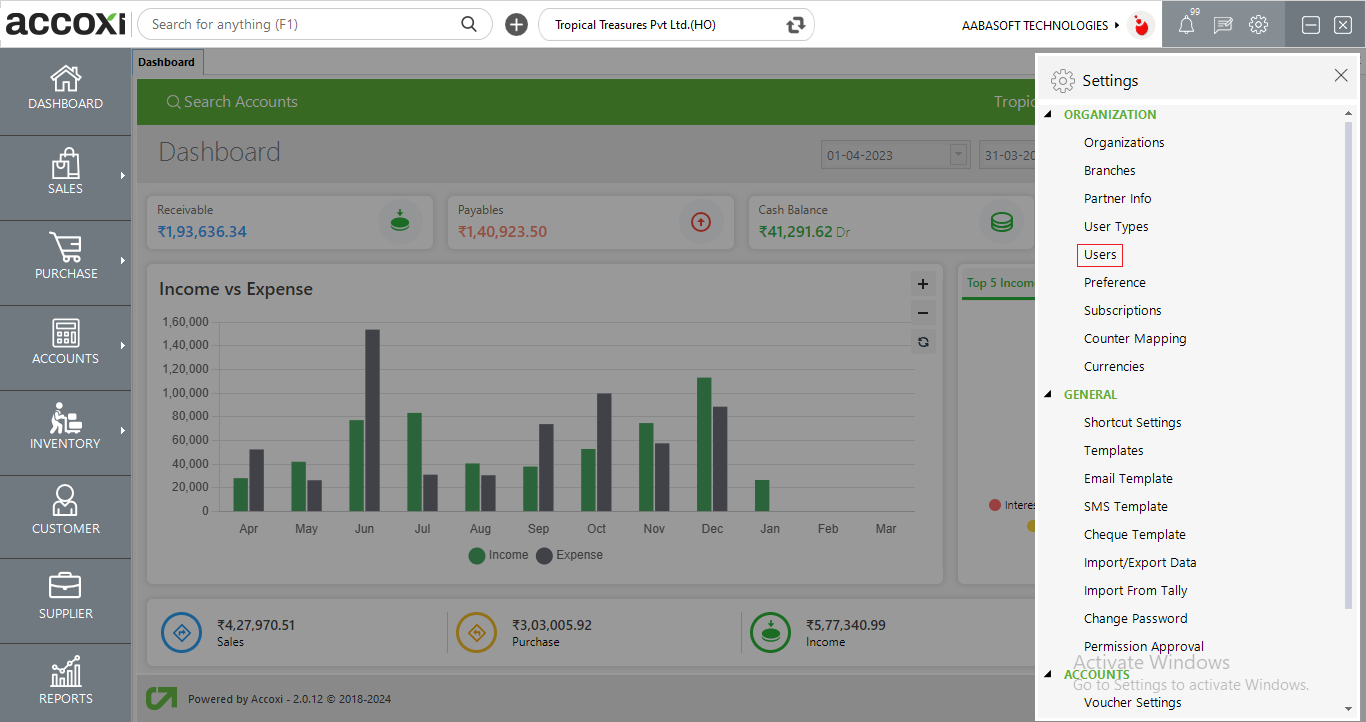
Click on the Settings => User => User Search opens.
Filter option is available below the User Search bar at the left hand side. Users can be filtered based on User’s First/Last Name, E-mail, User Type, Status of the user ie active or inactive .Either you can give any of the said criteria directly into the search bar near filter option or by clicking the filter drop down option you can give the details into the fields directly.