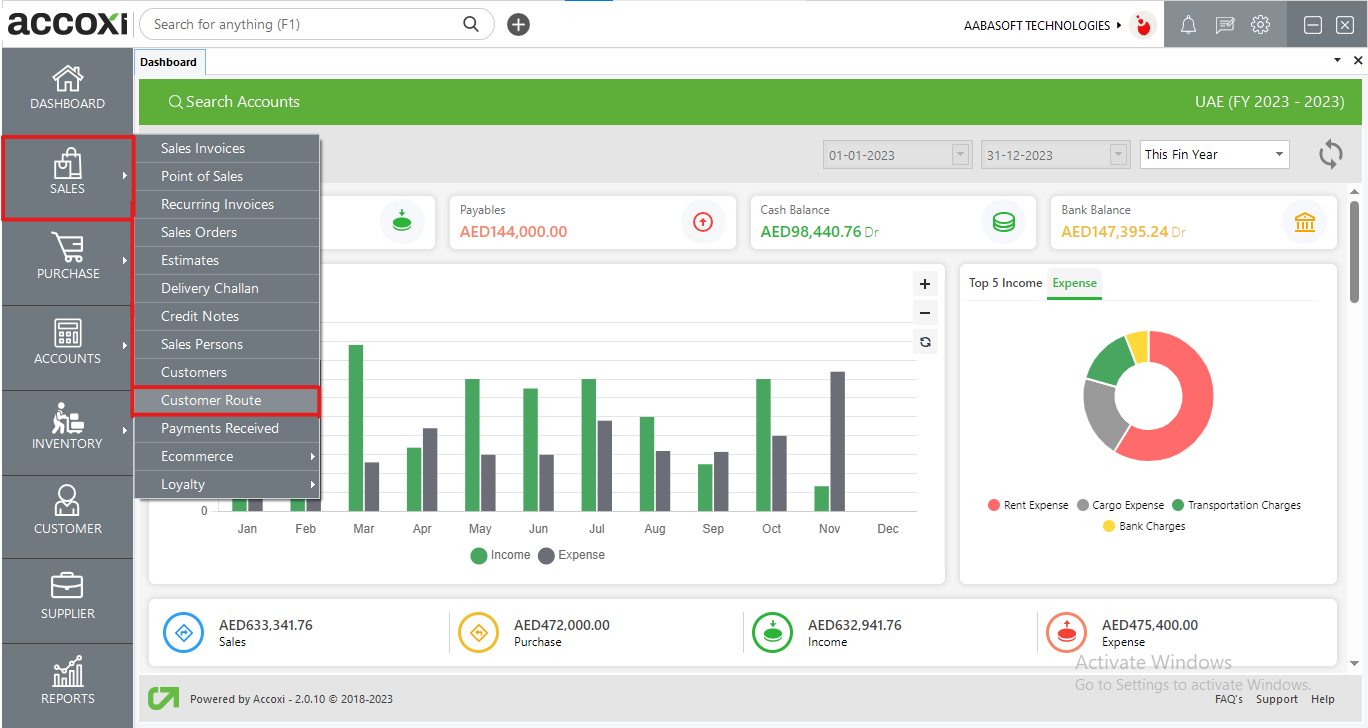
Customer route in Accoxi helps the user to assign routes to their customers.
In Accoxi, the Customer Route feature assists users in assigning specific routes to their customers. These routes can be set during the customer creation process, allowing for efficient organization and management. Additionally, the system enables the generation of route-wise party reports, providing valuable insights into customer data within a particular area. Moreover, the Customer Route form facilitates the appointment of salespersons for enhanced tracking of customer information in specific regions. This functionality contributes to improved customer management and streamlined sales processes.

Key Features of Customer Route in Accoxi:
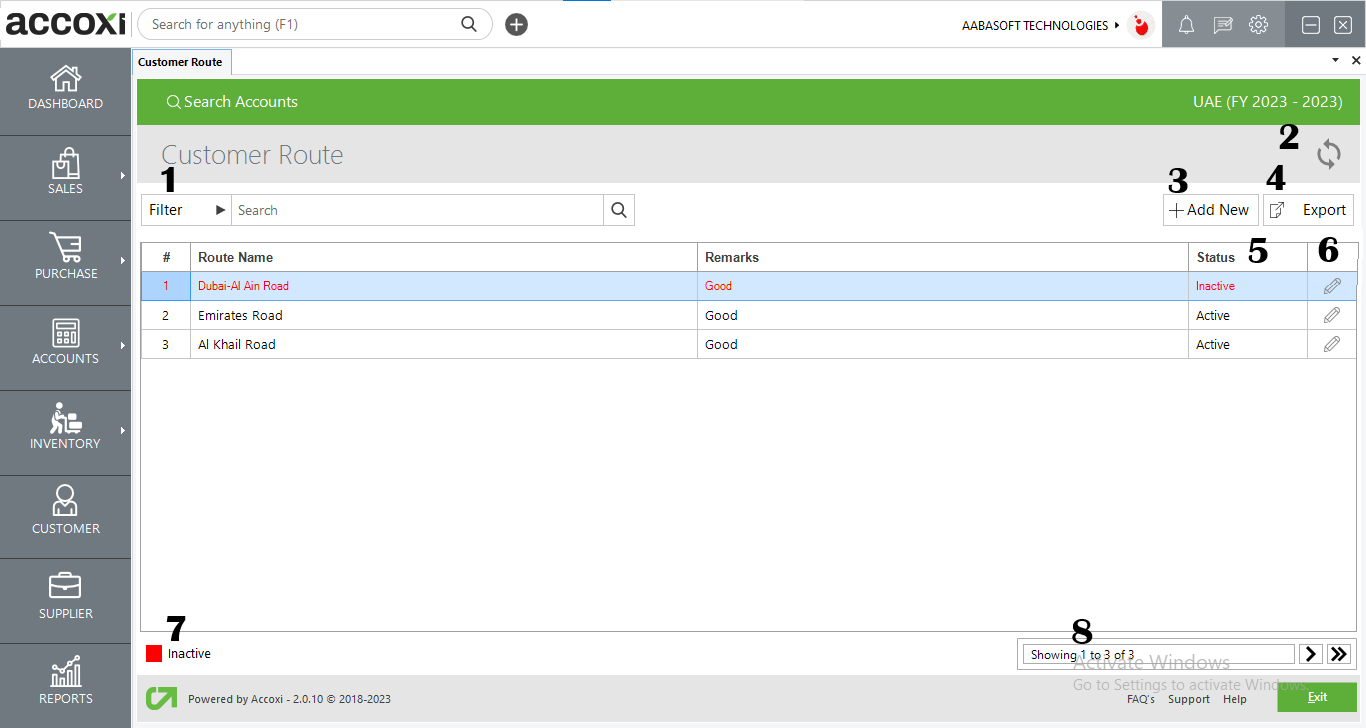
1. Filter option
The filter options in customer routes provide users with the capability to narrow down and locate a specific route name. Users can utilize two methods for filtering:
2. Refresh button
If the most recent data is not visible, users can update and refresh the displayed information by clicking on the "Refresh" button. This action prompts the system to retrieve and display the latest data, ensuring that users have access to the most up-to-date information in the customer routes section.
3. Add a new option
The "Add New" option provides users with the capability to create a new customer route. By selecting this option, users can initiate the process of defining and setting up a fresh customer route within the system. This allows for the creation and customization of routes to meet specific business requirements and organizational needs.
To create a new customer route in Accoxi, follow these steps:
By following these steps, you can successfully create a new customer route in Accoxi.
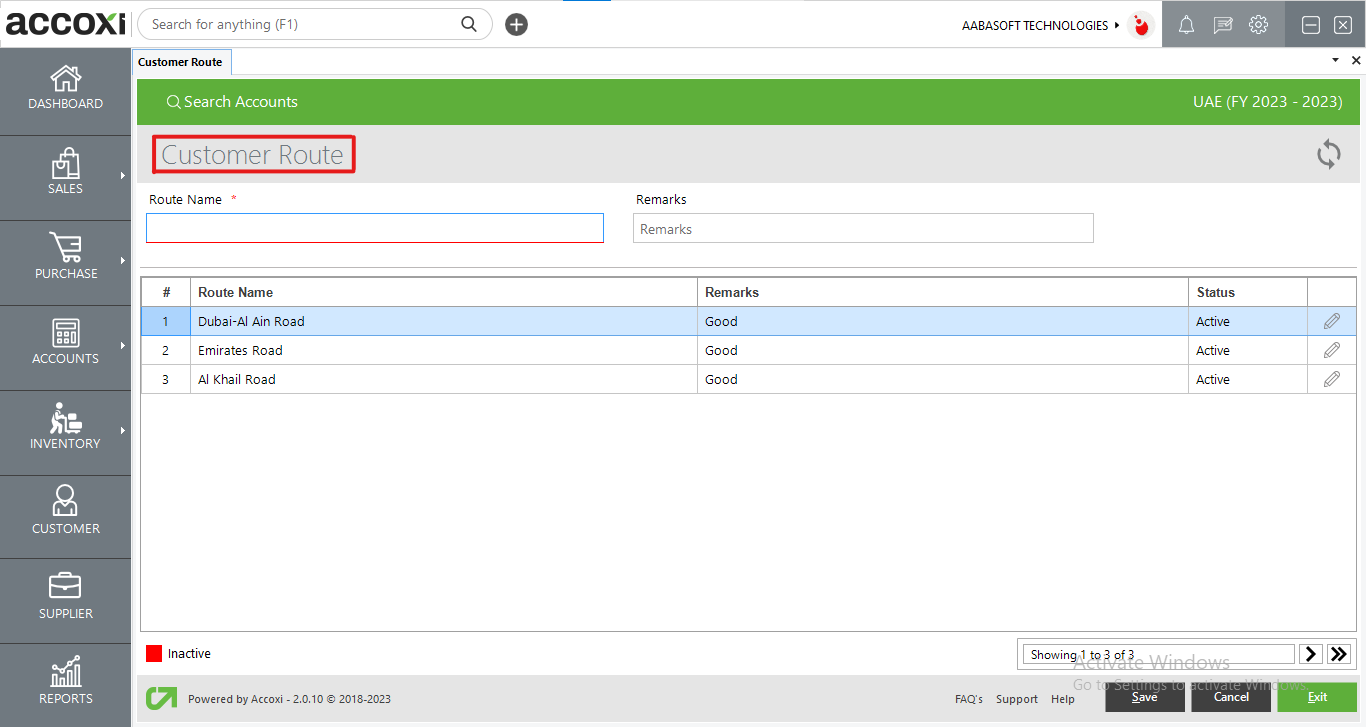
DATA AVAILABLE IN THE CUSTOMER ROUTE TABLE
|
Field |
Description |
|
# |
The "#" symbol signifies the sequential identification number assigned to data entries in the table. |
|
Route Name |
The specific name of the customer route. |
|
Remarks |
Any comments or notes pertaining to the customer route, if applicable. |
|
Status |
It displays whether the customer route is currently active or inactive. |
|
Edit |
The user has the ability to modify the specific route name. |
4. Export option
Users can export their data in Excel format by selecting the "Export" option. After clicking on the export menu, users can choose the desired location to save the data in Excel format.
5. Status option
Users have the flexibility to set their route as either active or inactive. If there are no customers assigned to a particular route, the user can change the route status to inactive.
6. Edit option
If the user wishes to make any changes related to the customer route, they can do so through the edit option. Clicking on the edit option allows the user to modify the route name and remarks.
7. Inactive option
In the status menu, details of inactive customer routes are indicated by the color red.
8. Pagination control
It manages page navigation and size in increments of 10, 20, 50, and 100. By entering a page number and clicking the Go button (>). Users can navigate directly to the specified page.