Management of debt note system in Accoxi.

A debit note serves as a communication tool employed by a vendor to notify the buyer of existing debt obligations. Alternatively, it can be generated by a buyer when returning goods received on credit. This document may offer details about an upcoming invoice or function as a reminder for funds presently owed, contributing to transparent and effective financial communication between the parties involved.
Key Features:
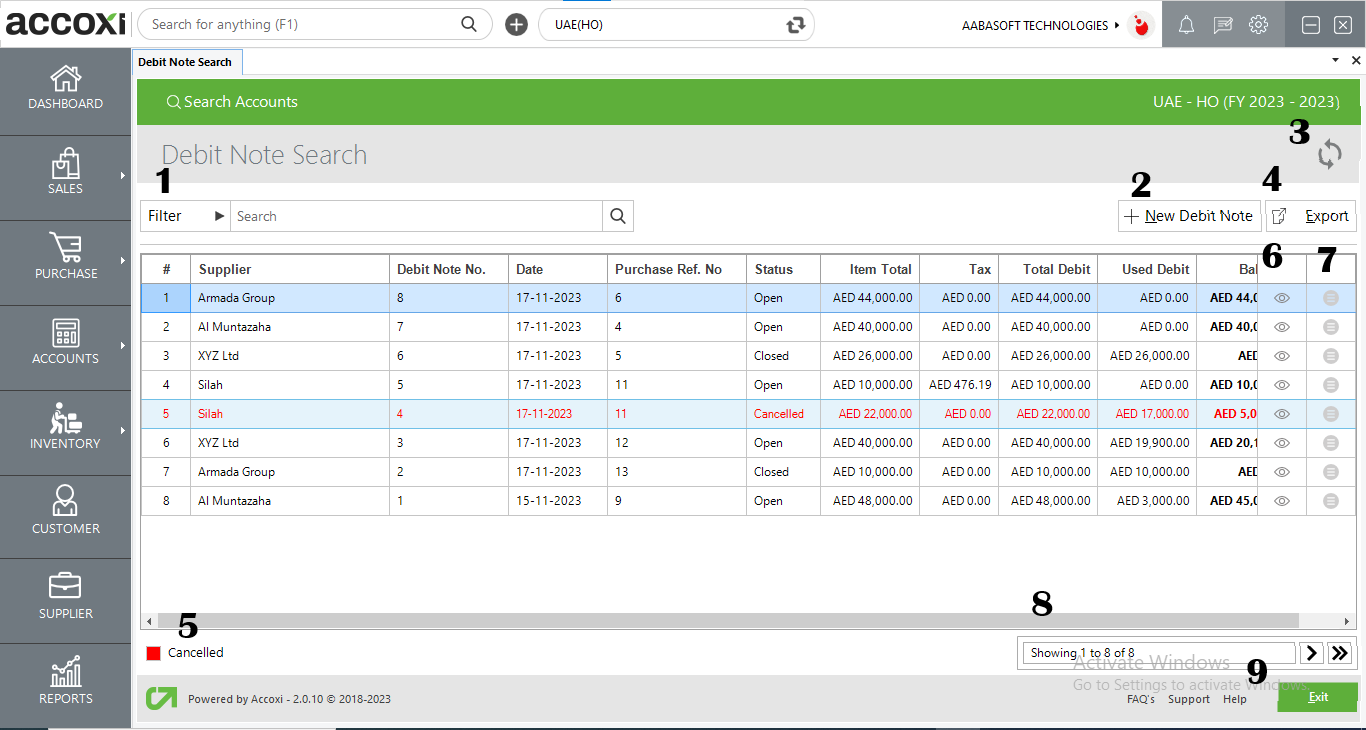
DEBIT NOTE SEARCH
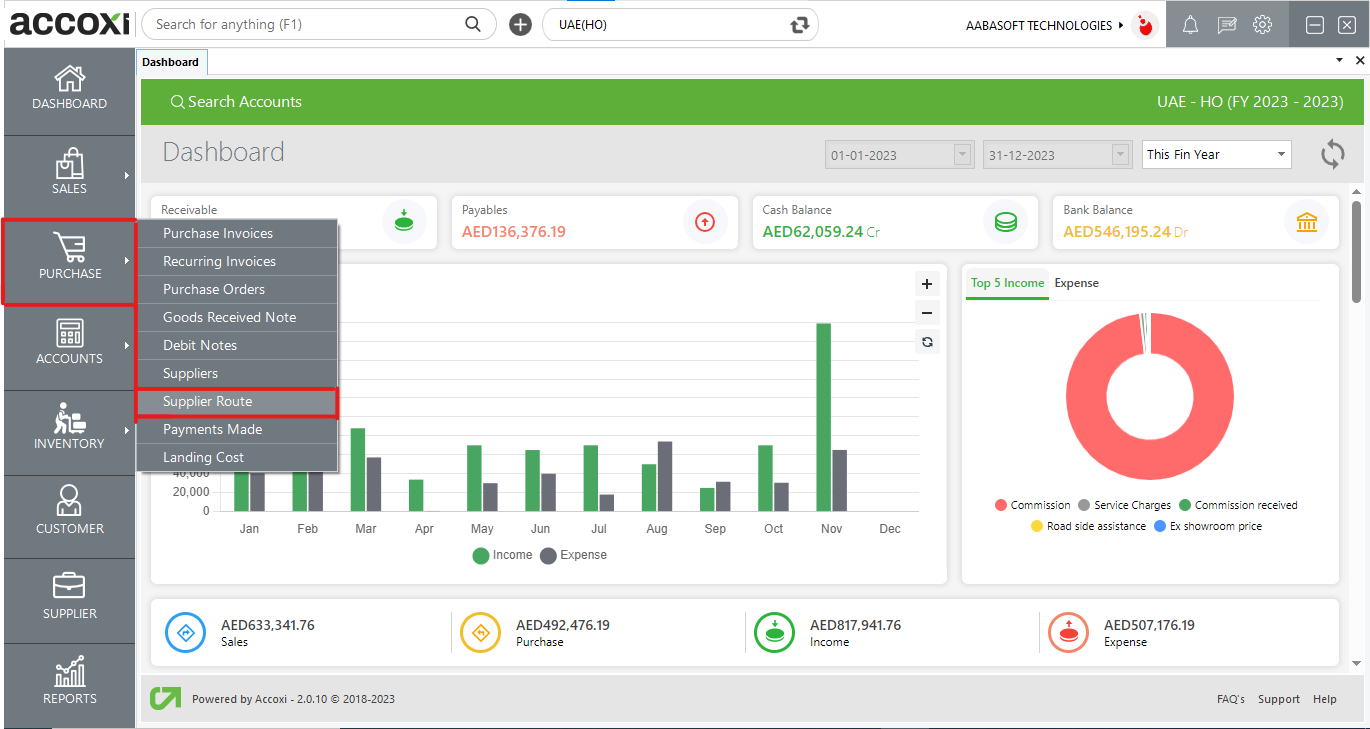
When navigating to the "Purchase" section and selecting "Debit Note," the system redirects the user to the "Debit Note Search" window. This window serves as a centralized hub for efficiently searching and managing debit notes, providing users with a comprehensive overview of their debit note transactions.
|
Field |
Description |
|
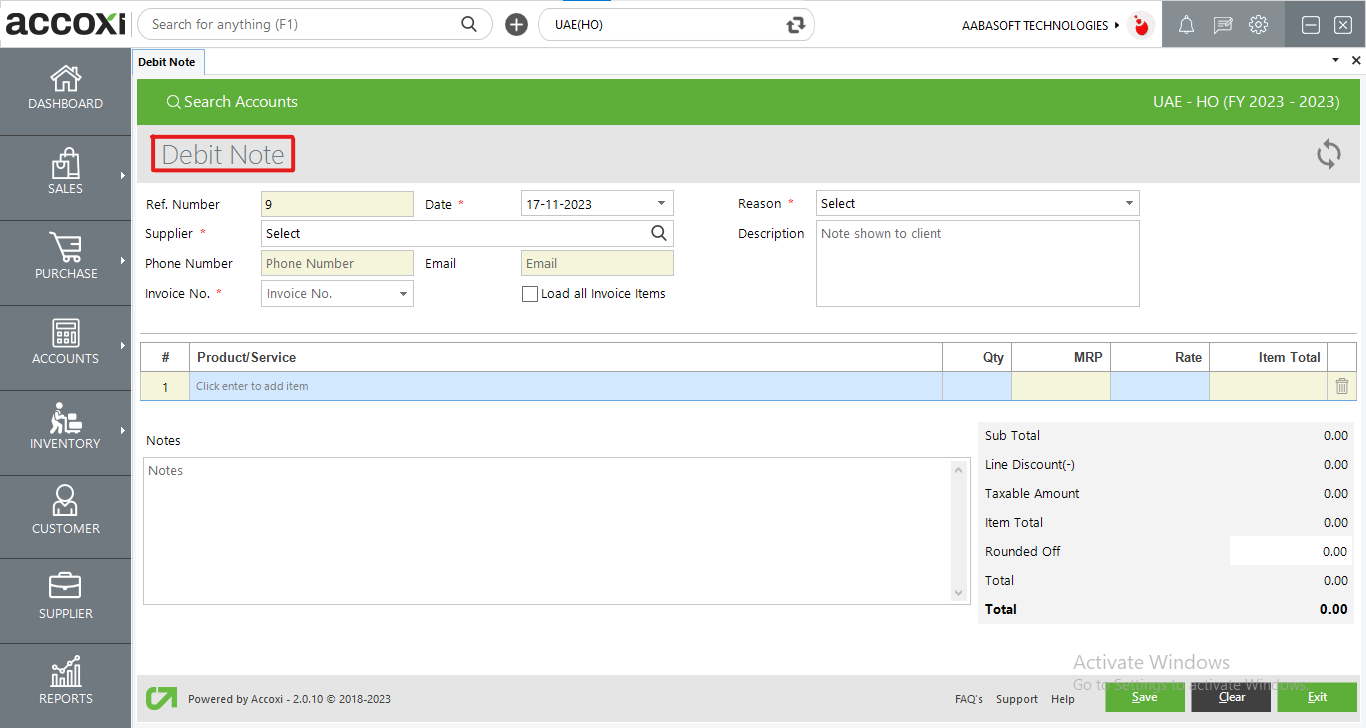
REF. NO. |
REF. NO. (Reference Number), is generated by the system automatically. |
|
Date |
By default, the system automatically records the transaction date as the current date |
|
Supplier |
Choose the supplier from the available options in the drop-down menu. |
|
Phone Number |
The information will be automatically populated based on the selected supplier. |
|
Description |
Input the description for the debit note. |
|
|
The description will be automatically filled in when the supplier is selected. |
|
Invoice Number |
Please choose the invoice number for which you wish to generate a debit note. |
|
Load All Items |
Enabling the checkbox labelled "Load All Invoice Items" results in the listing of items from the selected purchase order in the grid. |
|
Reason |
The user needs to specify the reason for generating the debit note, which could include a purchase return, correction in the invoice, or other relevant reasons. |
|
Product Or Service |
Input the product here. Pressing the Enter key will provide you with details about all the products you purchased from that supplier. |
|
QTY |
input the quantity of the product you wish to return. |
|
Save |
Select the "Save" button to store the entered details. After clicking "Save," the Debit Note view will appear. |
|
Clear |
The "Clear" option is used to erase or remove all the data entered by the user, clearing the entire input. |
|
Exit |
The "Exit" option is utilized to navigate to the previous page without saving the Debit note form. |
|
Blocked Columns |
If a product is entered in the table, the columns for Product/Service Code, HSN/SAC, Unit, MRP, and Rate will be blocked because these data were already inserted during product creation.
Upon entering the quantity, the Tax%, Taxable Amount, Tax Amount, Cess Amount, and Item Total will automatically adjust based on the entered quantity, updating the corresponding values accordingly. |
|
Discount |
This column is designated for adding any discounts provided on debit notes. It functions as an after-tax discount, directly reducing the Item Total column |
|
Round Off |
This column serves the purpose of rounding off small amounts, and the rounding method—whether downward, upward, or to the nearest value—is typically selected in the Preferences menu under Organization Settings. |
Menus available in Debit Note View:
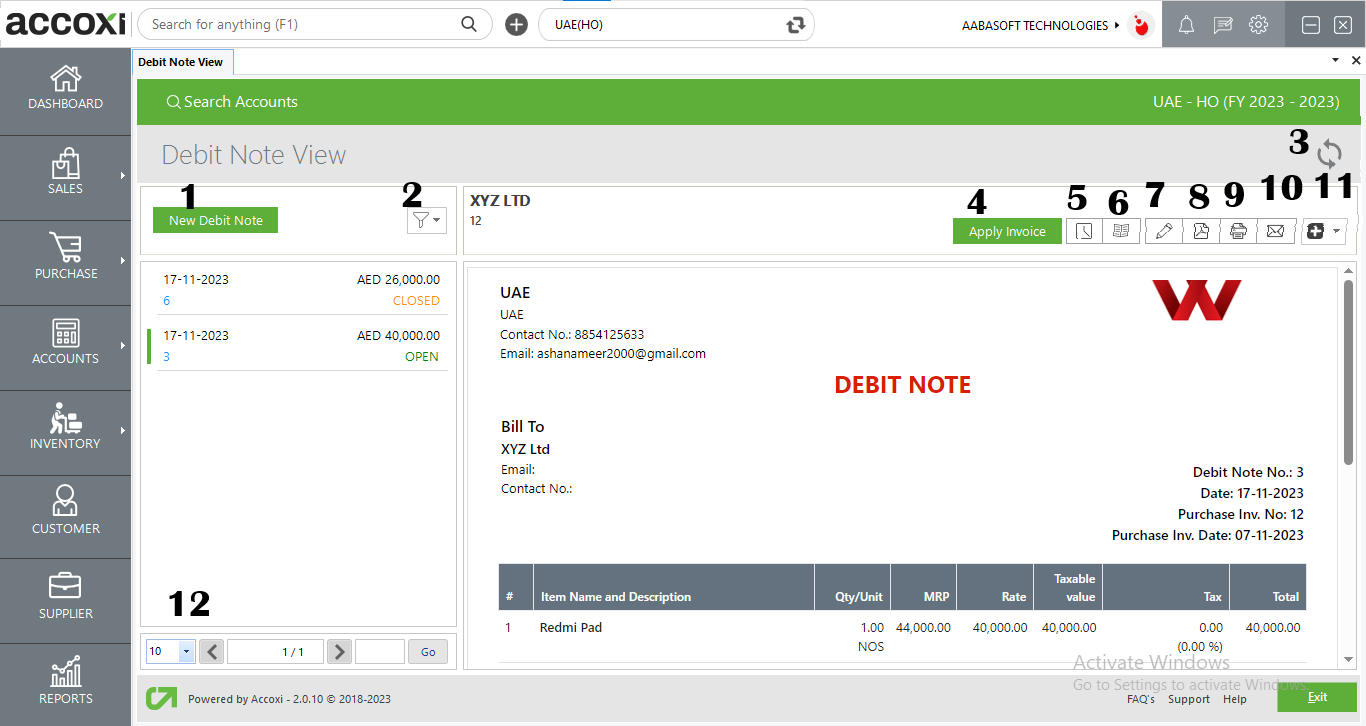
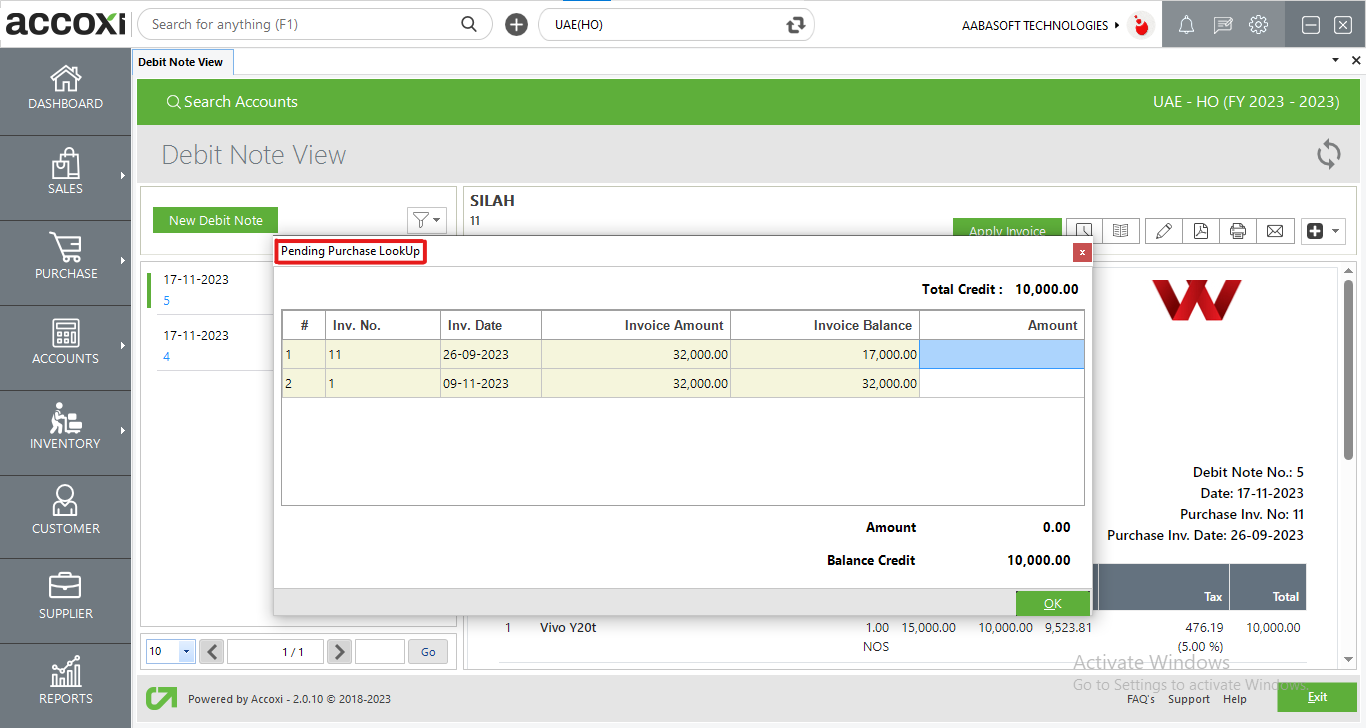
After selecting the apply invoice button, a pending purchase lookup window appears, listing pending credit purchases. The total remaining debits are displayed in the right corner of the window. Users can apply for debit only up to the pending debit amount. Once the debit amount is applied to the invoice balance, the debit is shown in the window.
The "Edit" option redirects the user to the debit note window, allowing them to update the data in the debit note.
The "View" option redirects the user to the debit note view, providing access to various features in that window.
This menu enables the user to apply an invoice against the debit note.
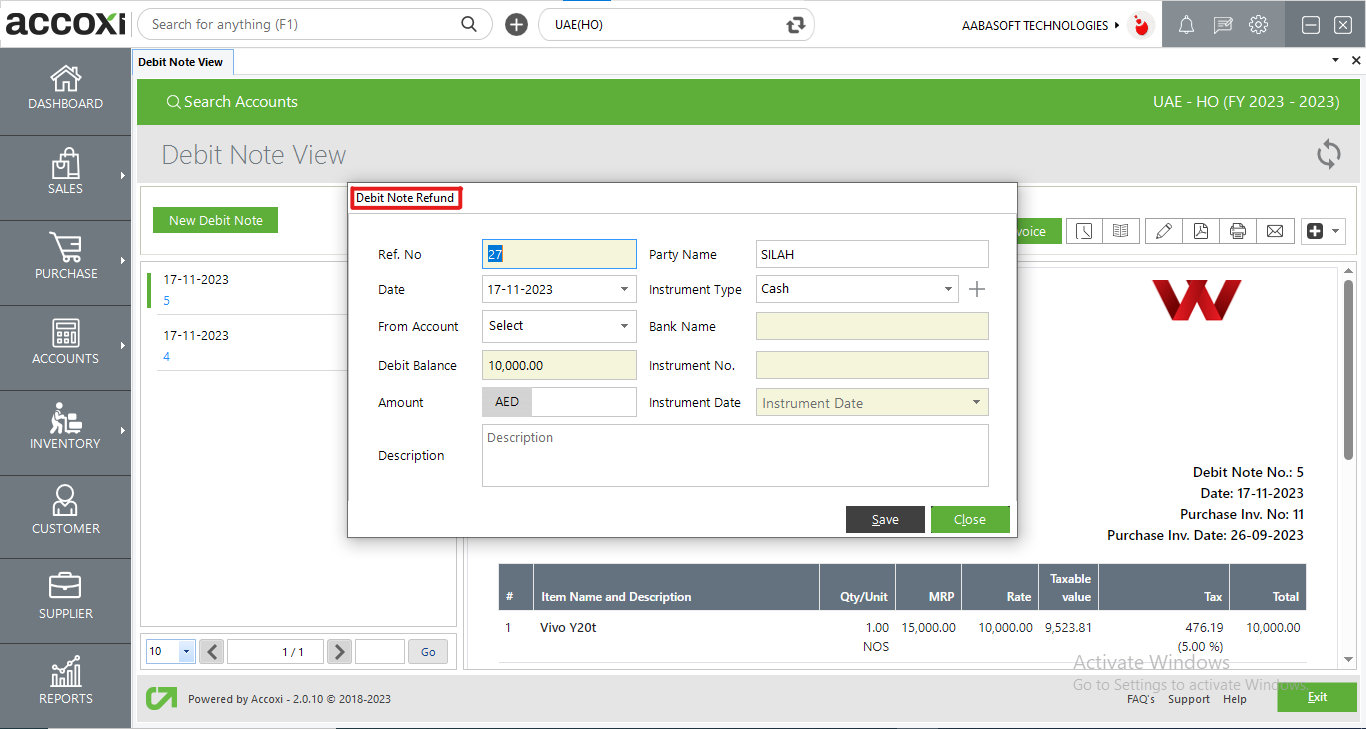
The user can easily access the refund option from here. If the supplier refunds the credit amount, it can be done by clicking the refund button.
The "Export to PDF" option is available if the user wants to convert the debit note form to PDF format.
The "Print" menu helps the user to print the created debit note form if required.