It enables user to create new unit for a Product or Service of the business concern

In Accoxi, the Unit function plays a crucial role, especially for businesses engaged in batch manufacturing where products are produced in quantities ranging from hundreds to thousands per batch. It operates as a sub-component of the inventory module and encompasses various units associated with trading items.
Key features of the Unit functionality in Accoxi include:
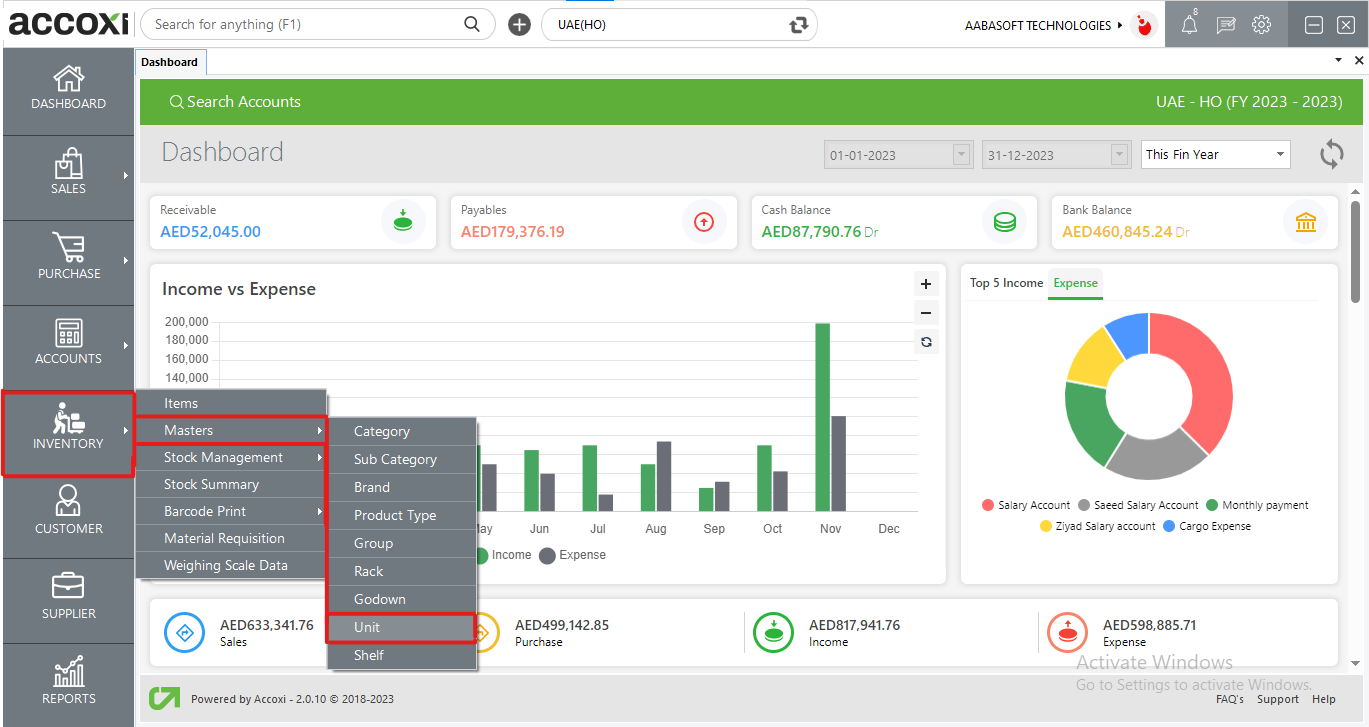
To access the Unit functionality in Accoxi, follow these steps:
Unit Search
The Unit Search interface comprises various menus and provides a comprehensive overview of all items in the business. It displays details of previously created units, including the Unit Name, Unit Code, and Status. Additionally, users can utilize this interface to create new units for products or services within the business.
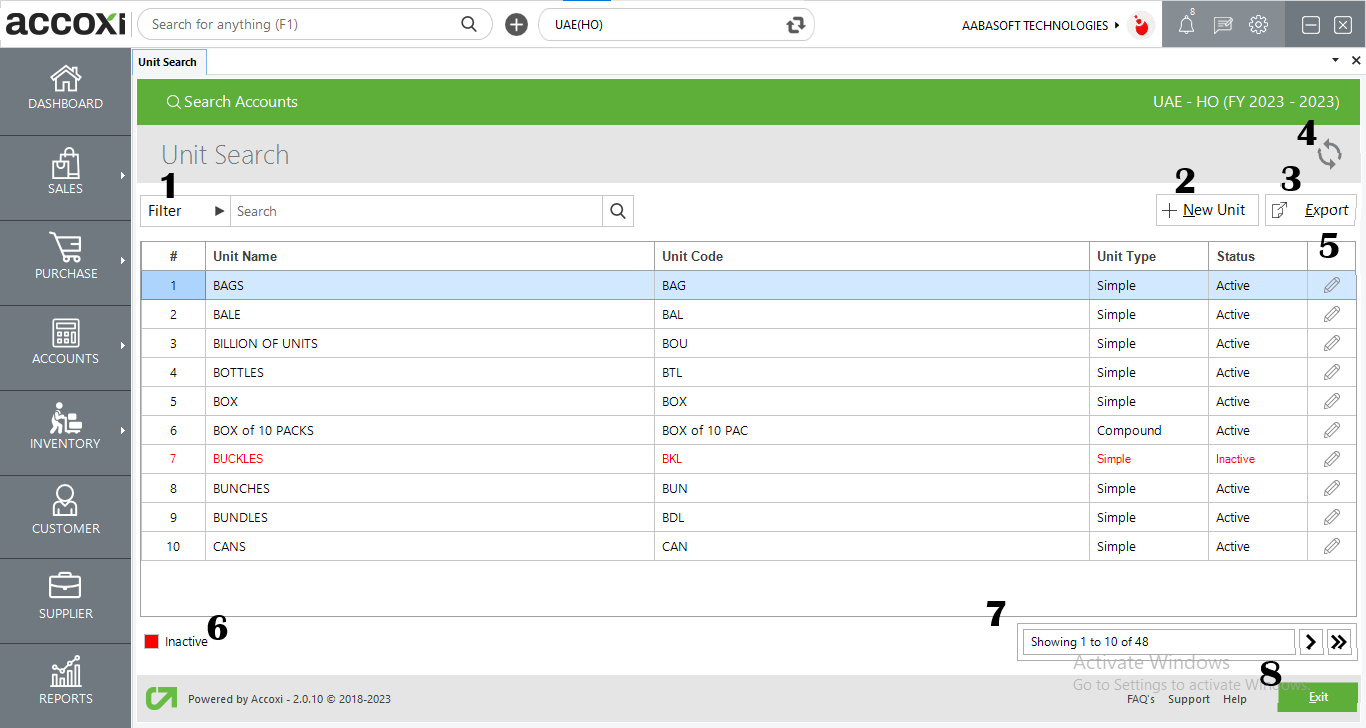
1. Filter
Users can filter units in two ways—either by directly entering the unit name into the search bar near the filter option or by selecting options from the filter drop-down. Filtering can be based on Unit Name, Unit Code, or Status. Status options include Active, Inactive, or All.
2. +New Unit
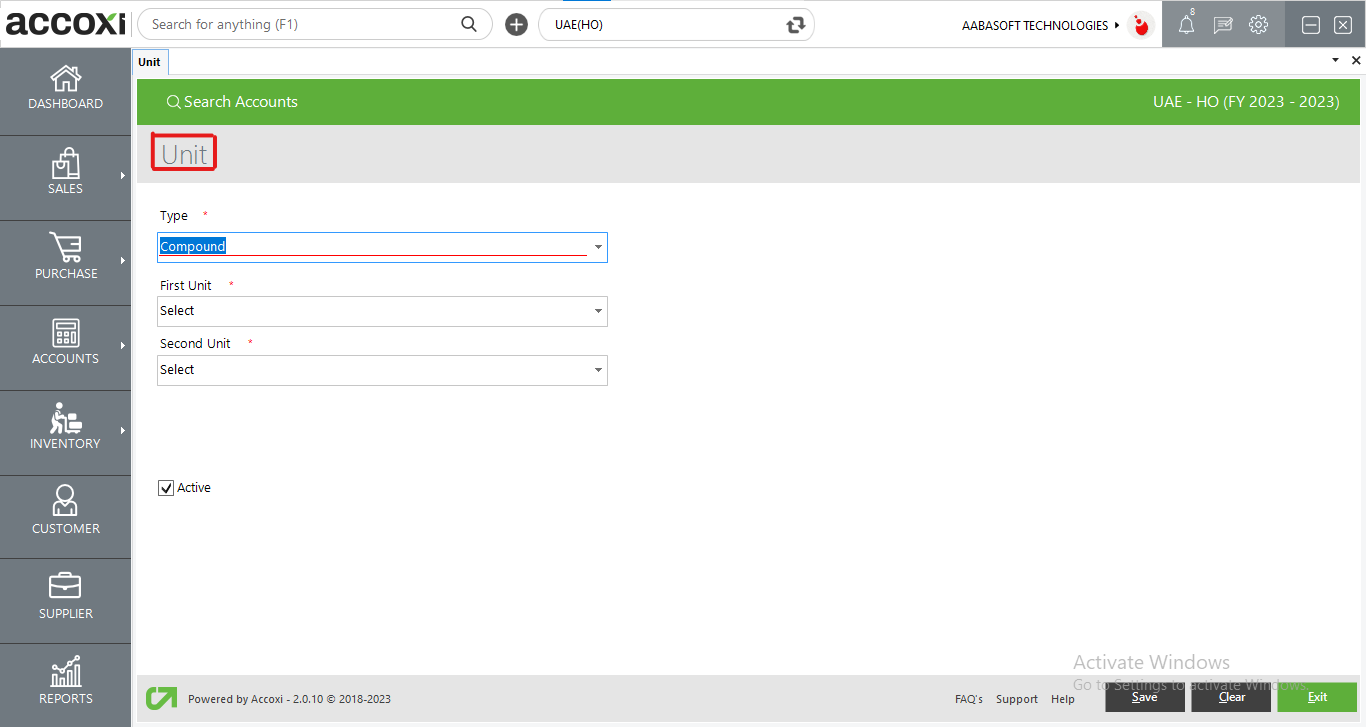
The "New Unit" option is available in the menu for creating a new unit. Clicking on this option opens a new form for the Unit page. Users can create both simple and compound units. For a simple unit, users need to input details such as Unit Name, Unit Code, and choose the Active option. For compound unit creation, users can enter the first unit conversion number, specify the second unit, and mark the Active option to set the unit as Active. If the user wishes to create the unit as Inactive, they can unmark the Active option.
|
Field |
Description |
|
Type |
In this section, users can choose the type of unit, either Simple or Compound. Simple Unit: Simple units include commonly used ones like Nos, Pcs, etc. Accoxi provides most common units by default. Compound Units: Compound units involve two different types of measurements. This feature allows grouping items that come in two different units. When the Compound Unit is enabled, new options for the First Unit and the Second Unit become available. |
|
Unit Name |
When selecting the Simple type, users can access this column and input the name of the simple unit. |
|
Unit Code |
When choosing the Simple type, users can access this column and input the code for the simple unit. |
|
Second Unit |
The second unit can be chosen from the drop-down list, which includes default simple units. |
|
Active |
Users can activate the unit by marking the "Active" option. Conversely, if they wish to create the unit as inactive, they should unmark the "Active" option. |
|
Save |
To save the entered data in the Unit window, users can use the "Save" button. |
|
Clear |
To clear the entered data in the Unit window, users can click on the "Clear" button. |
|
Exit |
Users can exit from the Unit window without saving the entered data by using this button. |
3. Export: The list of units can be exported to Excel format. Click on the Export button located at the top right corner near the +New button. Choose the file location and click Save.
4. Refresh: If the latest unit data is not displayed, click on the refresh icon at the top right corner of the page to fetch the new data.
5. Edit: This menu allows the user to edit a created unit. Clicking on the menu will open the selected unit form for editing.
6. Inactive: This option aids the user in easily identifying inactive units using color formatting. An inactive unit is indicated with red color.
7. Pagination Control: It manages Page Navigation and Page Size. Users can set the page size to 10, 20, 50, or 100. By entering the page number in the box and clicking the Go button, users can navigate to the intended page.
Steps to Inactivate a Unit:
Users can also change the status of a created active unit to inactive by using the Edit menu.