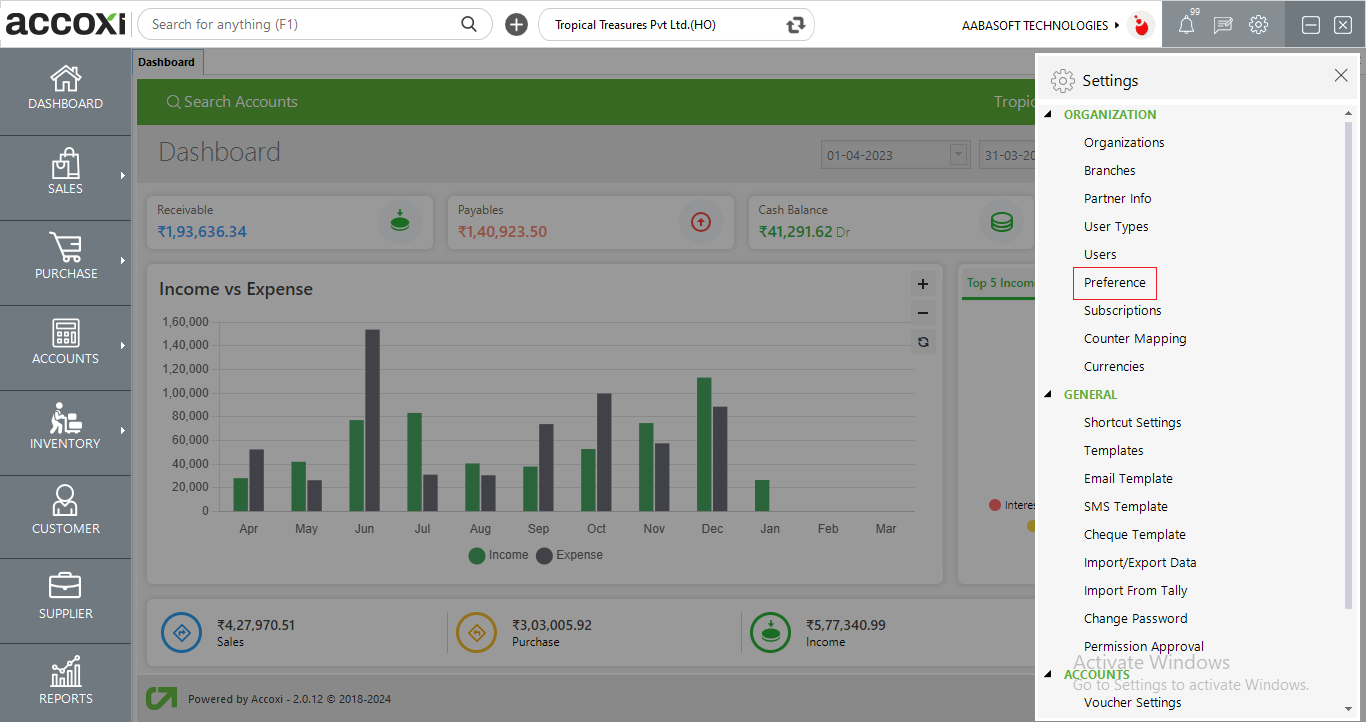
Preference helps users customize invoice and inventory activities of your business
Preference grants users to customize and set up all modules of Accoxi. in the preference module users can customize their subscription availed and edit features present in different modules of Accoxi

The organization preference settings allows the user to set various features available for an organization like setting up organization logo, signature, theme etc.
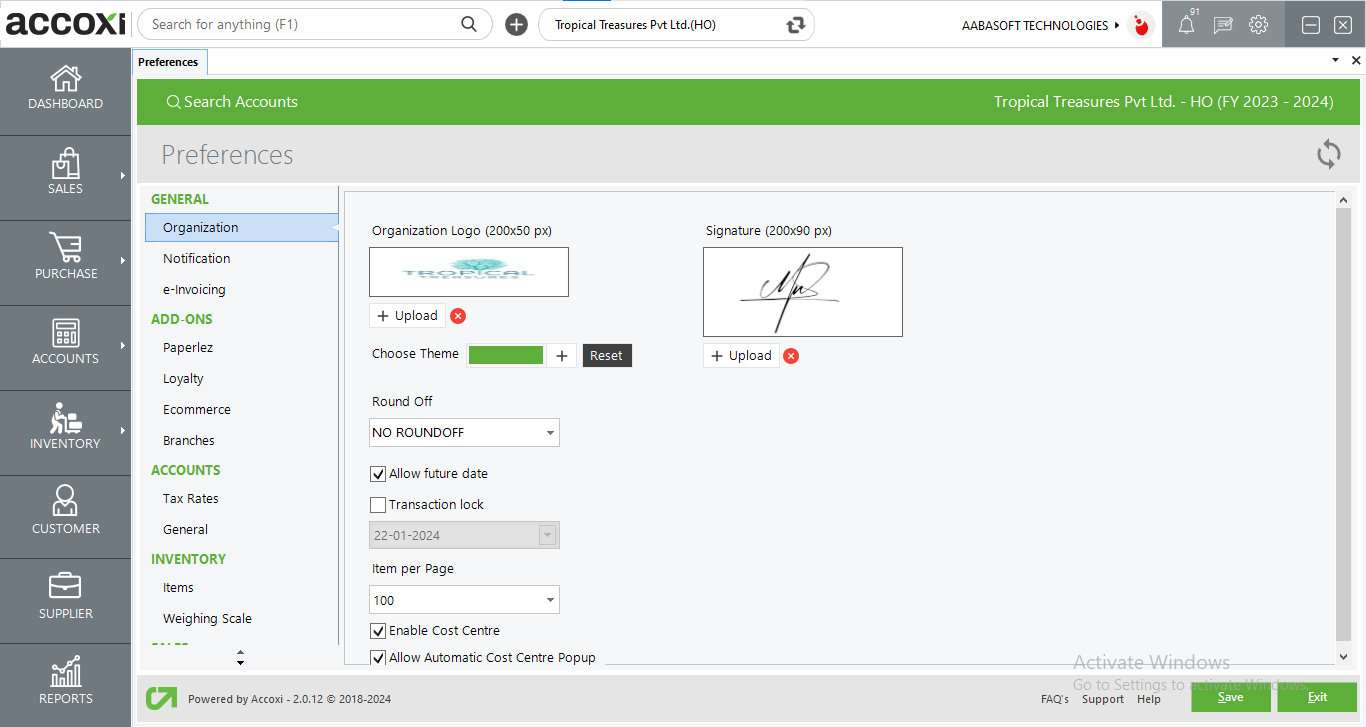
Users can add the organization logo to ACCOXI by clicking the upload button. Users can select the logo image from the pc, the image type can be in the form JPEG, PNG, BMP, GIF.
Users can opt for a theme for their organization from this option. The color theme option is available by clicking the + icon and the user can select any color from the Color dialog box.
And a reset option is available to reset the theme to default which is red in color.
Users can set the amount round-off option in these settings. Round off can be upwards, downwards, nearest, or no round-off
This option allows the user to make future date transactions. If it is disabled user can’t make future date transactions and the transaction can only take place on the current date
ACCOXI provides an option to lock transactions before a particular date.
This helps the user to eliminate any frauds and errors
This option is to set the number of items to be shown in a single window. By setting an item per page to 20 the user can view 20 items in a single page
Users can upload signatures or seals of the organization here by clicking upload Users can upload the signature in the form of JPEG, PNG, BMP, and GIF.
And user can enable this signature to be shown in the prints of transactions made.
The "Enables Cost Centre" feature offers an option to activate the cost centre function within the organization. This functionality facilitates the definition of distinct cost centres, allocation of incomes and expenses to these cost centres, and provides insights into the profit or loss associated with each cost centre. In Accoxi, cost centres are treated as separate departments.
Enabling the 'Allow Automatic Cost Centre Popup' feature offers the capability to allocate expenses or income to specific cost centres while entering a transaction. When this setting is activated, after saving a transaction, a popup window for cost centre allocation promptly appears, streamlining the allocation process without any delay. It's important to note that this setting becomes available in the preferences only if the settings for enabling cost centres are already enabled.
The notification feature in preference settings enables users to toggle notification settings for specific elements such as Recurring Sales, Updates, Payment Due, Receive Fund, and warnings like Enable Out-of-Stock Notification for zero stock and Notify when stock drops below the reorder point.

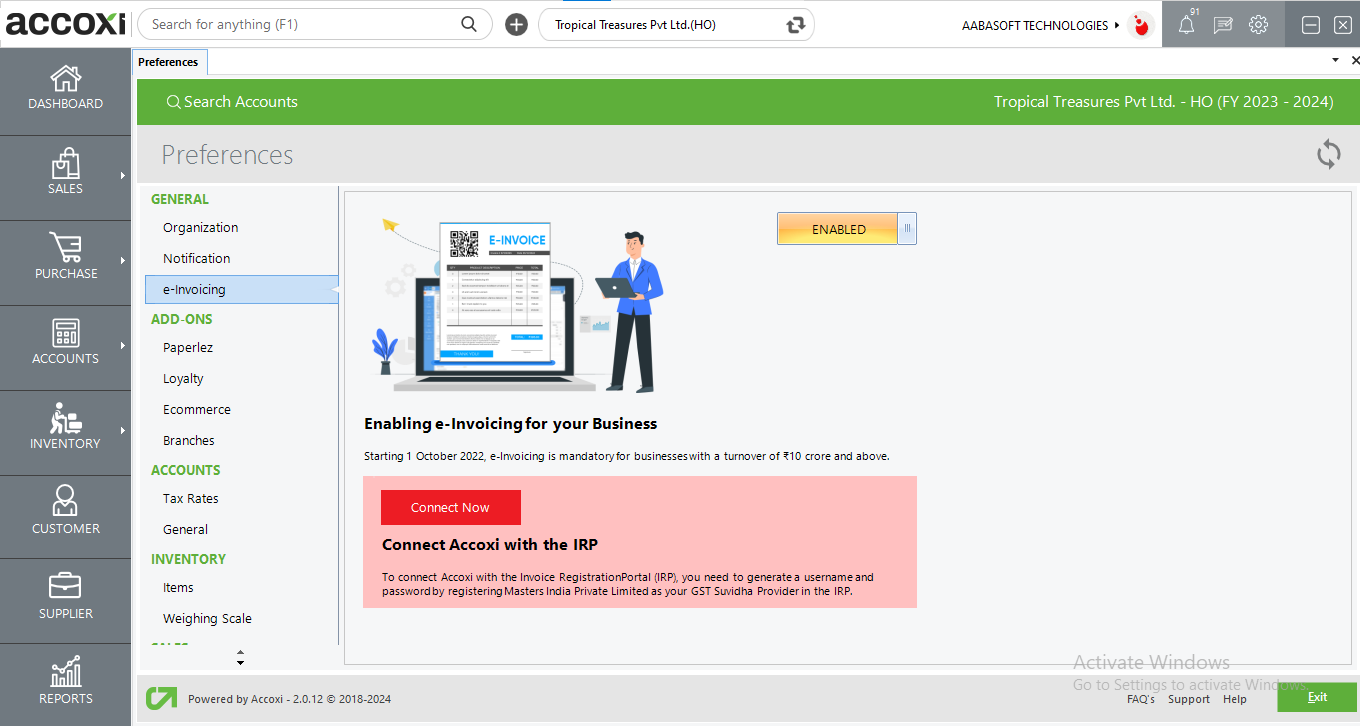
E-invoice involves electronically submitting invoices to tax authorities as part of a digital taxation system. It is designed to improve accuracy, reduce tax evasion, and enhance transparency in financial transactions. E-invoice filing systems are often integrated with government platforms to ensure compliance with tax regulations and streamline the invoicing process. Within Accoxi, the E-Invoicing feature in the preference settings allows businesses to easily enable E-Invoicing for their operations.
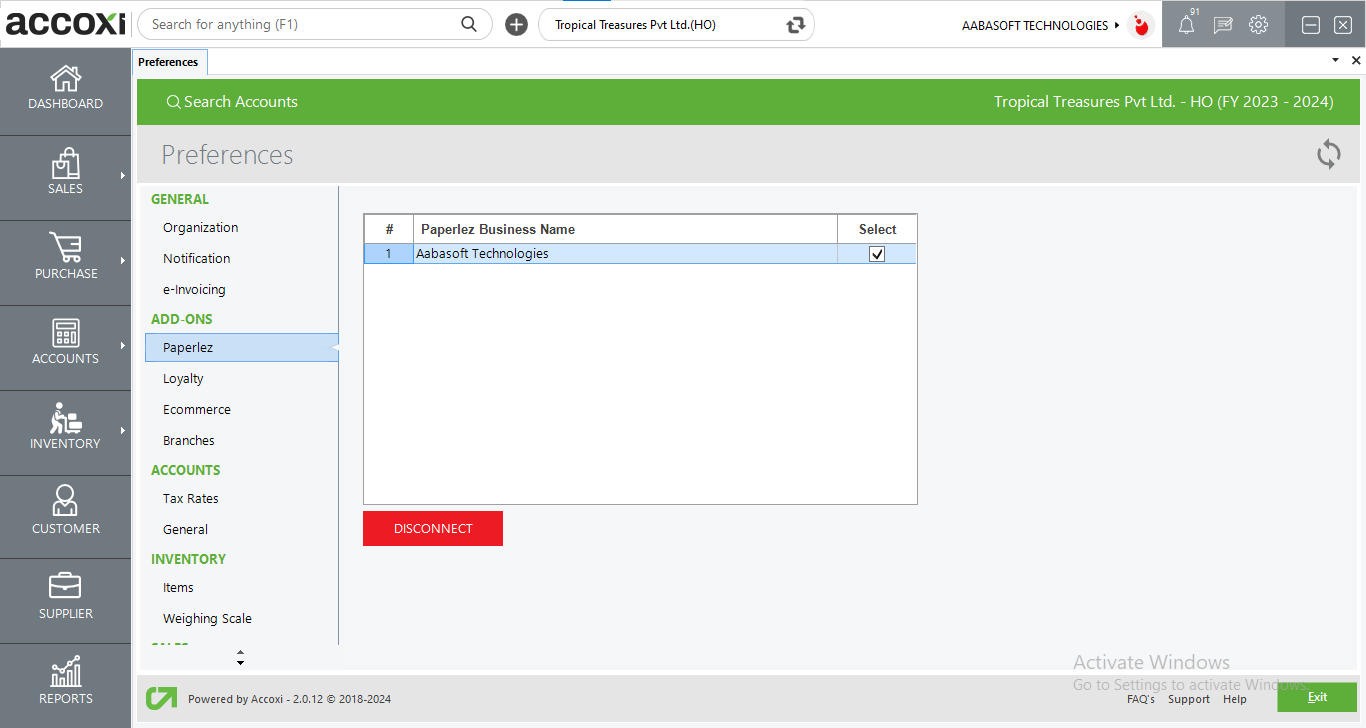
Paperelz is a handy tool when it comes to automating offices. Office automation is largely admired by organizations in the industry now. They search for optimal software in every ‘nook and cranny for tallying their requirements of transforming into a self-sustained automated workplace.
The concoction of Accoxi and Paperlez offers many added advantages. All you have to do is start an account for your business in Paperlez just like the way you did for Accoxi. You can register your business by clicking on the Subscribe button given below
OPTIONS AVAILABLE IN LOYALTY
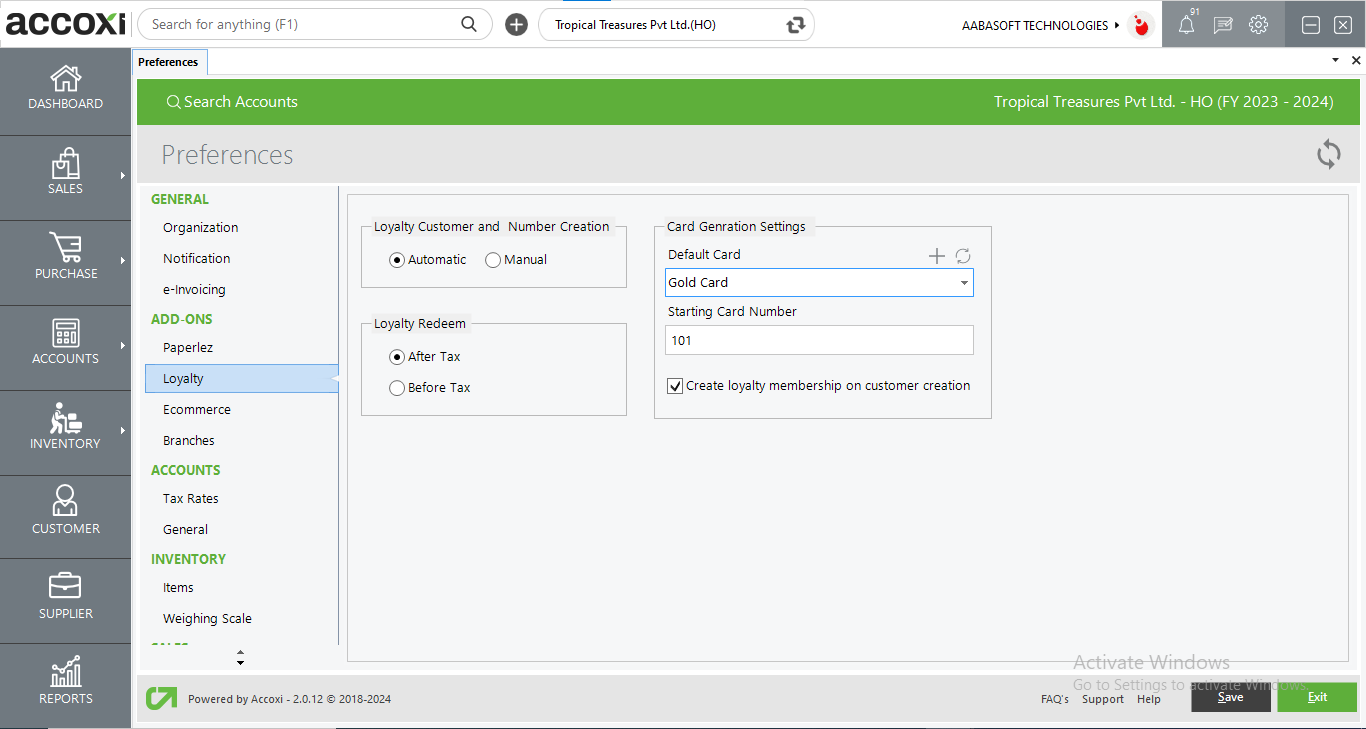
There are two options available for Loyalty customer number creation which are, automatic and manual.
If the user selects automatic mode, while generating a customer from the customer module, this customer will be automatically created as a loyalty customer and a loyalty card will be assigned to them. And user cannot create card info details in automatic option.
In the case of manual mode, user can manually create loyalty customer and also can create card info details.
Users can select any one of the option and the loyalty customer creation will work on the basis of the mode selected.
Two options are available for Loyalty redeem process which are after tax and before tax. User can select anyone of the option for loyalty card redeem.
If the user selects the automatic option in Loyalty Customer and Number creation user needs to enter the details for automatic loyalty card generation.
Default card- For the process of automatic card generation a default card should be assigned. First user need to select type of card on this field. By clicking on the select option list of created cards will open and can select the required one.
Starting card number- After selecting the default card, user can enter the starting number of the card in this field.If the user wants to create a loyalty membership on customer creation, mark the option below the Starting card number.
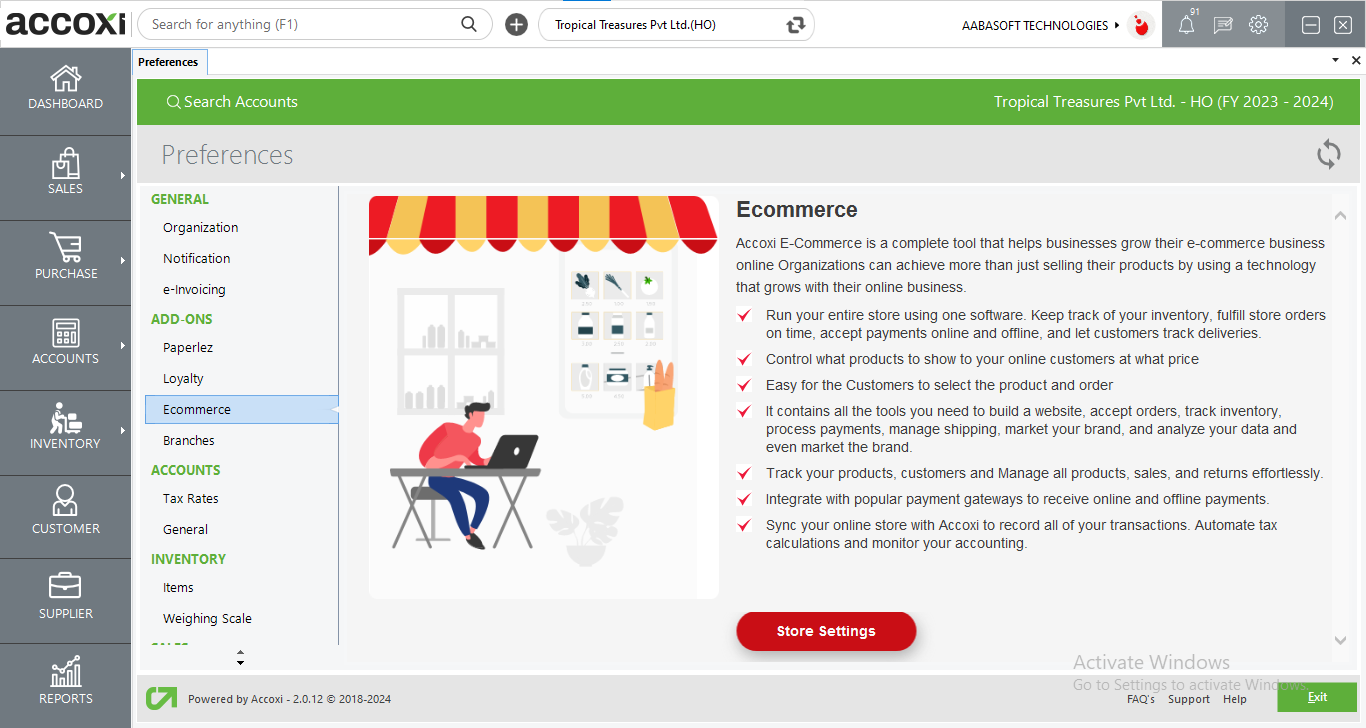
Integrated e-commerce functionality in Accoxi streamlines financial processes and enhances efficiency. This integration automates the recording of sales, expenses, and inventory management, reducing manual data entry errors. E-commerce integration allows for real-time tracking of transactions, providing accurate and up-to-date financial information. Additionally, it facilitates seamless reconciliation between online sales platforms and accounting records, ensuring consistency and reliability in financial reporting. Overall, the integration of e-commerce capabilities optimizes workflow, saving time and improving the accuracy of financial and inventory data.
Accoxi empowers users to personally design their E-commerce platform within the software. It provides a user-friendly interface for setting up banners, featured categories, trending products, and more. With Accoxi, users can track orders, update statuses, and manage inventory in real-time, enhancing operational efficiency and accuracy.
This comprehensive platform ensures seamless control over various aspects of E-commerce management, allowing businesses to stay agile and responsive to customer needs. Ultimately, Accoxi serves as an all-encompassing solution for creating, managing, and optimizing E-commerce experiences.
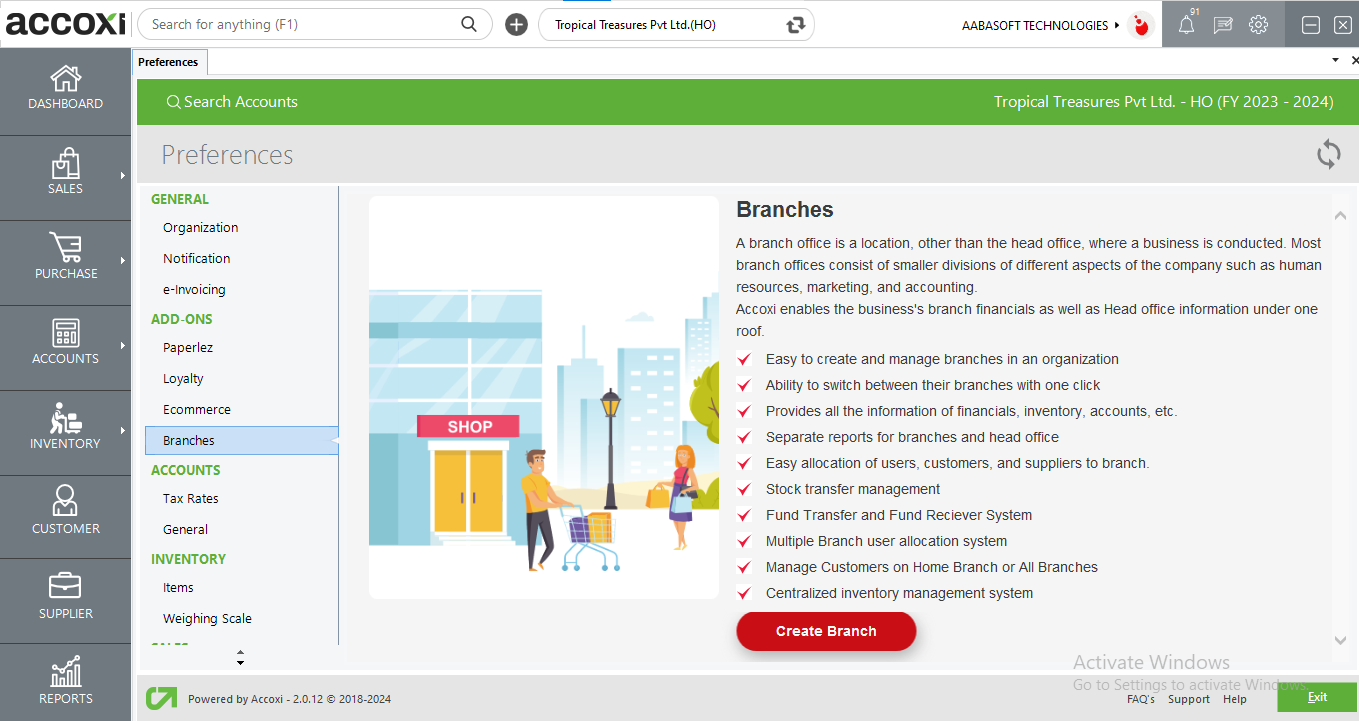
Accoxi facilitates effortless multi-branch management by allowing businesses to seamlessly handle multiple branches. Whether these branches have the same or different GST, they can be efficiently managed within a single account. The software provides comprehensive branch-wise reports for finance, inventory, and accounts, ensuring a detailed and organized overview of each location's performance. With a simple one-click switch, users can easily navigate between branches, streamlining the management process. Additionally, Accoxi simplifies stock transfers and fund transfers between branches, contributing to a more efficient and integrated operational workflow.
The "Create Branch" option in the preference settings directs users to the branch creation window, providing a comprehensive platform for entering all pertinent details related to the branch. This includes essential information such as the branch name, address, contact details, GST number, and other relevant particulars.
The user can set various options for the sales invoice in this preference settings like discounts, payment methods etc.
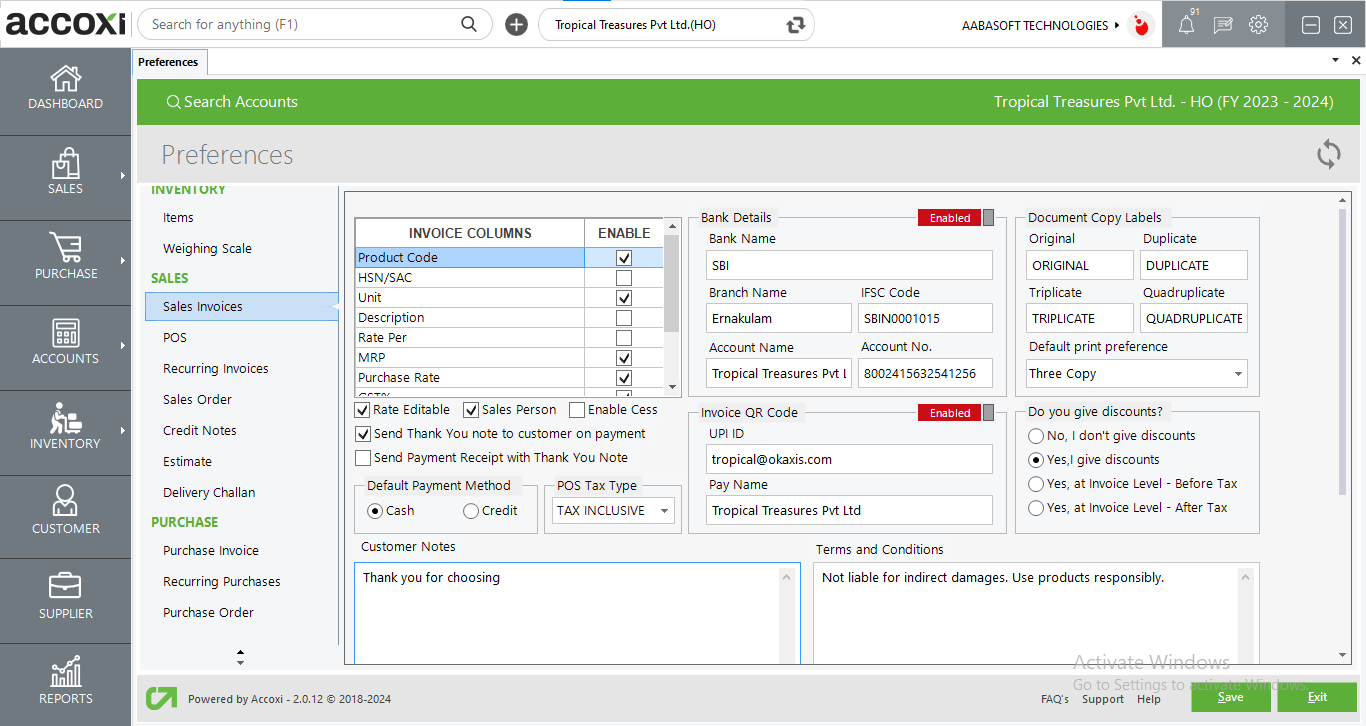
Column options:
User can enable or disable columns in the sales invoice window. The available columns are product code, HSN/SAC, description, disc %, disc amt.
User can enable or disable other options like;
Payment notes, due date in the sales invoice view window. User also can enable thank you notes while mailing for the customer payments and user can enable or disable the sales person.
the users can add their Bank details such as Bank Name, Branch Name, IFSC, Account name, Account number, and it will be shown in the sales invoice view form
Users can simply enter their UPI ID and pay name to generate QR code and It is shown in the sales invoice view form
User can select the type of discount given to the customer in this option. Types like item level, after tax, before tax and user can opt not to give any discounts.
User can enable to edit the selling rate if it is disabled user cant edit the rates which are already added in the batch of the product. if the user wants to add CESS to the invoice he can enable from here.
User can select the default payment method in the sales which cash sales or credit sales.
User can add customer notes here. Once set customer note it will be shown in all the sales invoices
users can add the terms and conditions of the sales invoice and it =will be reflected in the sales invoice forms
User can set the copy of the document label in here if the document is copied once it will show as duplicate user can set the number of documents to print in here also.
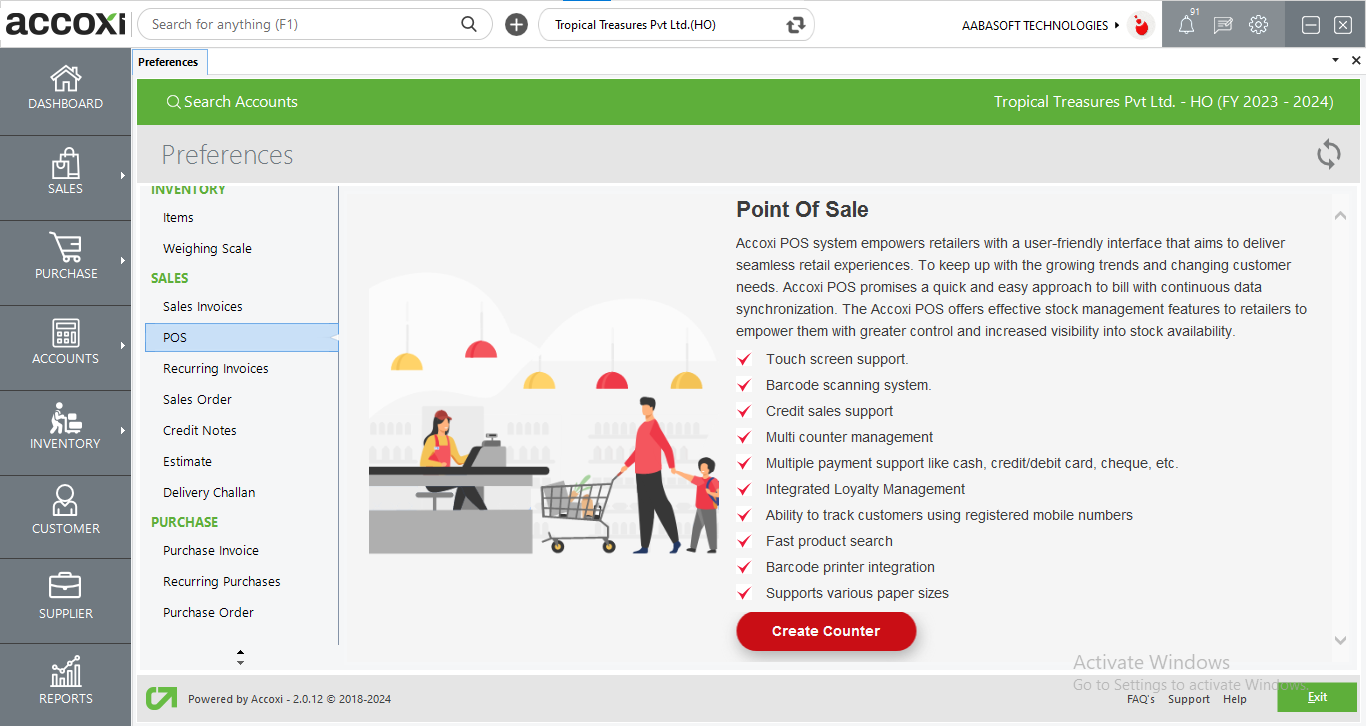
The Accoxi POS system provides retailers with a user-friendly interface designed to offer effortless retail experiences. In response to evolving trends and dynamic customer requirements, Accoxi POS assures a swift and straightforward billing process coupled with continuous data synchronization. With features such as touchscreen support, barcode scanning, multi-counter management, rapid product search, credit sales, and versatile payment methods, Accoxi ensures a smooth and efficient retail encounter. To facilitate POS sales, users are required to create a counter, and access to this counter can be configured within the settings.
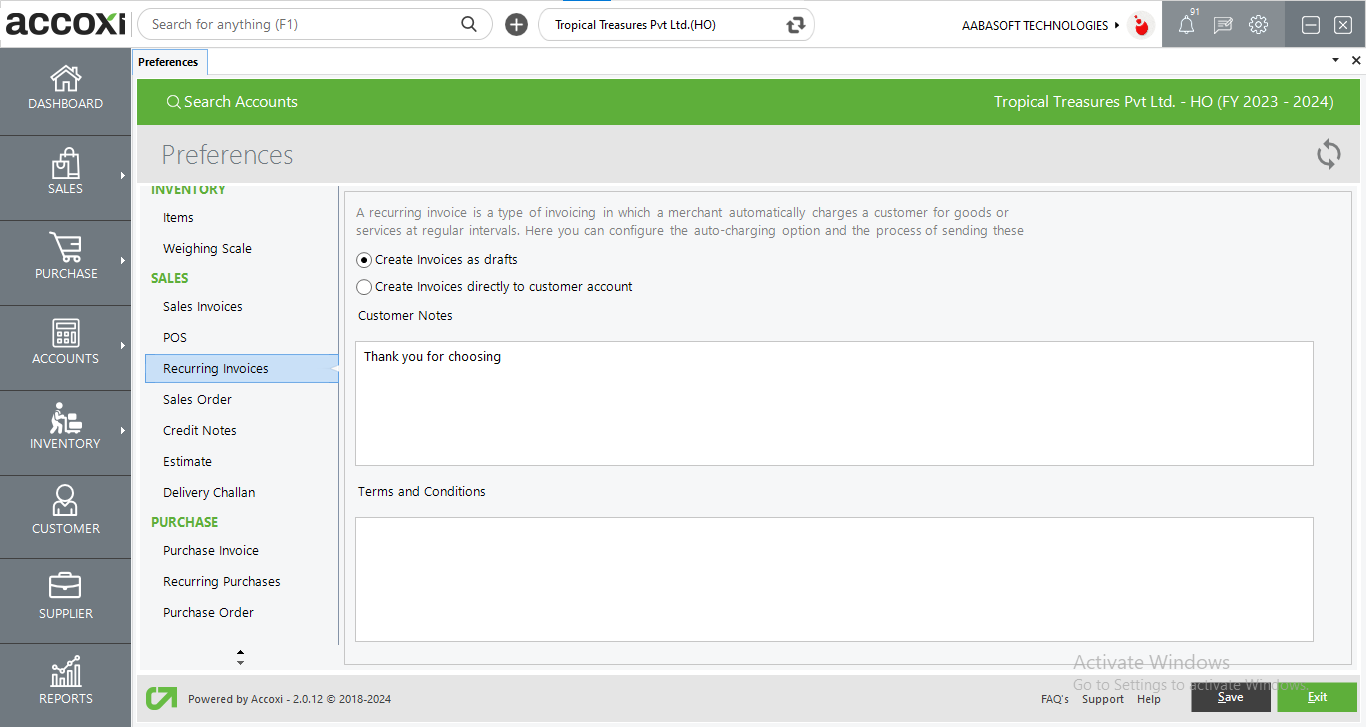
Recurring sales invoice preference option deals with whether the automatically created invoice will be saved as a draft or be converted into an invoice to customer account. User can enable draft or invoice for the recurring sales in this window
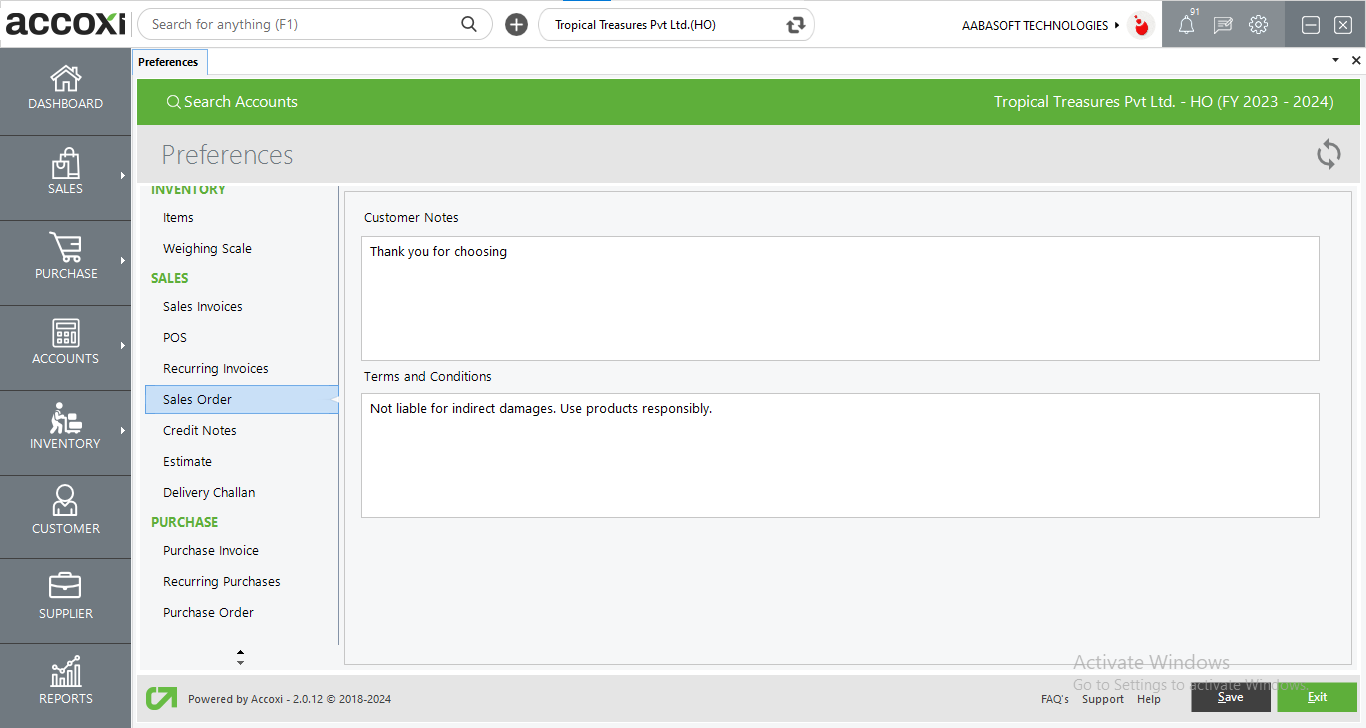
Users can enter terms and conditions and customer notes of the sales order here.
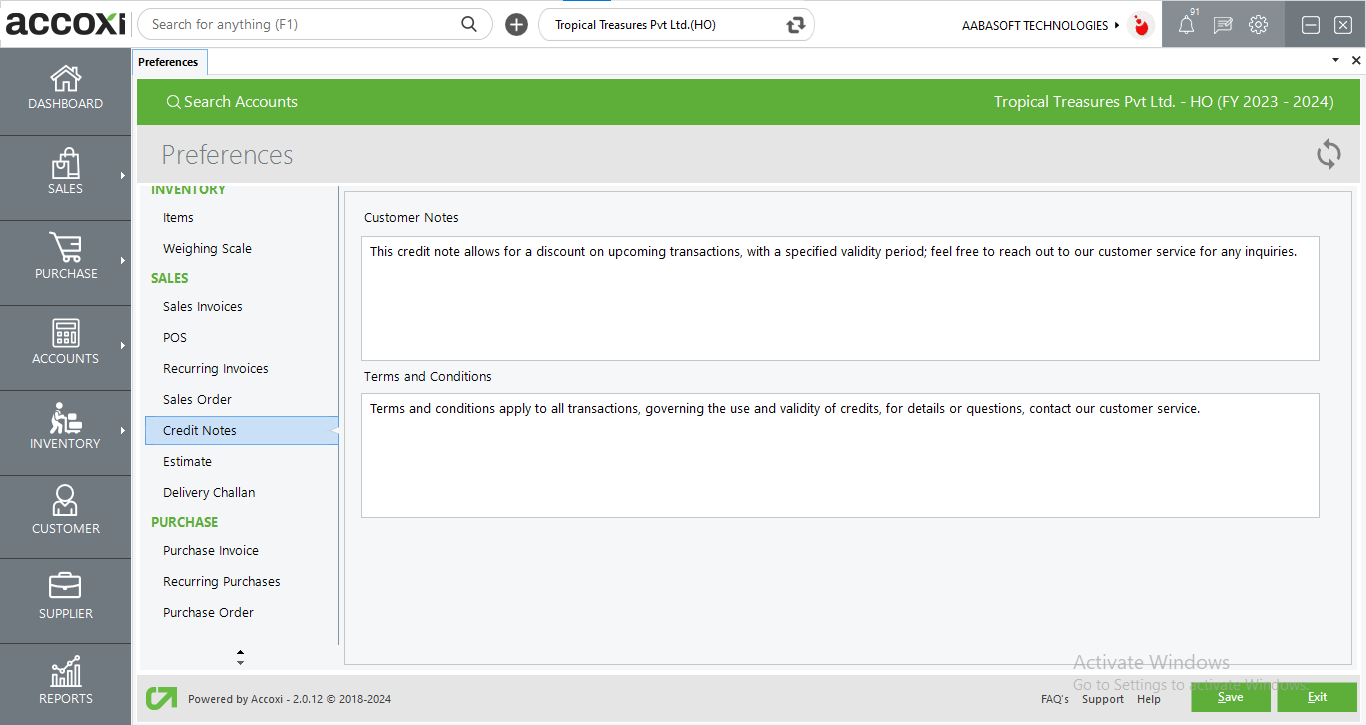
Users can enter terms and conditions and customer notes of the credit note here.
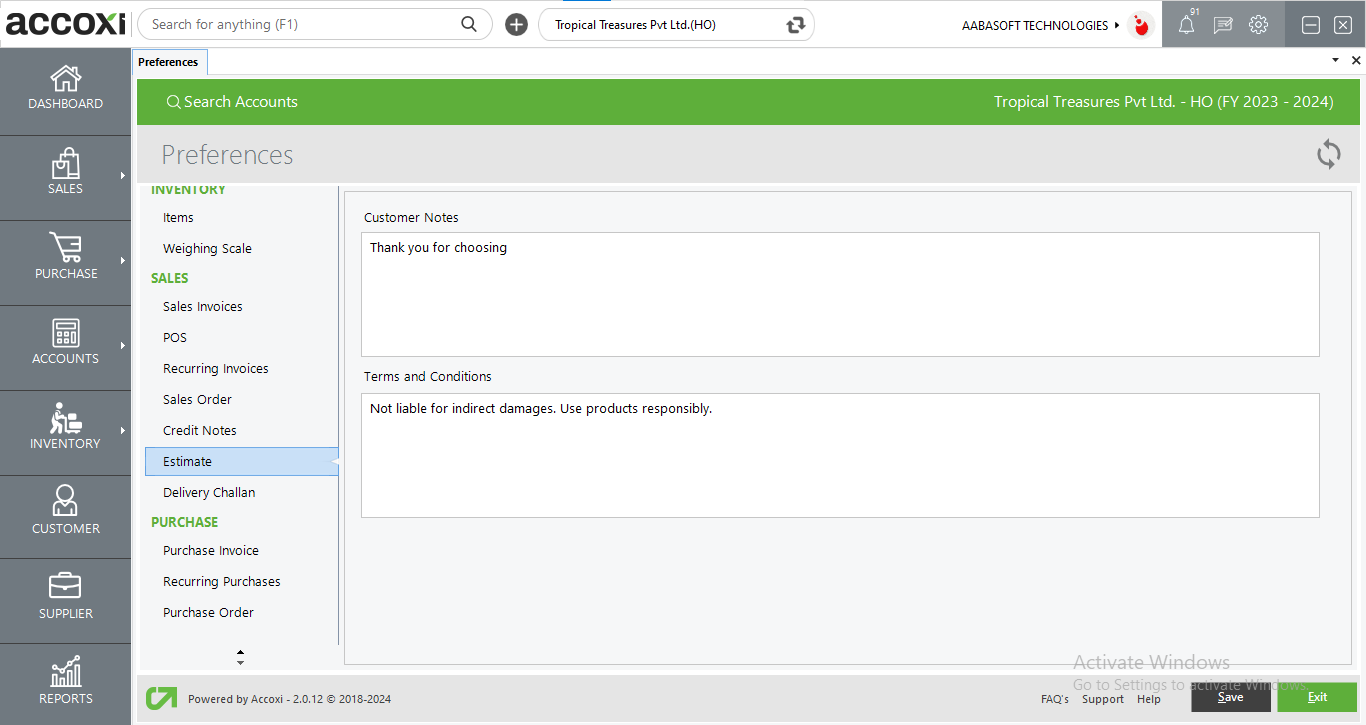
Users have the ability to predefine customer notes and terms & conditions for display in the Estimate. These notes will appear in all estimates, providing a consistent presentation, with the option to edit them if necessary.
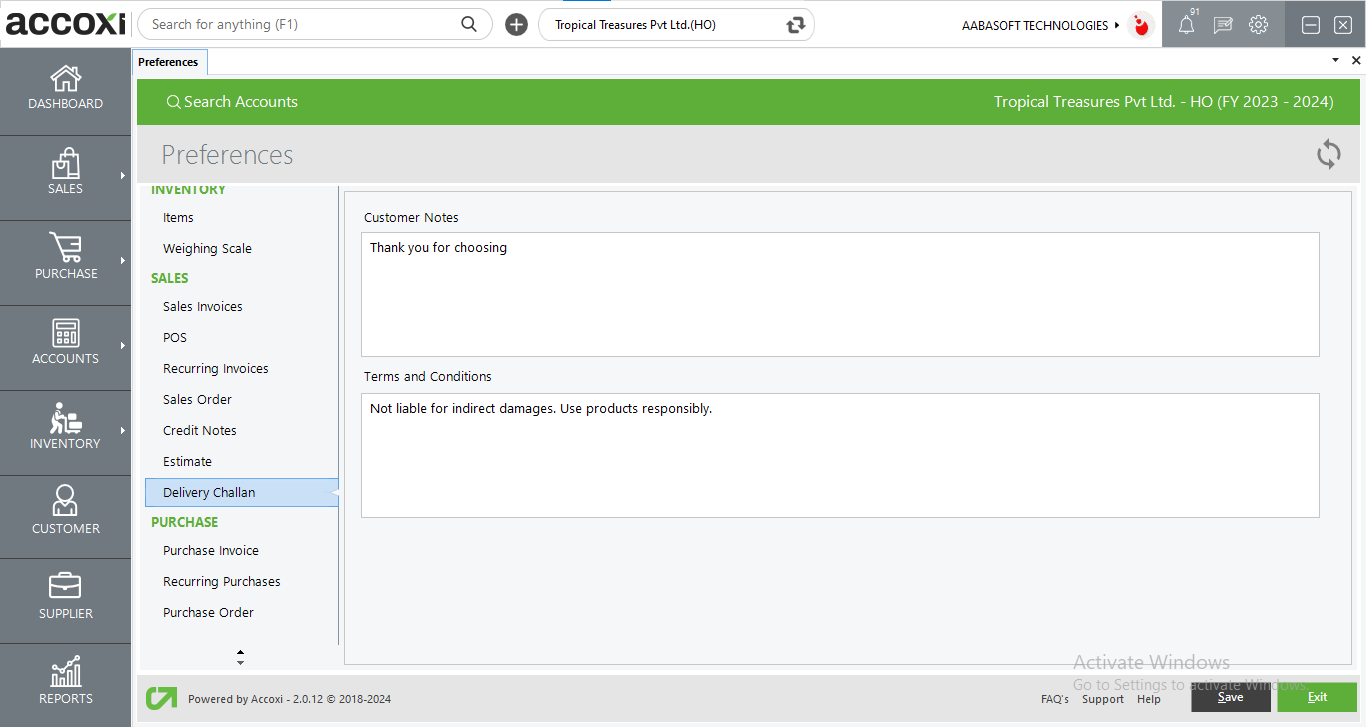
Users can predefine customer notes and terms & conditions for display in the Delivery Challan (DC). These predefined notes will be shown in all DCs, offering a consistent format, and users will have the option to edit them if necessary.
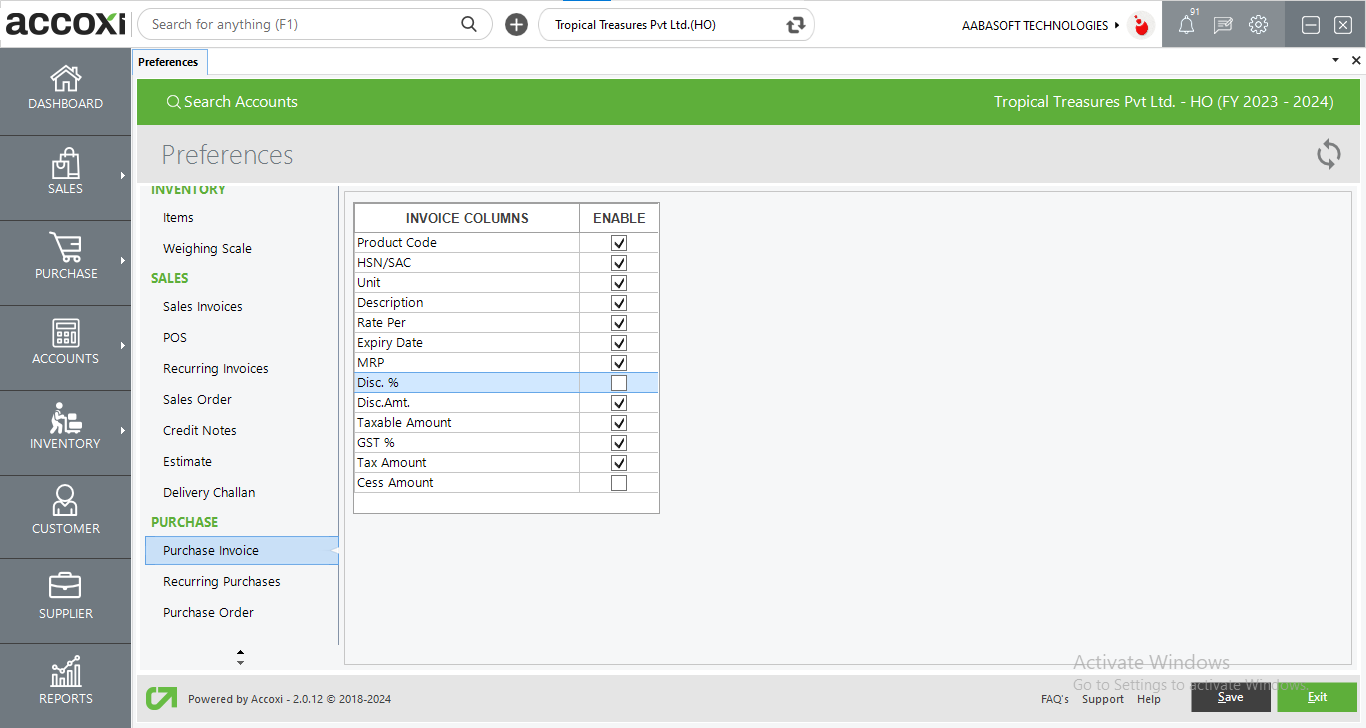
User can enable the columns to be shown in the purchase invoice from here.
Columns like product code, HSN/SAC, description, CESS rate etc.
User also can enable and disable payment notes details as well as due date of the invoice.
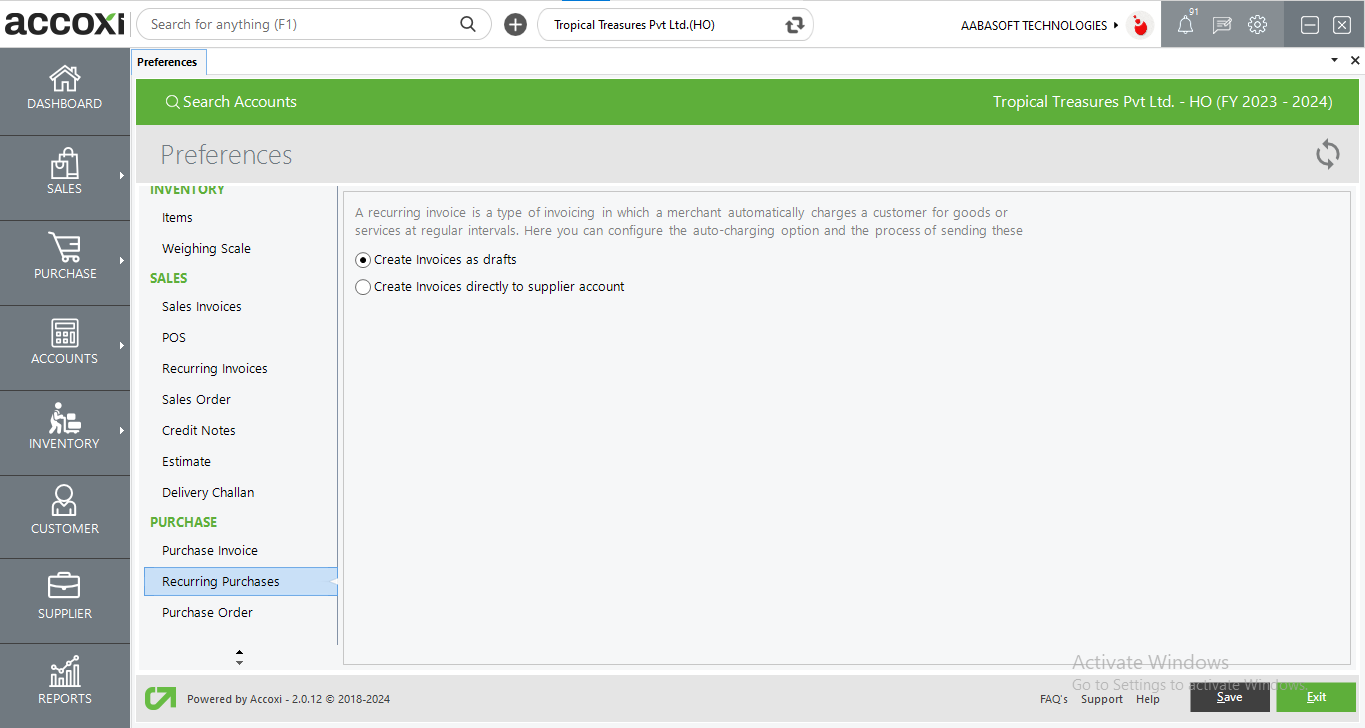
The recurring purchase invoice preference option deals with whether the automatically created invoice will be saved as a draft or if it should be converted into an invoice to a supplier account.
Users can enable draft or invoice for the recurring purchase in this window
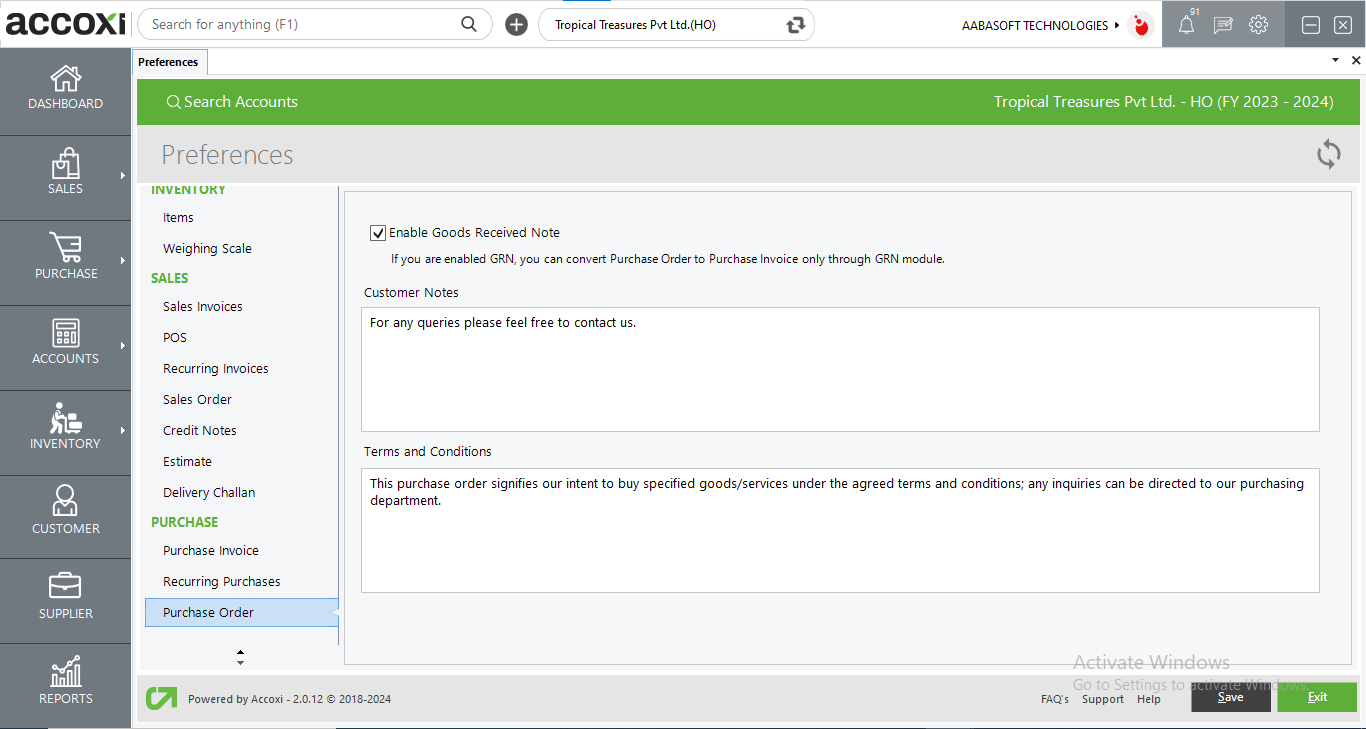
The Purchase order preference setting deals with the customer notes and the terms and conditions which is shown in the purchase order forms. Users can type the data in this column.
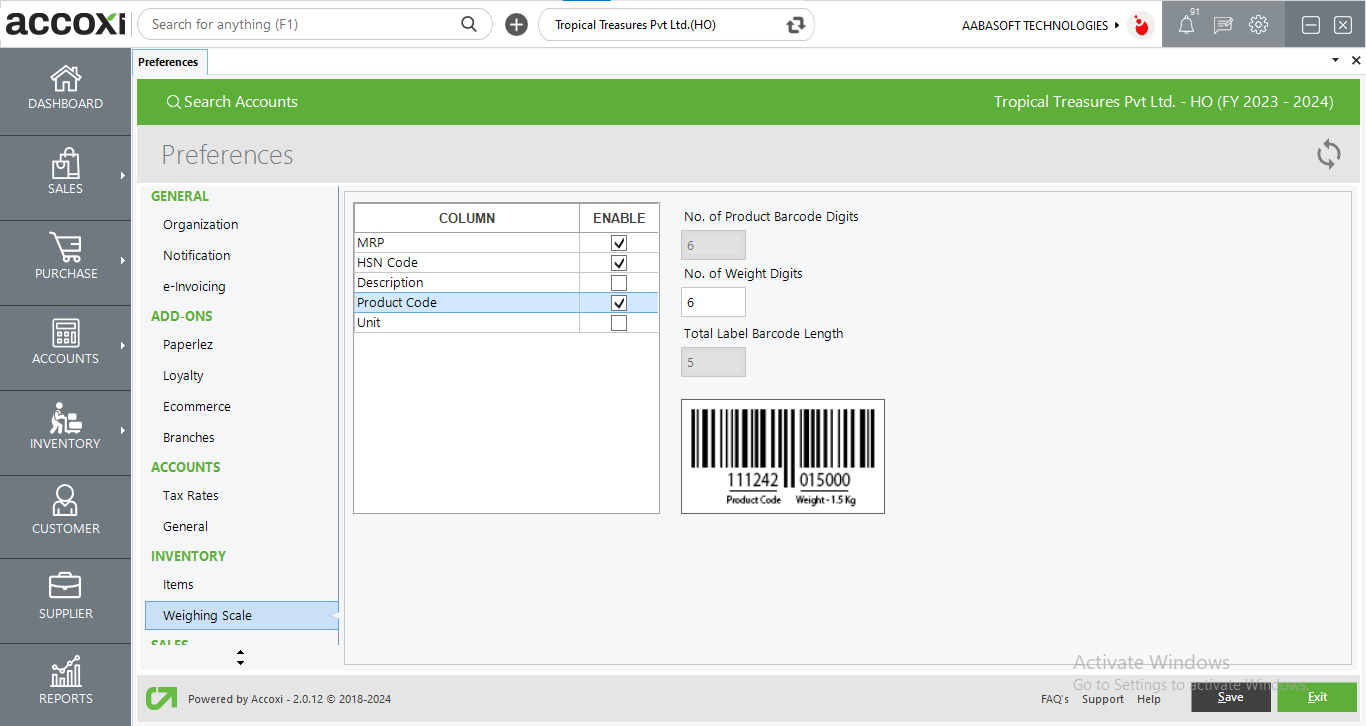
User can set preferences of the inventory in this window.
Preferences like stock validation, batch, tax etc. Can be applied in this window
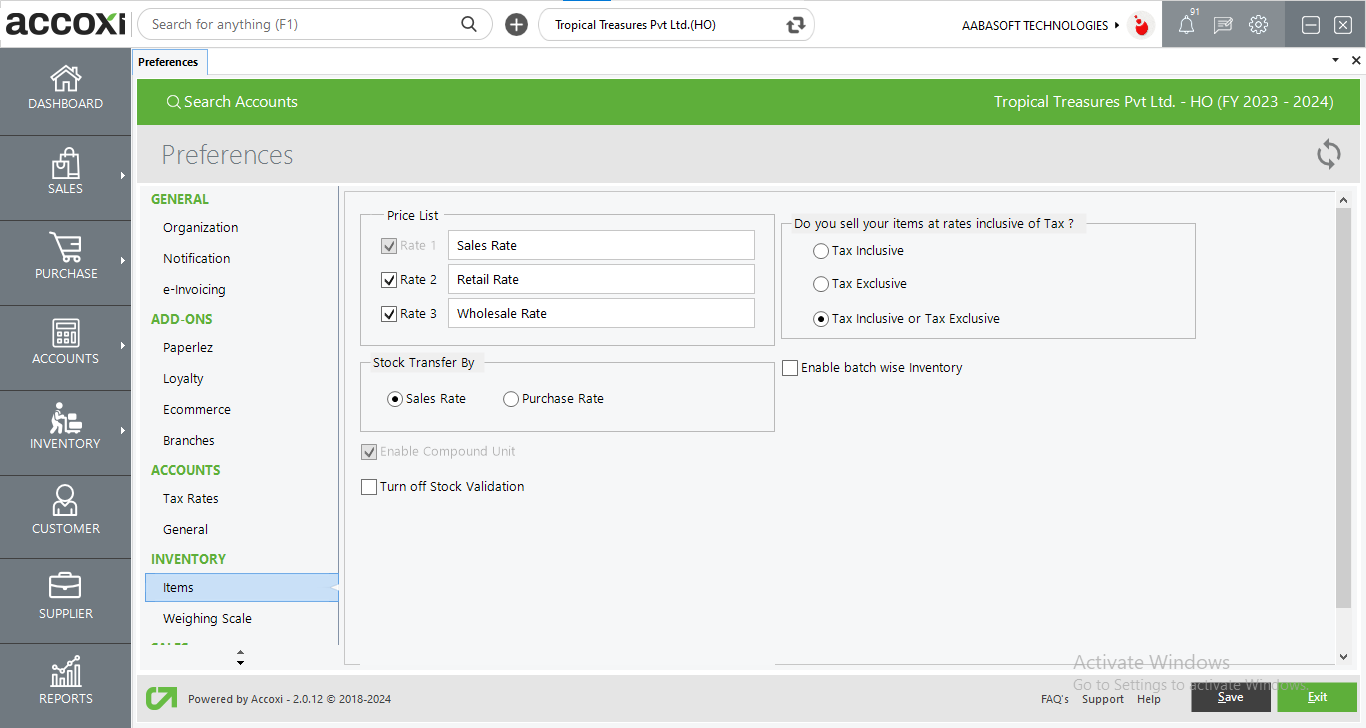
The users can set various prices for their products.
Users can set the default batch name for the items in this option
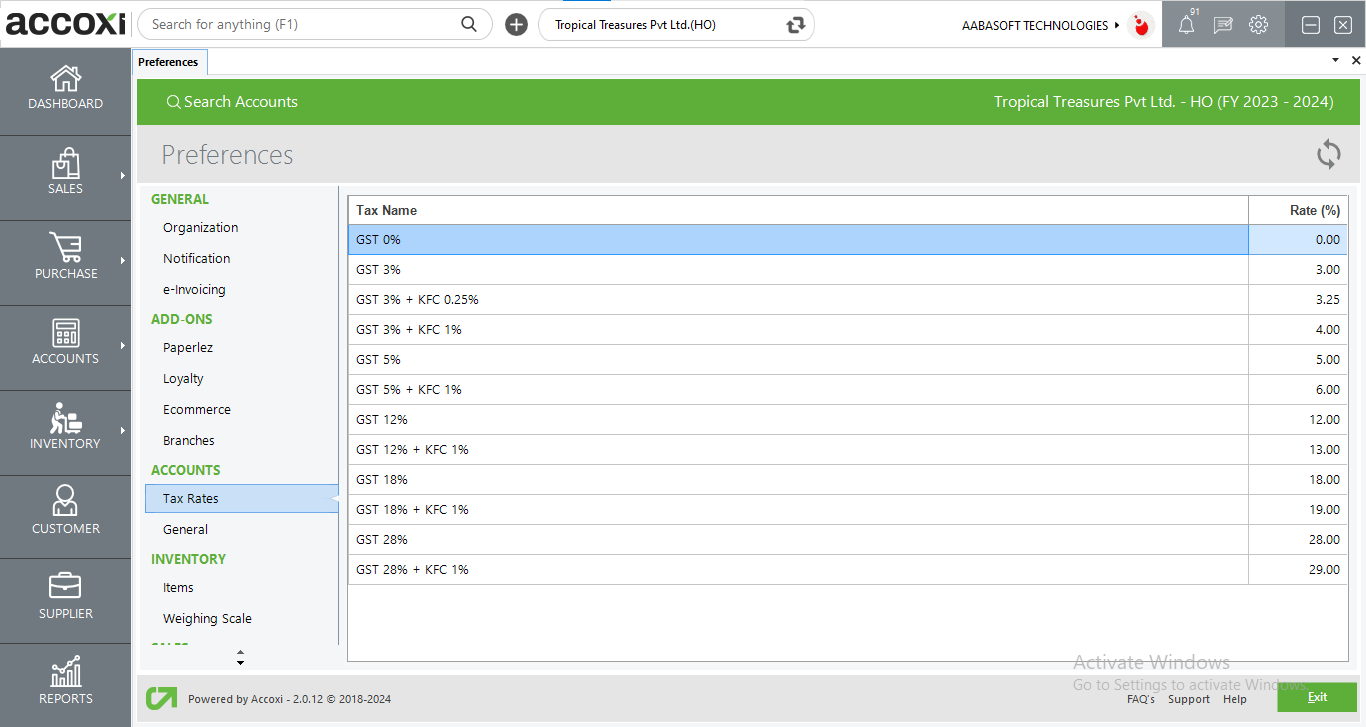
This option enables the user to set the tax rates of the product which is inclusive/exclusive or both.
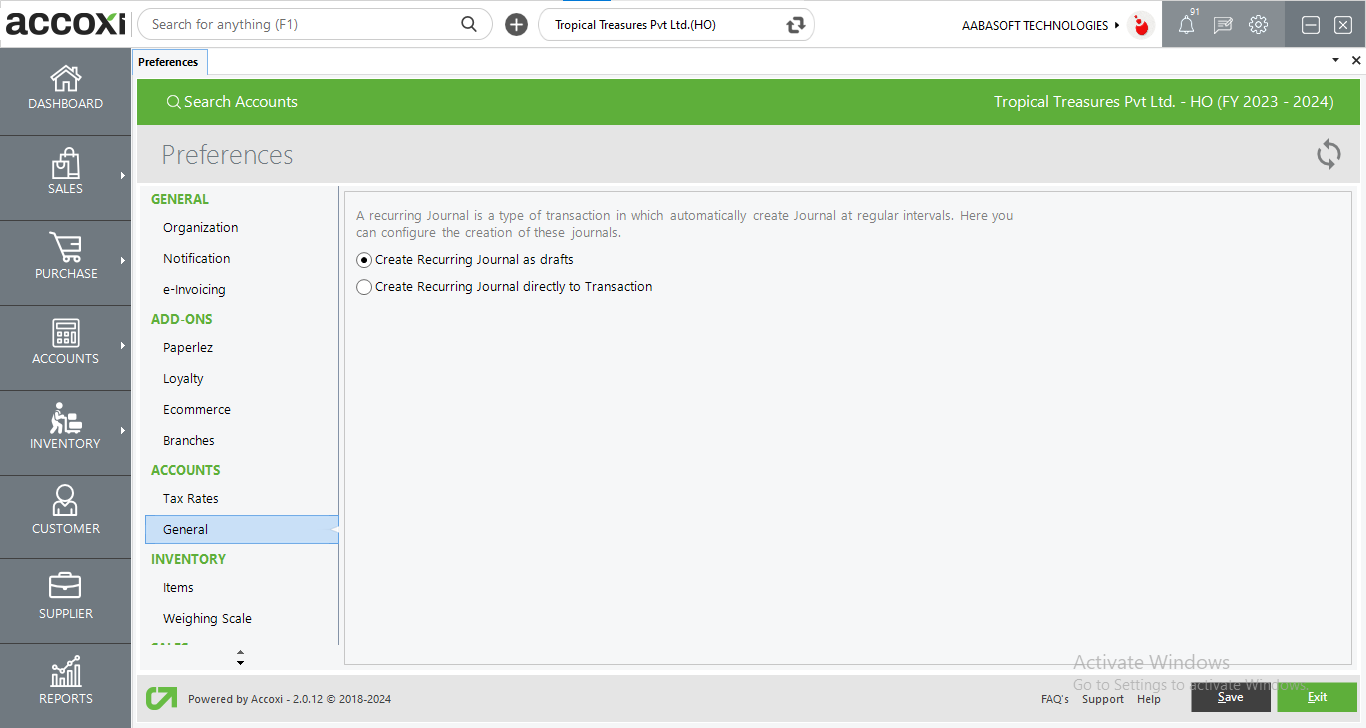
In the general settings under preferences, provides a provision to determine whether recurring journals should be saved as drafts or processed as transactions. Users have the ability to configure the creation of recurring journals within this setting.