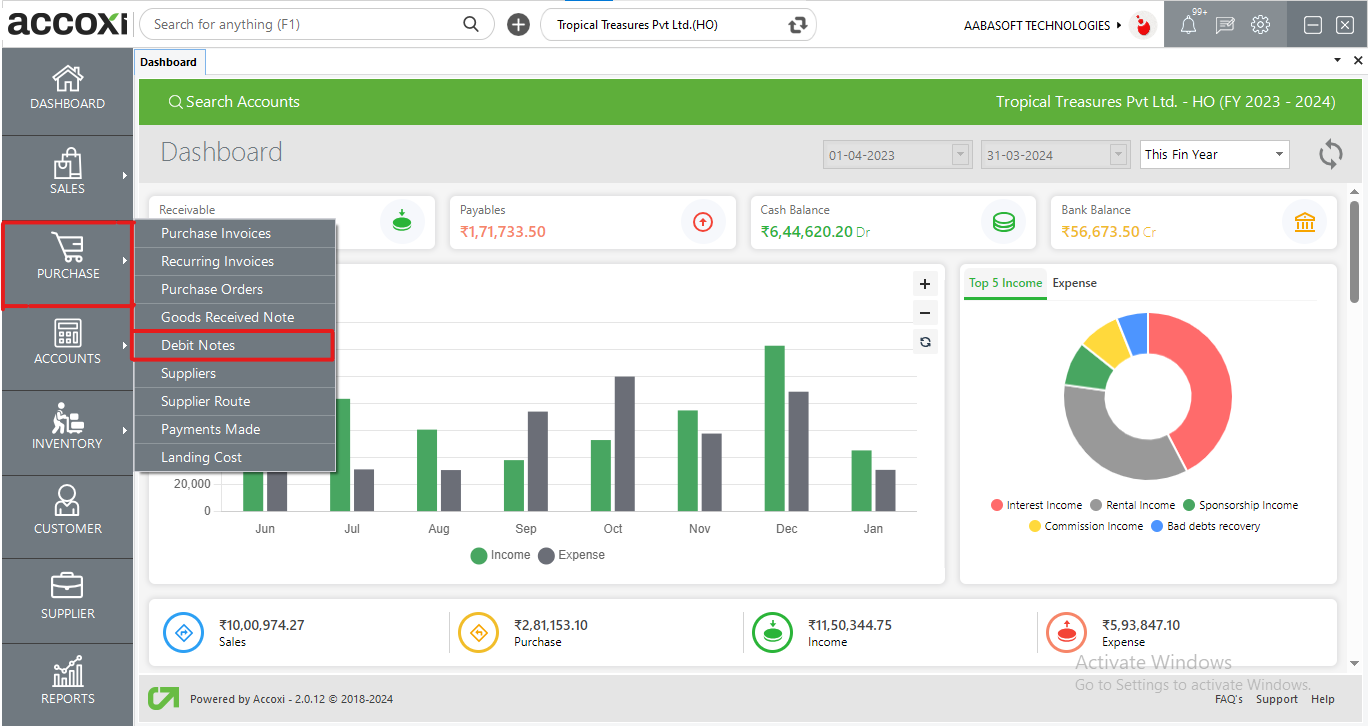
Management of debt note system in Accoxi.

A debit note is a document used by a vendor to inform the buyer of current debt obligations, or a document created by a buyer when returning goods received on credit. The debit note can provide information regarding an upcoming invoice, or may serve as a reminder for funds currently due.
The debit notes in ACCOXI function for entering purchase returns and corrections in invoices and bills. It helps the user to easily record the debit notes of purchase against purchase invoices and its includes more options. The debit notes in ACCOXI function for entering purchase returns and corrections in invoices and bills. It helps the user to easily record the debit notes of purchase against purchase invoices

Key Features
DEBIT NOTE SEARCH
When we click on purchase and the debit note it redirects the user to DEBIT NOTE SEARCH window.
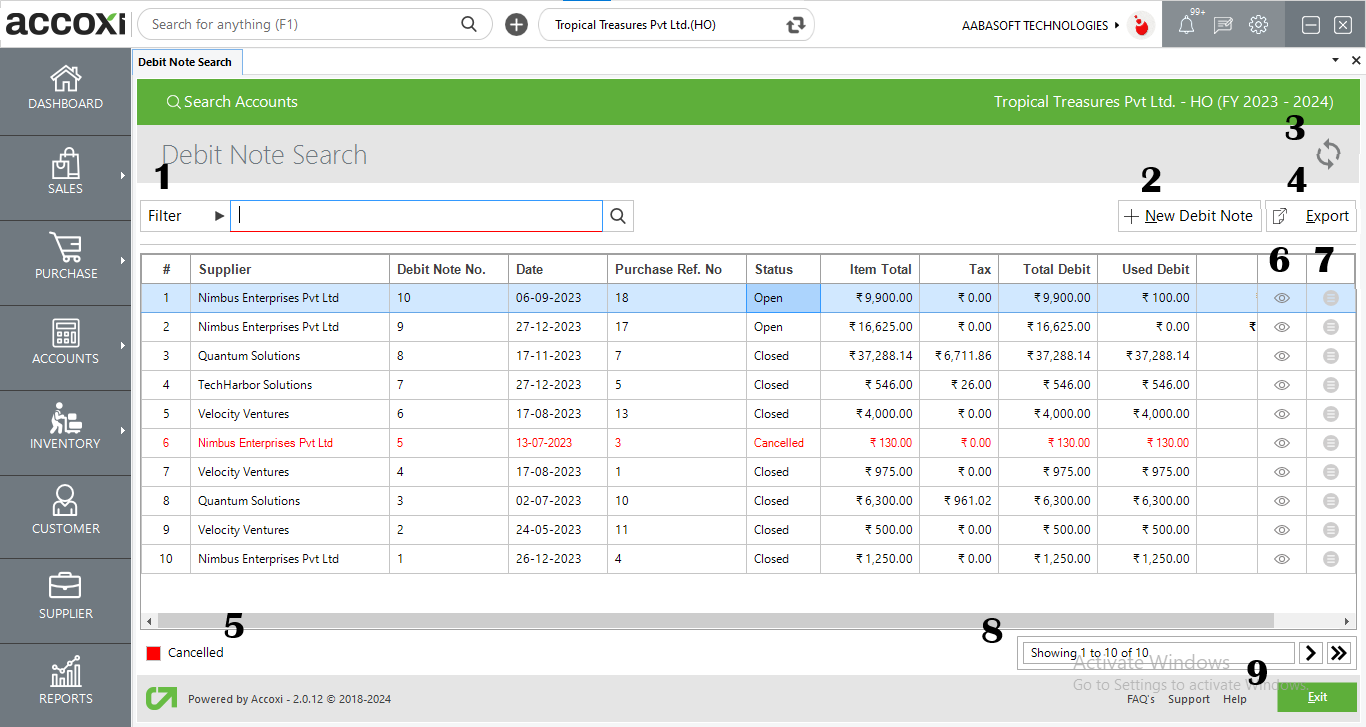
1. FILTER
The filter option in the DEBIT NOTE search window helps the user to filter the debit notes data shown in the window
The filter of debit note search can be conducted in two ways-Either you can directly enter the supplier name/debit note number into the search bar near the filter option or by clicking the filter drop-down, you can filter the data by entering the Party name, invoice number, by date or by the status. The debit note data can filter using by date format, for the user need to enter the starting date and the end date of the debit note. Data filter by status includes sorting of data on the basis of open, closed, and all.
2. NEW
A new debit note can be entered using the new button and by selecting the purchase option.
Steps to add a DEBIT NOTE:
|
Fields |
Description |
|
REF. NO. |
Automatically generated |
|
date |
But by default, the date will be set as the date of entering the transaction into ACCOXI. |
|
supplier |
Select the supplier from the drop-down menu |
|
Phone number |
Will be auto-filled based on the supplier |
|
description |
Enter the description of the debit note |
|
|
It will be auto-filled when we select the supplier |
|
Invoice number |
Select the invoice number that you want to create a debit note against |
|
Load all items |
By clicking load all items user can insert all the items included in the selected invoice.
|
|
Reason |
The user should state the reason for creating the debit note reason may be a purchase return, a correction in the invoice, or maybe other reasons
|
|
Product or service |
Enter the product here.by pressing the enter key it will give you the details of all products that you purchased from that supplier |
|
QTY |
Enter the quantity of the product that you want to return and save |
|
Save |
Click on the Save button to save the details that is entered. After clicking save, debit note view will appear. |
|
Clear |
The clear menu is for clearing or removing the entire data entered by the user. |
|
exit |
Exit menu is used to exit from the debit note window without saving the debit note form. |
|
Blocked columns |
If a product is entered in the table, the product’s product/service code, HSN/SAC, unit, MRP, & rate columns will be blocked because while we create the product these data are inserted. When the quantity is entered tax%, taxable amount, tax amount, cess amount, and item total will change according to that. |
|
TDS |
The TDS column is blocked since TDS is deducted while entering the purchase invoice |
|
Discount |
This column is to add any discounts given on debit notes.it's an after-tax discount and it reduces the item total column. |
|
TCS |
TCS column is to select the required TCS required in the debit note to be made |
|
Round off |
This column is to round off small amounts and the round-off may be downward, upward and nearest this is selected in the preferences menu => organization settings. |
Menus available in Debit note View:
1. New Debit note
A new debit note button to create a new debit note redirects the user to the debit note creation window.
2. Filter
The filter menu enables the user to filter the data and the data can be filtered on the basis of credit note status, open, closed, or all.
3. Refresh
The refresh icon ensures new data is retrieved and shown in Accoxi. If in case new data isn't shown, click on the refresh icon to retrieve the new data.
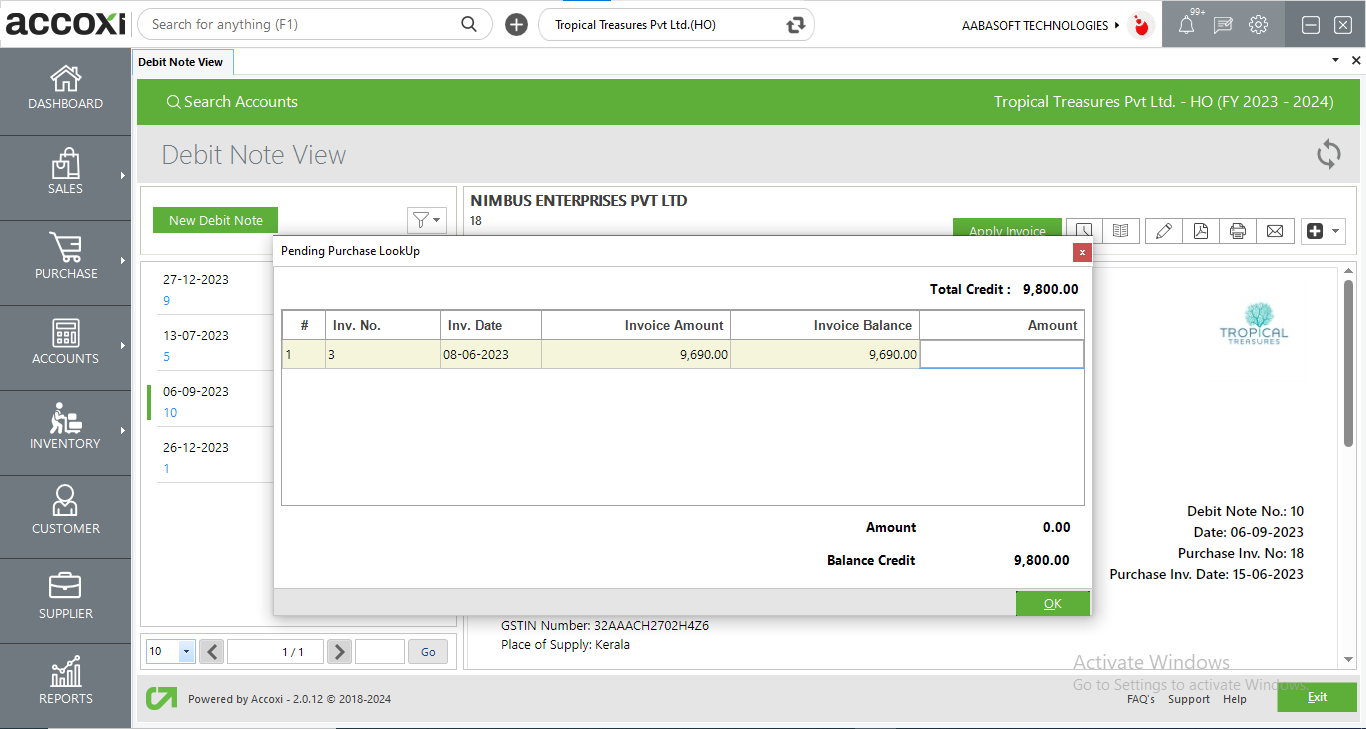
4. Apply invoice
This menu enables the user to apply an invoice against the DEBIT note. Users can convert the total debits into pending invoice amounts and can adjust the invoice balance by it. When the user clicks on the Apply Invoice menu, the pending invoice list will open and the user can select the invoice and set the amount towards the dealer. If the debits are nil, then the user can’t use apply invoice option.
After clicking apply invoice button a pending purchase lookup window will appear. In it a list of pending credit purchases is listed. And the total debits remaining is shown in the right corner of the window. Users can apply for debit only up to that pending debit amount. And after applying the debit amount to the invoice balance debit is shown in the window.
5. History
This menu helps the user to obtain the history details of the debit note.
OPTIONS AVAILABLE IN THE HISTORY WINDOW
6. View journal
It is the menu that shows the journal view of the transaction. The Journal view shows both debit and credit aspects with the amount.
7. Edit the menu
The Edit menu helps the user to edit or correct the details that are entered in the debit note and can save again after it.
8. Export to pdf
If the user wants to convert the DEBIT note form to PDF format, then the export to PDF option is available. After clicking export to pdf a save as directory option will appear and the user can opt for the pdf file saving location.
9. Print
The print menu helps the user to print the created debit note form if required.
After clicking the print button it will redirect to print options where the user can select the printer number of copies to take etc.
10. E-mail
The user can send the created DEBIT note form to the suppliers or to anyone through Email by using the Email button.
By clicking the mail button it will redirect the user to the mail format window where the “TO” mail address is automatically appeared which is the mail of the supplier.
11. More options
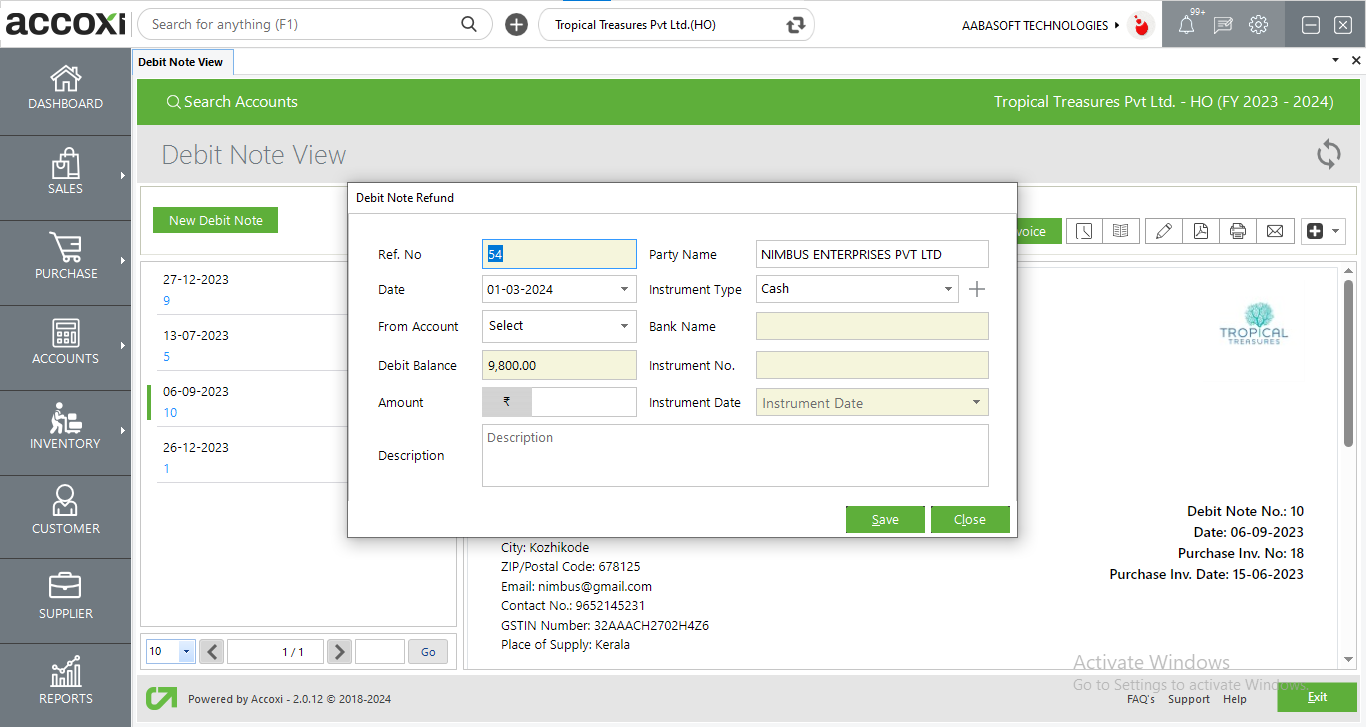
11.1. Refund option
If the supplier refunds the amount, it can be done by clicking the refund menu. When clicking on the Refund menu, the debit refund form will open and the user can enter the amount with payment details in it.
11.2. Cancel
The cancel option enables the user to Cancel the prepared debit note.
3. REFRESH
If your latest data is not displayed, click on the refresh icon on the top left corner of the page to fetch the new data.
4. EXPORT
The purchase invoice list can be exported to Excel format. Click on the Export button at the top right corner near the +New button. Select the file location and click on save.
5. COLOUR FILTER
The canceled debit notes will appear in the search in red color.
6. View icon
This icon redirects the user to debit note invoice view window
7. More option
Under the more function, the following menus are available
8. Pagination Control
It controls the page navigation and the page size. Page size can be set to 10, 20, 50 or 100. And by giving page number in the box and clicking on Go button. It jumps to the said page.
9. Exit
Below the pagination control, there is exit button. If you want to exit the supplier search page click on exit button.
The debit notes in ACCOXI functions for entering purchase/bills return and corrections in invoices and bills. This option is to create purchase return as well as bills return of the business. Debit note search shows cancelled debit notes also and you can be easily adjust credit amount with the supplier by selecting “apply invoice” in the debit note view option.
ACCOXI provides the option of debit notes to create purchase/bills return and Apply invoice option included in it. This menu enable you to apply invoice against the DEBIT note. You can convert the total credit amount in to pending invoice amount and can adjust the invoice balance by it. When you click on the Apply Invoice menu, pending invoice list will open and you can select the invoice and set the amount towards the dealer. If the credit amount is nil, then you can’t use apply invoice option.
Yes. You can export the Debit notes data in to Excel format. It can be done by the following steps;