A step-by-step guide on adding, creating, and editing suppliers in Accoxi
A supplier, whether an individual or an organization, is someone who furnishes necessary items, such as products or services. In the business context, the role of a supplier involves delivering top-notch products sourced from manufacturers to distributors or retailers at favourable prices, facilitating resale in the market.

In Accoxi, you have the capability to add vendors with whom you engage in your business. To facilitate the creation of purchase transactions such as bills, purchase orders, and purchase invoices, it is necessary to add suppliers.
Key Features:
Supplier Module: Clicking on the Supplier Module leads to the Supplier Search, providing a user-friendly interface for managing and searching for suppliers.
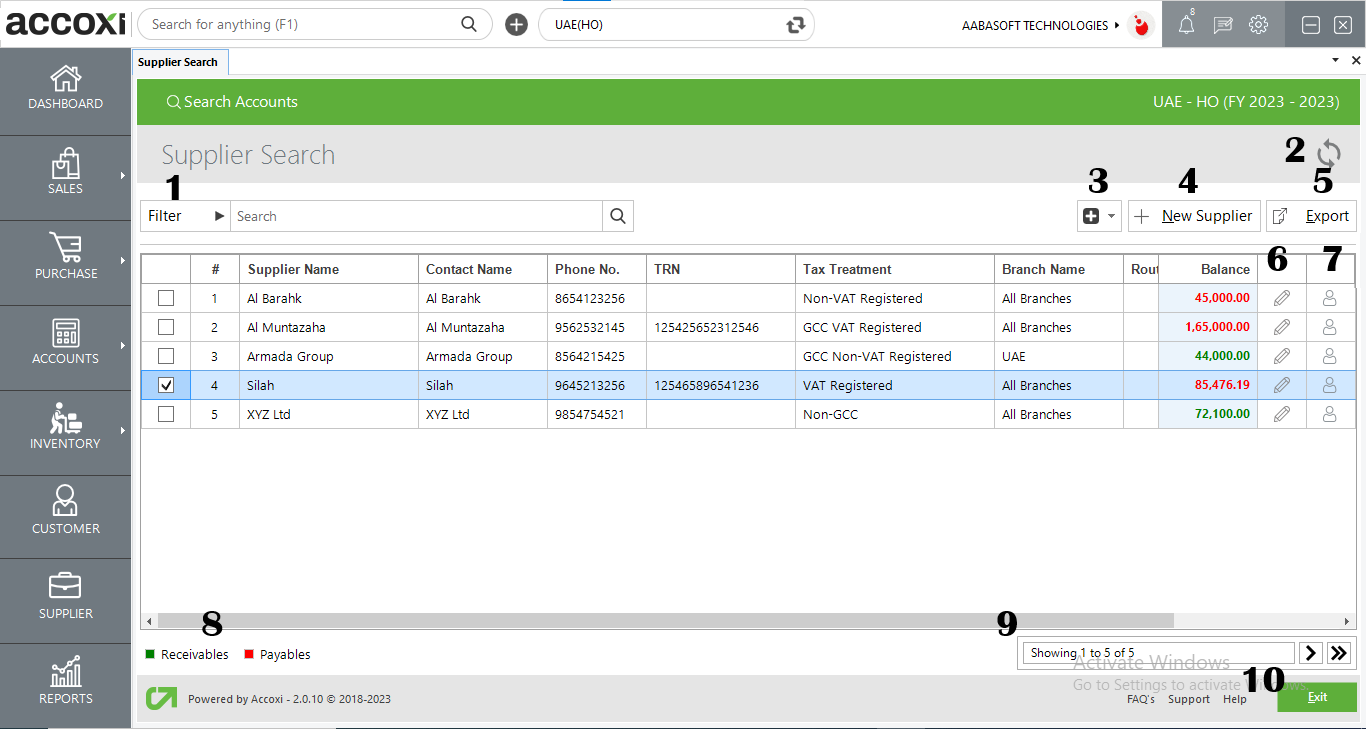
Supplier Search comprises various menus and showcases the details of vendors added to the business.
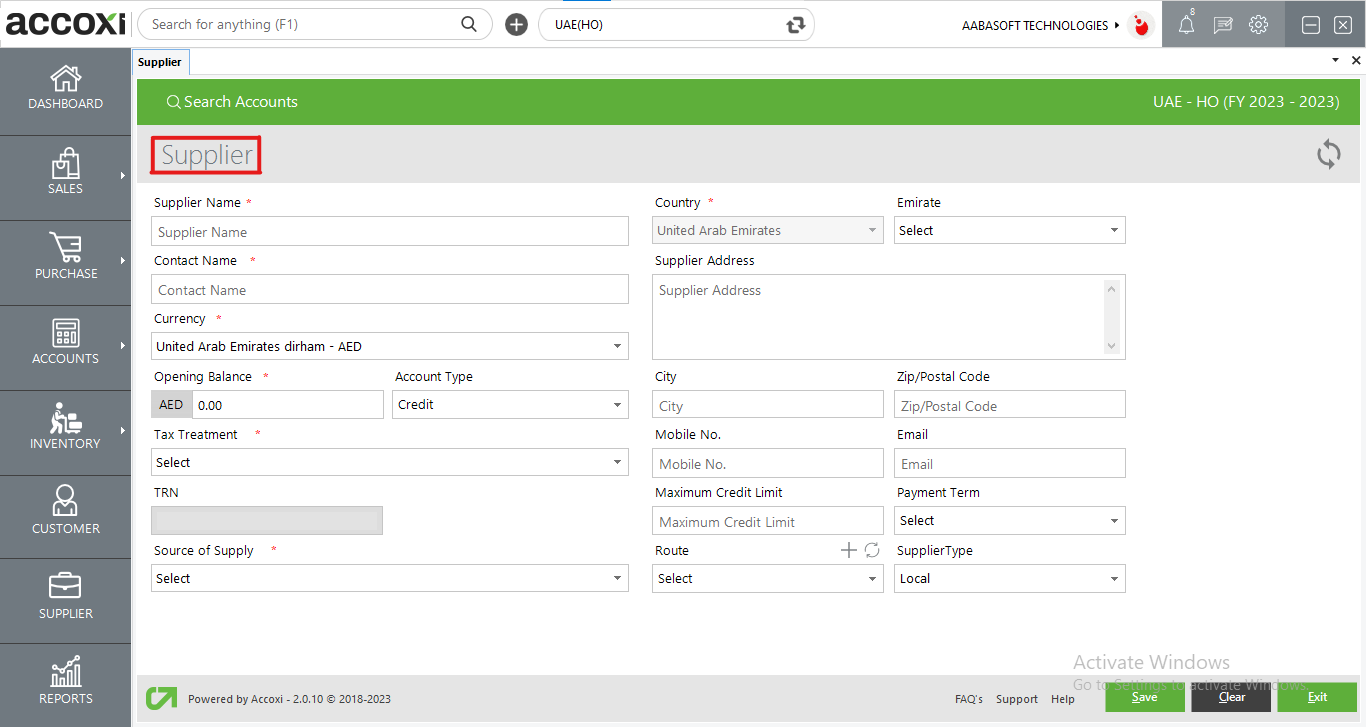
Steps to create a new supplier:
|
Field |
Description |
|
Supplier Name |
Input the supplier's name. |
|
Contact Name |
Provide the name of the contact person. |
|
Currency |
The user can choose the currency for the supplier based on the currency used for the transaction. |
|
Opening Balance |
You can input the opening balance for the supplier, if applicable. If no opening balance is provided, the default value will be set to '0'. |
|
Account Type |
The opening balance can be specified as a credit or debit amount. From the dropdown menu of the Type, you can select the appropriate field. |
|
Tax Treatment |
Choose the tax treatment from the dropdown menu. Options include VAT Registered, Non-VAT Registered, GCC VAT Registered, GCC Non-VAT Registered, and Non-GCC. |
|
TRN |
If the Supplier is VAT Registered or GCC VAT Registered, enter the TRN (Tax Registration Number). For suppliers with tax treatment as Non-VAT Registered, GCC Non-VAT Registered, or Non-GCC, the TRN field becomes inactive. |
|
Source of Supply |
For VAT registered and Non-VAT registered suppliers, you can select the source of supply from the dropdown menu. |
|
Country |
For suppliers registered for VAT and those not registered for VAT, the country is fixed as UAE, and no other country can be selected. However, if the tax treatment is GCC Registered, GCC Non-VAT Registered, or Non-GCC, the country dropdown option becomes active, allowing you to choose the required country. |
|
Emirates |
For VAT registered and non-VAT registered suppliers, you can choose the emirates from the dropdown menu. |
|
Supplier Address |
Input the supplier's address. |
|
City |
Provide the city of the supplier. |
|
Zip/Postal Code |
Input the pin code/ZIP code of the supplier’s locality. |
|
Mobile no |
Provide the mobile number. |
|
|
Enter the email ID of the supplier. |
|
Maximum credit limit |
In this section, you have the option to define the maximum credit limit permitted by your supplier. If your purchase from this specific supplier exceed this limit, a warning message will be triggered. |
|
Payment Term |
In this section, you can configure the payment terms, and these terms will be reflected in the purchase invoice. The status of the invoices, such as overdue or unpaid, is determined based on these payment terms. |
|
Route |
The user must select the supplier route or click on the plus sign on the route bar to create a new supplier route. |
|
Supplier Type |
In this option, you can allocate the supplier type. Users can differentiate supplier as global or local. Global implies that the supplier will be accessible in all branches, while local indicates availability in that specific branch only. |
|
Refresh |
If the most recent data is not displayed, simply click on the refresh icon located at the top right corner of the page to fetch the updated information. |
|
Save |
Clicking the save button enables you to finalize the transaction. |
|
Clear |
This option allows the user to clear the data entered in the New supplier creation window. |
|
Exit |
Users can exit from the invoice window by clicking this button. |
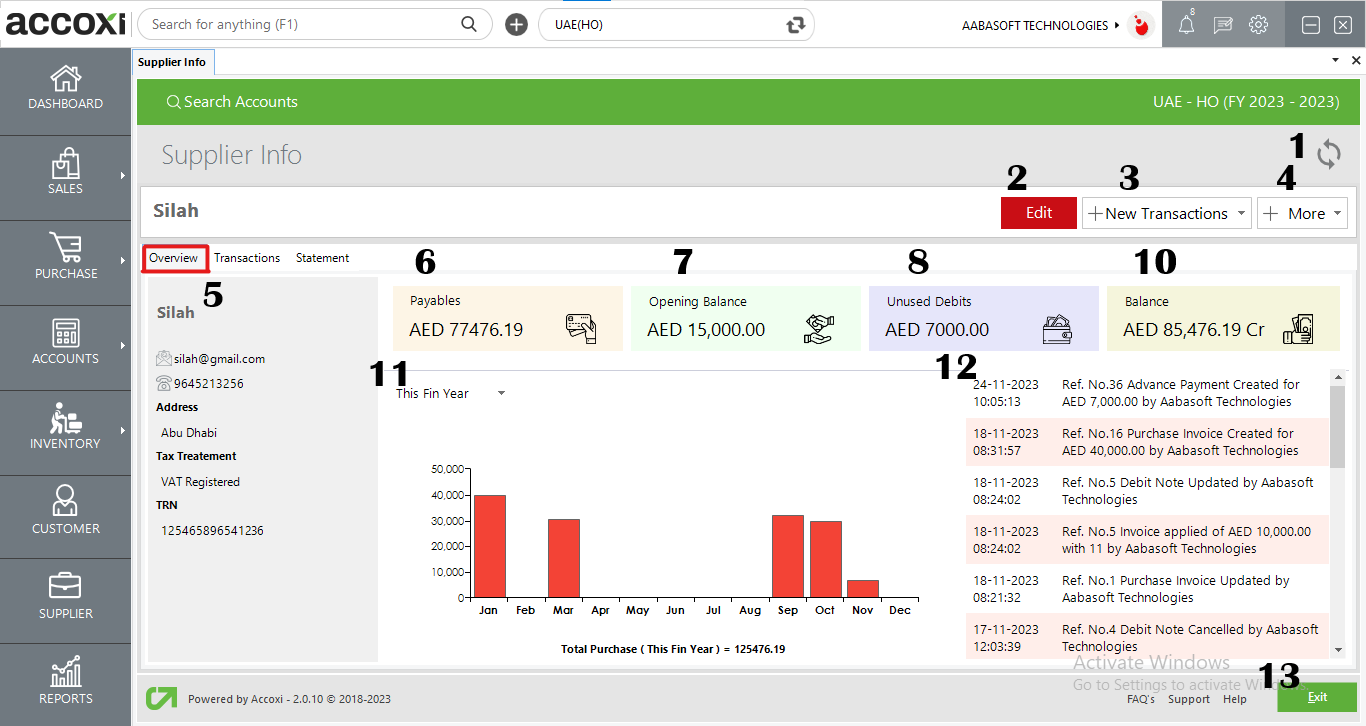
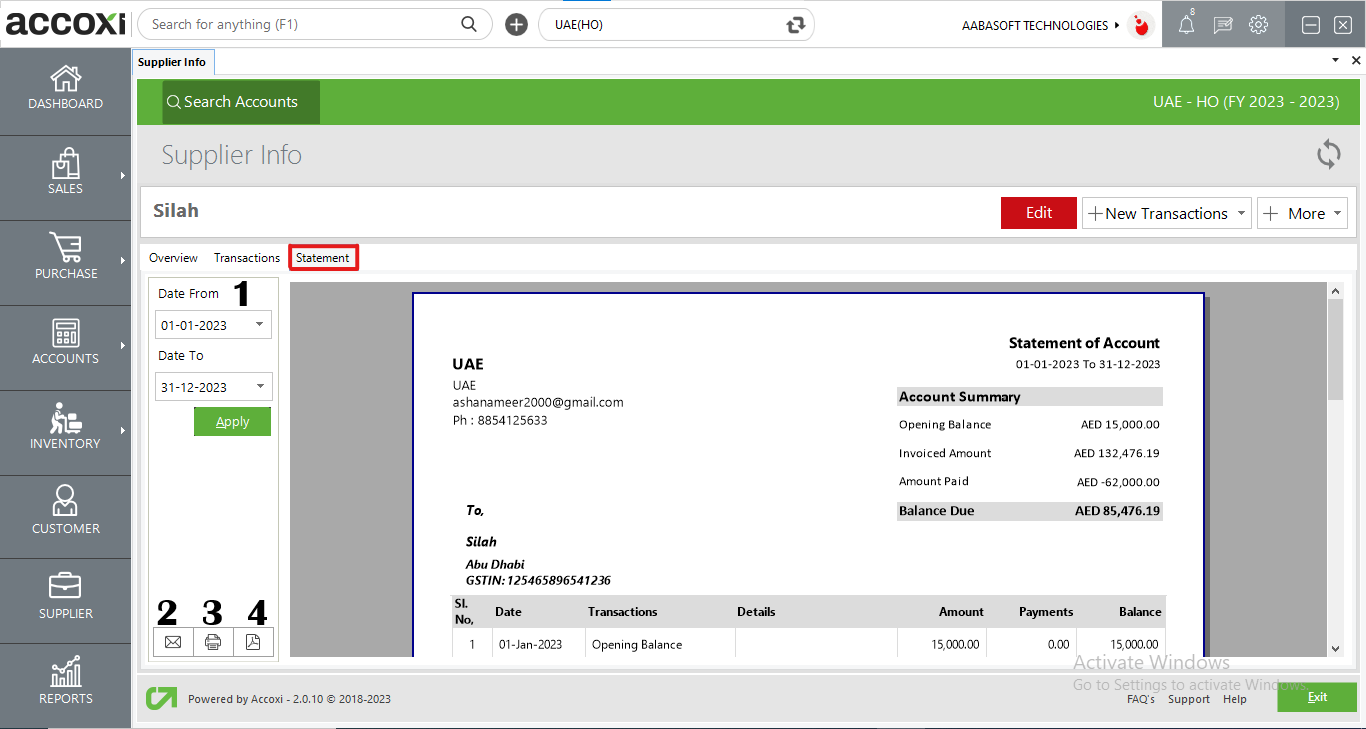
The Overview page provides a comprehensive snapshot of the supplier's basic information and activity. It features a mini dashboard displaying the supplier's balances, unused debits, and payables. Additionally, a graph illustrates the sales activity of the supplier.
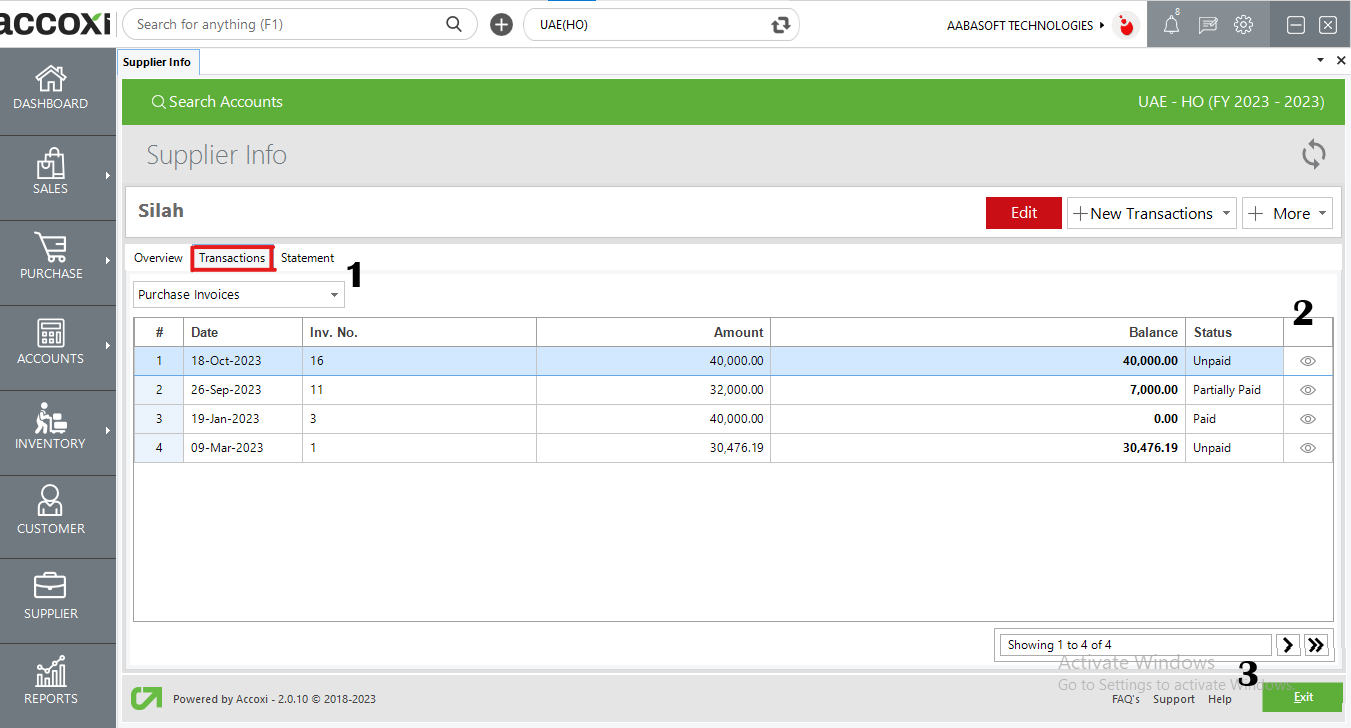
The Transaction tab presents a detailed list of transactions conducted with the supplier. Users can employ the dropdown option to filter these transactions based on specific criteria. Additionally, users have the option to view individual invoices by selecting the "View" option.