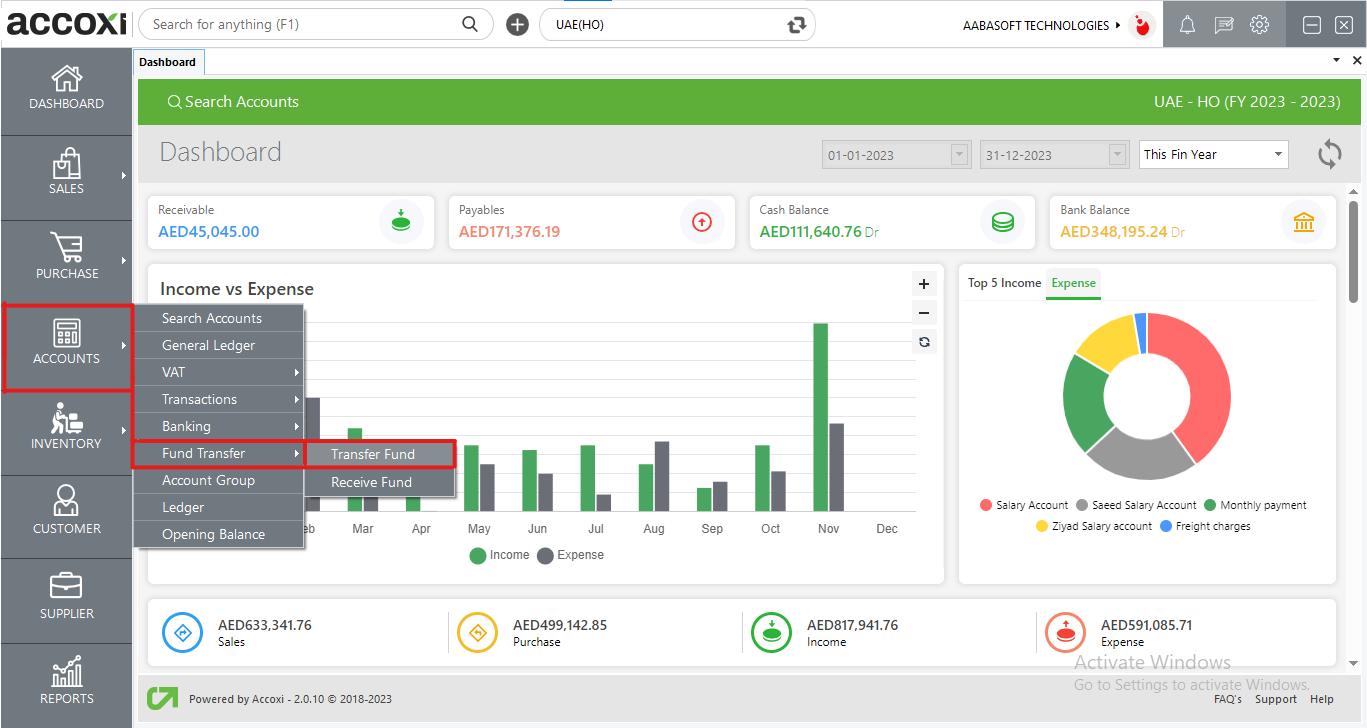
Conduct Fund Transfers from Head Office To Branches

Accoxi provides users with a Transfer Fund feature, facilitating the seamless movement of assets, monetary funds, and ownership rights between accounts. This feature enables users to record fund transfers from Head Office to Branch, from Branch to Head Office, and between different branches. It's important to note that this option is exclusively accessible within the Branch concept, and users won't be able to access the form in other cases.
Key Features:
The Transfer Fund search page displays comprehensive details of previously initiated fund transfers.
|
Field |
Description |
|
# |
Serial number of transactions |
|
Date |
This field displays the Fund Transferred Date, indicating the date when the payment is made to the branch. |
|
From Account |
This column provides information about the From Account, which is the account from which the fund is transferred. |
|
To Branch |
This field indicates the destination of the fund transfer, representing the place to which the fund is directed or sent. |
|
To Account |
Users can view the account within a branch to which the funds are transferred. |
|
Status |
This column allows the user to check the current status of the fund transfer, which may be categorized as Pending, Cancelled, or Received. |
|
Amount |
This column displays the total amount of a specific fund transfer. |
|
Total |
The cumulative total amount of all fund transfer transactions is presented at the bottom of the table. |
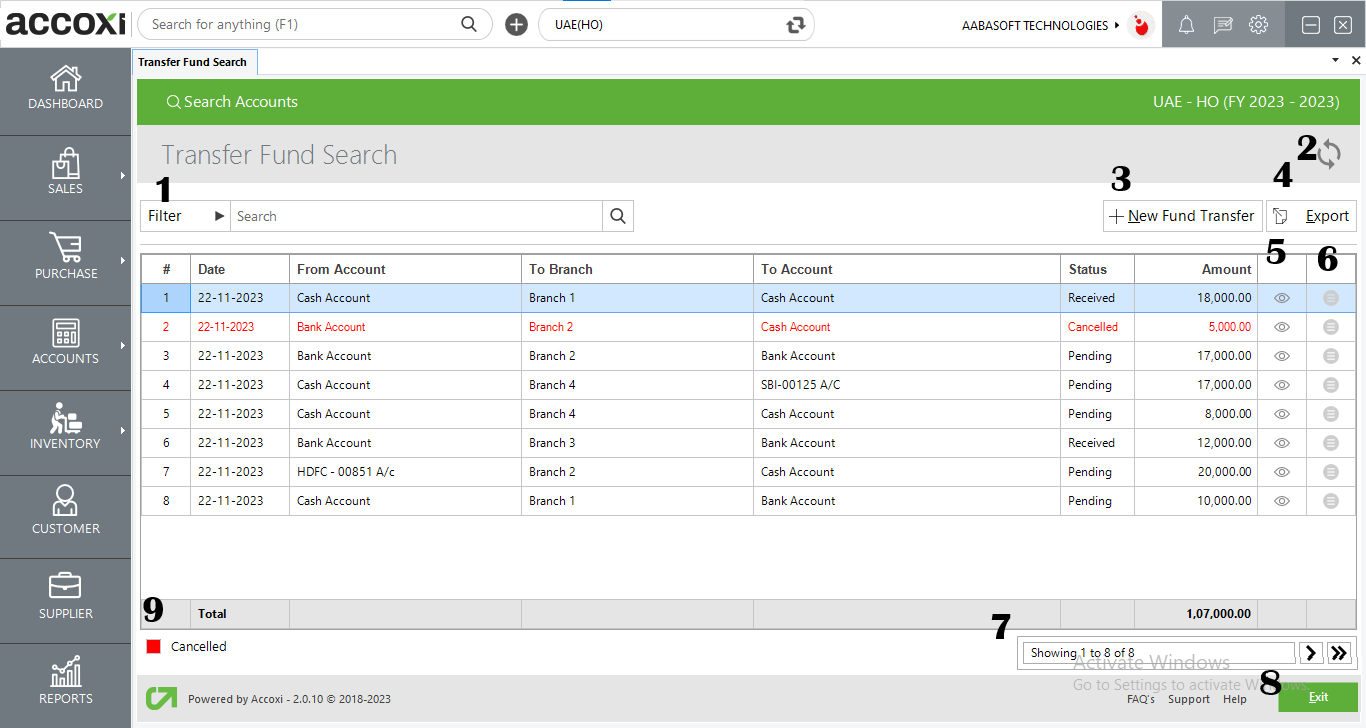
Users can filter fund transfer details in two ways: directly entering details in the search bar near the Filter Option or by clicking the Filter menu. The filter tab opens with options to filter data by branch, from account, date, and status. After selecting or entering filter details, clicking Apply displays filtered data.
Click the refresh button if the latest data is not displayed.
Users can add a new Fund Transfer by clicking on the +New Fund Transfer menu, opening a form for entering details.
Fund Transfer data can be exported to Excel format. Click the Export button near the +New Button, select the file location, and click Save.
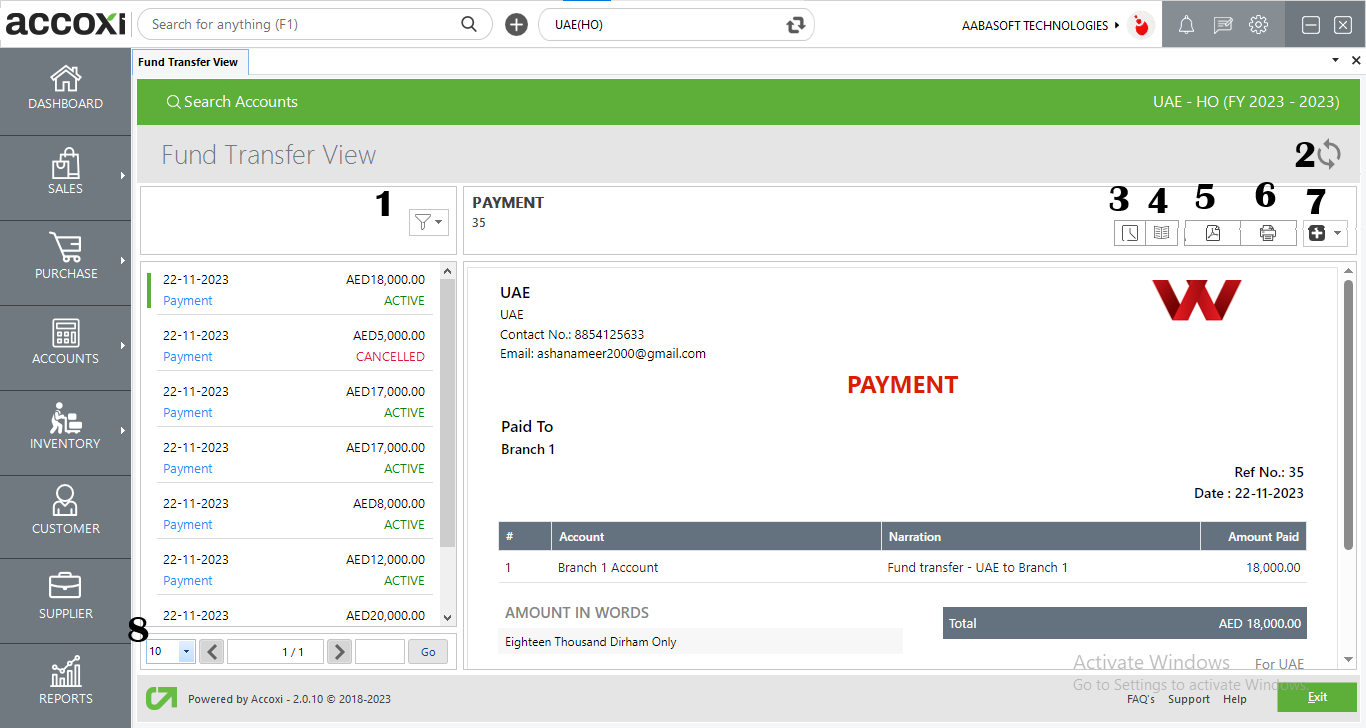
This menu directs users to the Fund Transfer view page, providing access to all details related to transferred funds.
Controls page navigation and size. Page size options include 10, 20, 50, or 100. Users can jump to an intended page by entering the page number and clicking Go.
Clicking on "exit" redirects users to the previous page.
Cancelled fund transfer details are visually highlighted, with the color red indicating cancelled transfers.
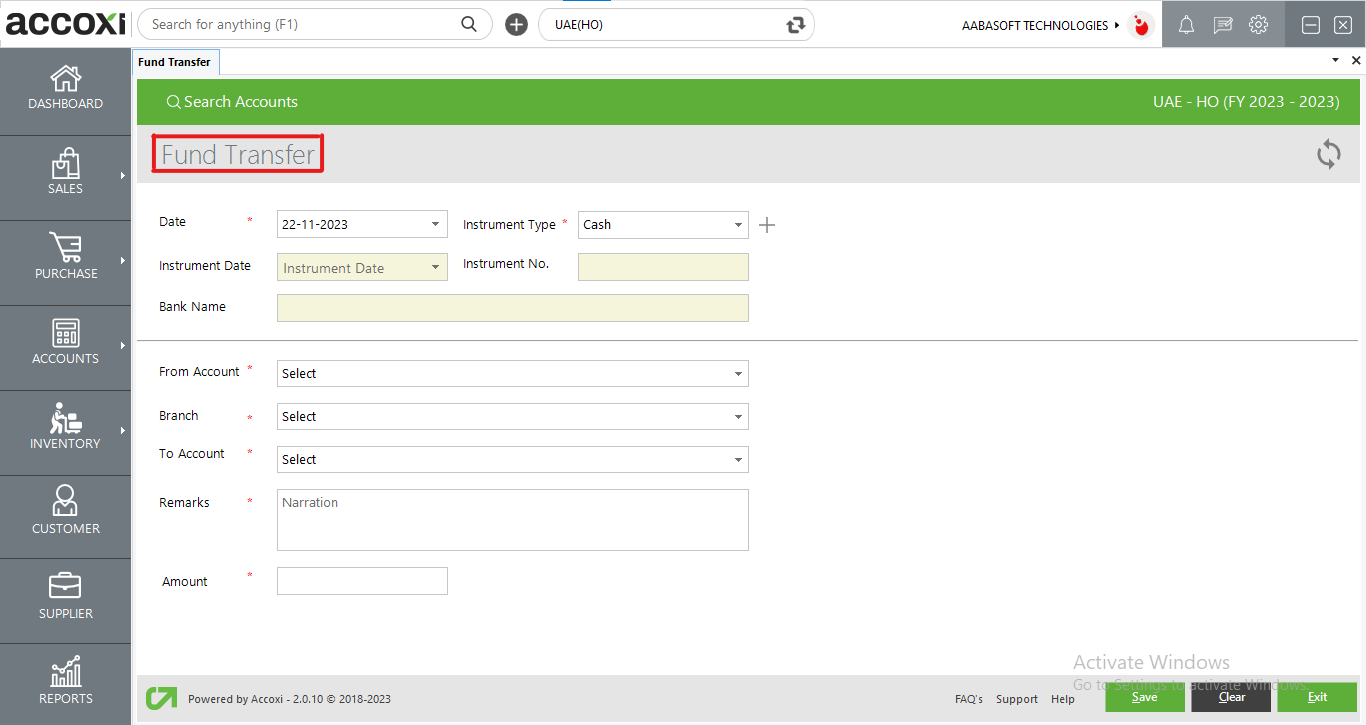
Here are the steps to create a new Fund Transfer:
Data Available In Fund Transfer Table
|
Field |
Description |
|
Date |
The date field is automatically populated with the current date by default. If the user wishes to change the date, they can do so by clicking on the Date menu and selecting the desired date. |
|
Instrument Type |
The user is required to choose an instrument type, which encompasses options such as Cash, Cheque, DD (Demand Draft), etc. |
|
Instrument Date And Number |
Once the instrument type is selected, the user then proceeds to choose the instrument date and enter the instrument number. It's worth noting that these fields are restricted in the case of Cash as the instrument type. |
|
Bank Name |
For the selected instrument type, the user can input the bank name. However, it's important to mention that this field is disabled when the instrument type is set to Cash. |
|
From Account |
In this field, users can choose a bank account, and the specified amount will be transferred from the selected bank. |
|
Branch |
Through this option, the user can designate the "To Branch," and the specified amount will be transferred to the selected branch. |
|
To Account |
In this section, users can pick the "To Account" within the selected branch, and the amount will be transferred to the specified branch account. |
|
Narration |
In this space, users can provide additional details or explanations related to the fund transfer. |
|
Amount |
Input the desired amount that the user intends to transfer in this field. |
|
Save |
Once the details are entered, click on the "Save" option to store the transaction. |
|
Clear |
There is a "Clear" option available to discard changes and exit from the form without saving. |
|
Exit |
There is an "Exit" option provided to leave the page without saving the entered data. |
Menus Available in Fund Transfer View
|
Field |
Description |
|
1. Filter |
You can filter out transfers based on their status, such as Active, Cancelled, and Drafts. |
|
2. Refresh |
If the most recent data is not visible, simply click on the refresh icon located at the top left corner of the page to fetch the updated information. |
|
3. History |
The "Comments" and "History" sections display all edits and modifications made to the transfer, along with the respective dates of changes. Users have the option to input comments related to the transfers made. |
|
4. Journal View |
This menu displays the Journal View of the transaction. The Journal View provides a comprehensive overview, showcasing both the debit and credit aspects along with their corresponding amounts. |
|
5. Export To PDF |
If the user wishes to convert the Fund Transfer form to PDF format, they can utilize the "Export to PDF" option. Upon clicking on "Export to PDF," a "Save As" directory option will appear, allowing the user to choose the location for saving the PDF file. |
|
6. Print |
In the Transfer View, the Print menu is accessible, allowing the user to obtain a printout of the Fund Transfer form. |
|
7. More Options |
In the 'More Features' section, users have the ability to cancel a transfer. By selecting 'Cancel,' a validation message will appear. Choose 'YES' to cancel the transfer or 'NO' to cancel and exit the option. |
|
8. Pagination Control |
This function manages page navigation and page size. You can set the page size to 10, 20, 50, or 100. Enter the desired page number in the box and click the 'Go' button to navigate directly to that page. |