Create barcodes and print labels
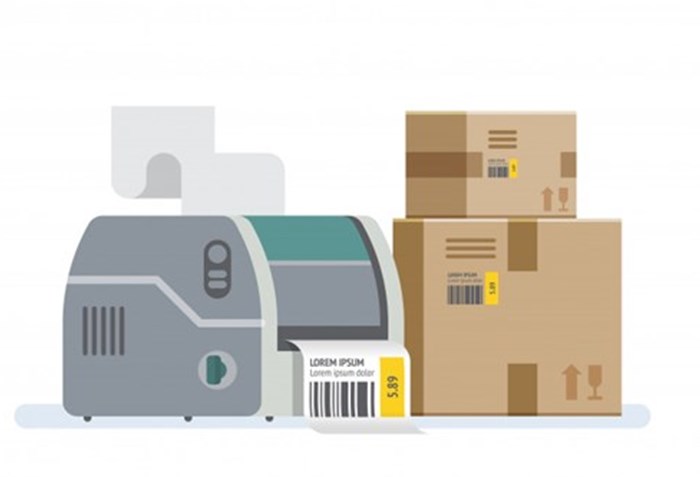
Barcodes are widely recognized, but managing the barcodes for each product can be challenging. Accoxi, a billing software, simplifies this task through its Barcode Printing feature. This option allows users to create barcodes and specify the desired number of labels with ease. With just a single click, users can effortlessly generate barcodes and print labels, streamlining the process of product identification and labelling in ACCOXI.
Key features of Barcode Printing in ACCOXI include:
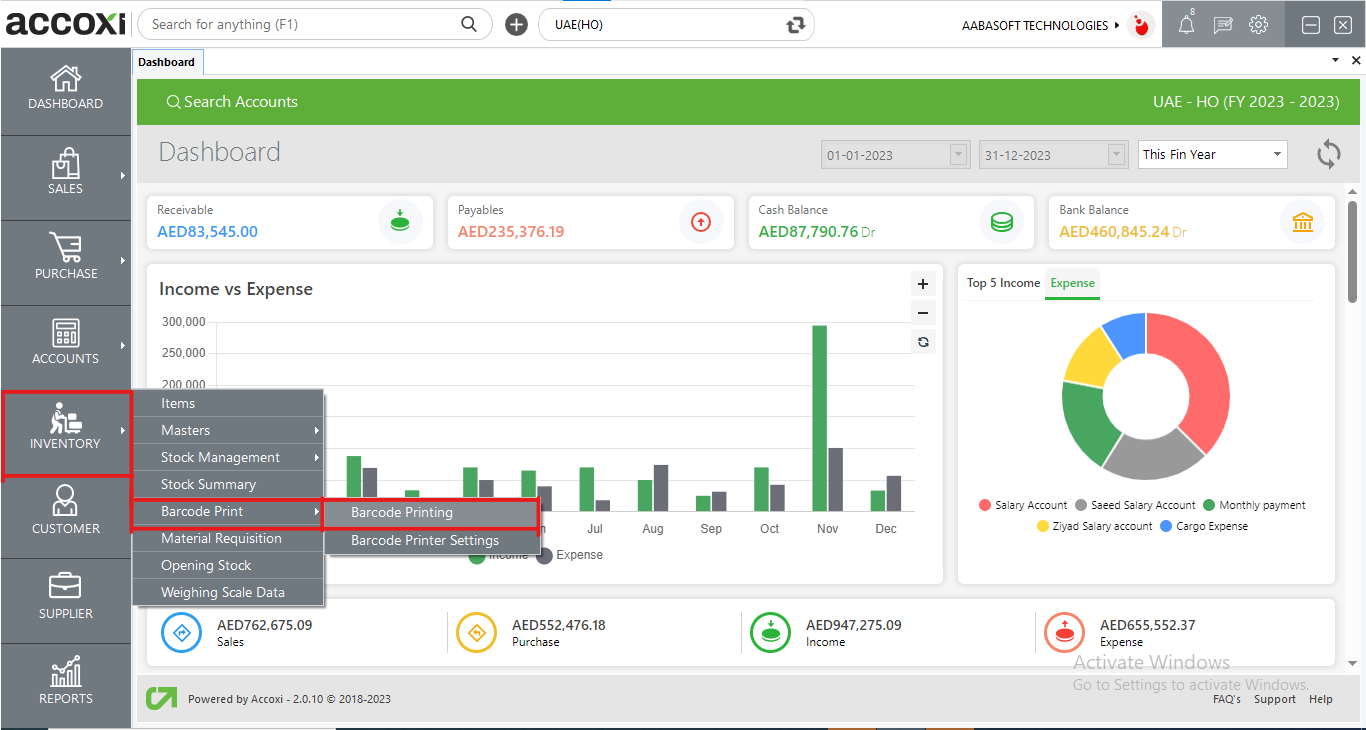
By navigating to the inventory module and selecting the barcode printing menu, users will be directed to a barcode search window. In this window, users can conveniently view all the barcodes that have been created.
OPTIONS AVAILABLE IN THE BARCODE SEARCH MENU
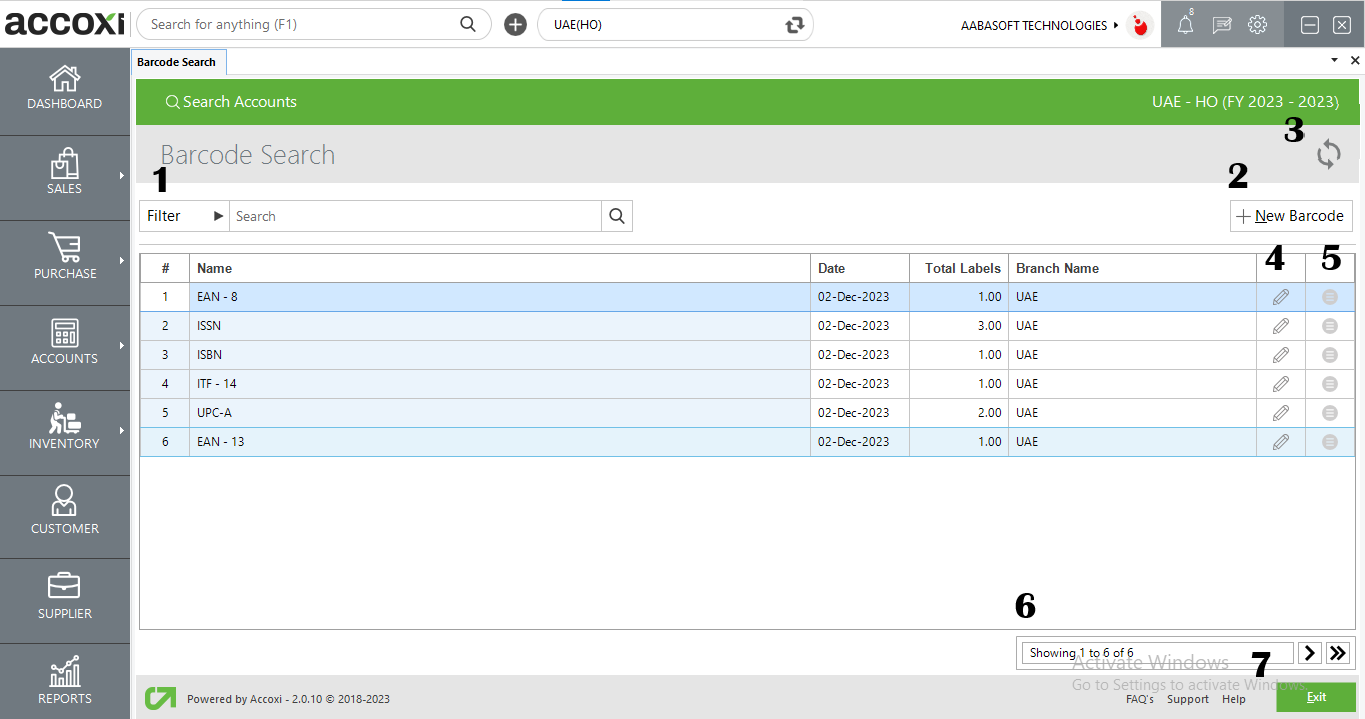
The filter option in the Barcode search window allows users to refine the displayed barcode data.
Users can create a new barcode by selecting the new barcode option.
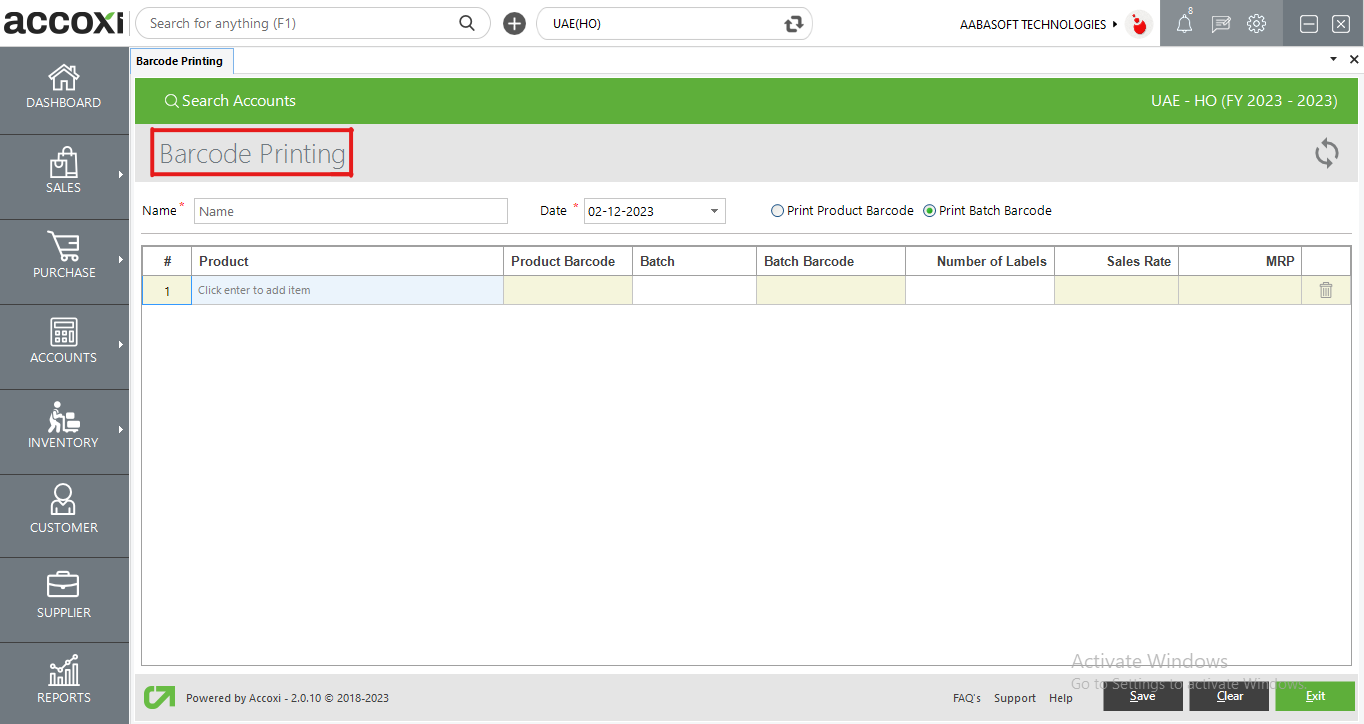
Steps to add a NEW BARCODE:
|
Field |
Description |
|
Name |
The user needs to input the name of the barcode in this field. |
|
Date |
The user should choose the date of the barcode creation by selecting it in this field. |
|
Print Product Barcode And Batch Barcode |
Users can choose which type of barcode to print, i.e., product barcode or batch barcode, by selecting the appropriate option in this field. |
|
# |
This column displays the serial number of the data in the table. |
|
Product |
In this column, the user can select the name of the product for which they want to create a barcode. |
|
Batch |
This column displays the batch of the product for which the user wants to create a barcode. |
|
Number Of Labels |
In this column, the user should input the number of labels they want to print for the specified product and batch. |
|
Sales Rate |
The Sales Rate column is automatically filled when the user selects the batch of the product, and it is blocked to prevent manual edits. |
|
Delete Option |
Users can delete the data in the rows easily by clicking this button. |
|
Save |
To save the new barcode created, this button can be used. |
|
Clear |
To clear the data entered in the barcode printing window, use this button. |
|
Exit |
To exit the entire barcode window, use this button. |
DATA AVAILABLE IN THE BARCODE SEARCH TABLE
|
Field |
Description |
|
# |
The serial number of the data in the table is presented in sequential order for easy identification. |
|
Name |
The name of the created barcode is displayed in this section for reference and identification. |
|
Date |
The date of creation for the barcode is displayed in this column, providing information about when the barcode was generated. |
|
Total labels |
The total number of labels to be printed is shown in this column, indicating the quantity of labels intended for printing. |
|
Branch name |
The branch name is displayed in this column, providing information about the specific branch associated with the barcode. |
In case the latest data is not displayed, users can click on the refresh icon located at the top left corner of the page to fetch updated information.
Users have the option to edit the details of a created barcode by clicking on this icon. This action redirects the user to the barcode printing window, where all information about the barcode is visible and can be modified.
The more option provides additional functionalities, allowing users to print and obtain duplicates of the barcode data.
This feature manages page navigation and size. Users can set the page size to 10, 20, 50, or 100. By entering the desired page number in the box and clicking the Go button, users can navigate to the specified page.
Located below the pagination control, the exit button allows users to leave the barcode search page. Clicking on this button will exit the page.
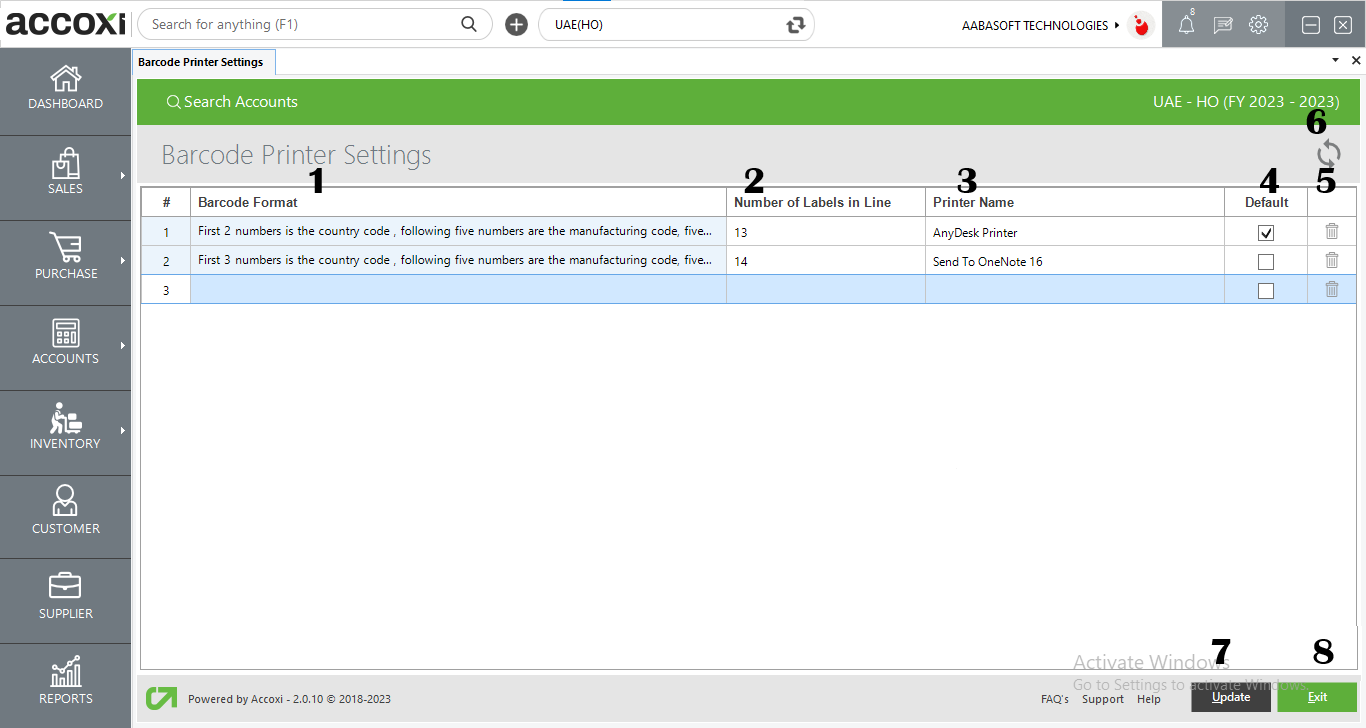
A barcode printer is a peripheral device connected to a computer for printing barcode labels. In Accoxi, the settings for the barcode printer can be accessed from the inventory menu. This section is dedicated to configuring various parameters related to the barcode printer, including barcode format, the number of labels in line, printer name, and other relevant settings.
The barcode printer settings menu in Accoxi provides users with various options to configure and customize their barcode printing setup. Here are the key features and functionalities of the Barcode Printer Settings menu:
These features collectively provide users with the flexibility to tailor their barcode printing setup according to their preferences and requirements.