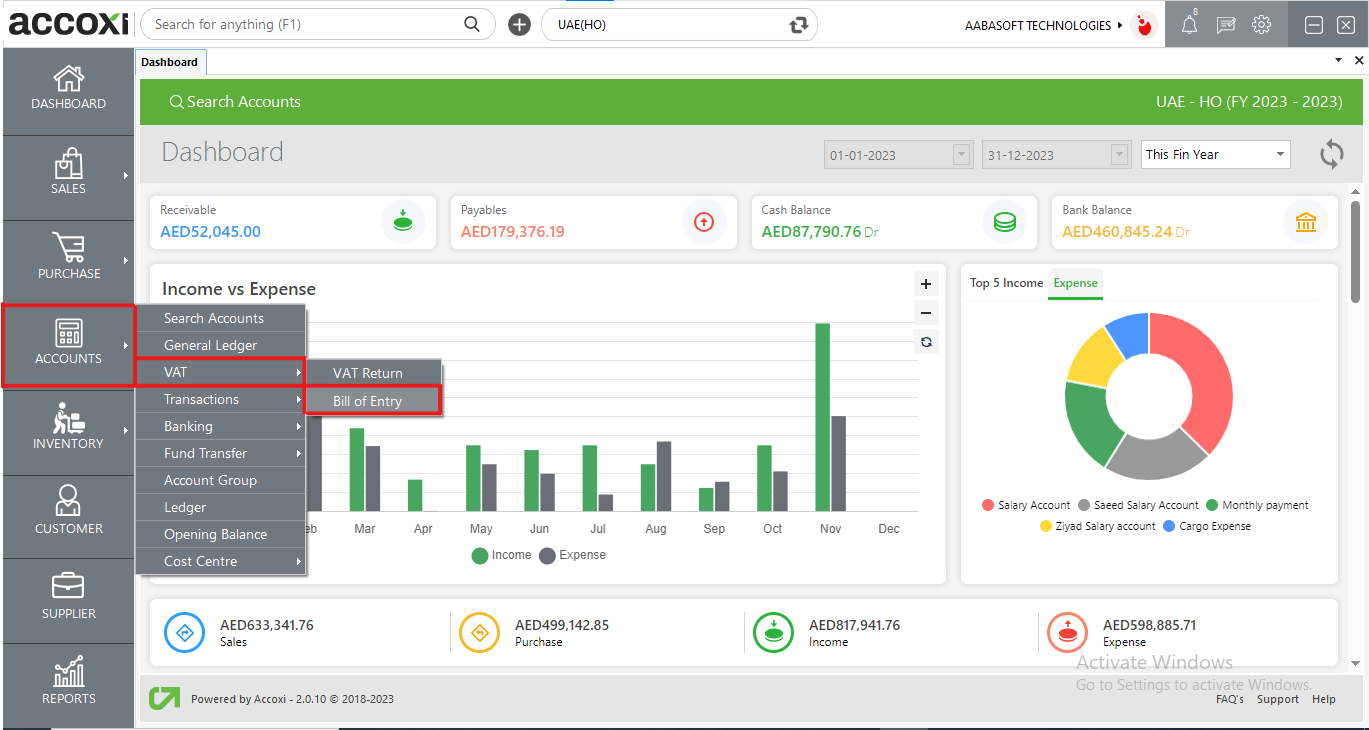
learn how to create and navigate through Bill Of Entry in Accoxi

A Bill of Entry is a mandatory document filed by importers with customs authorities before bringing goods into a country. It details information about the imported goods, including description, quantity, value, and other key specifics, facilitating customs clearance and ensuring compliance with import regulations.
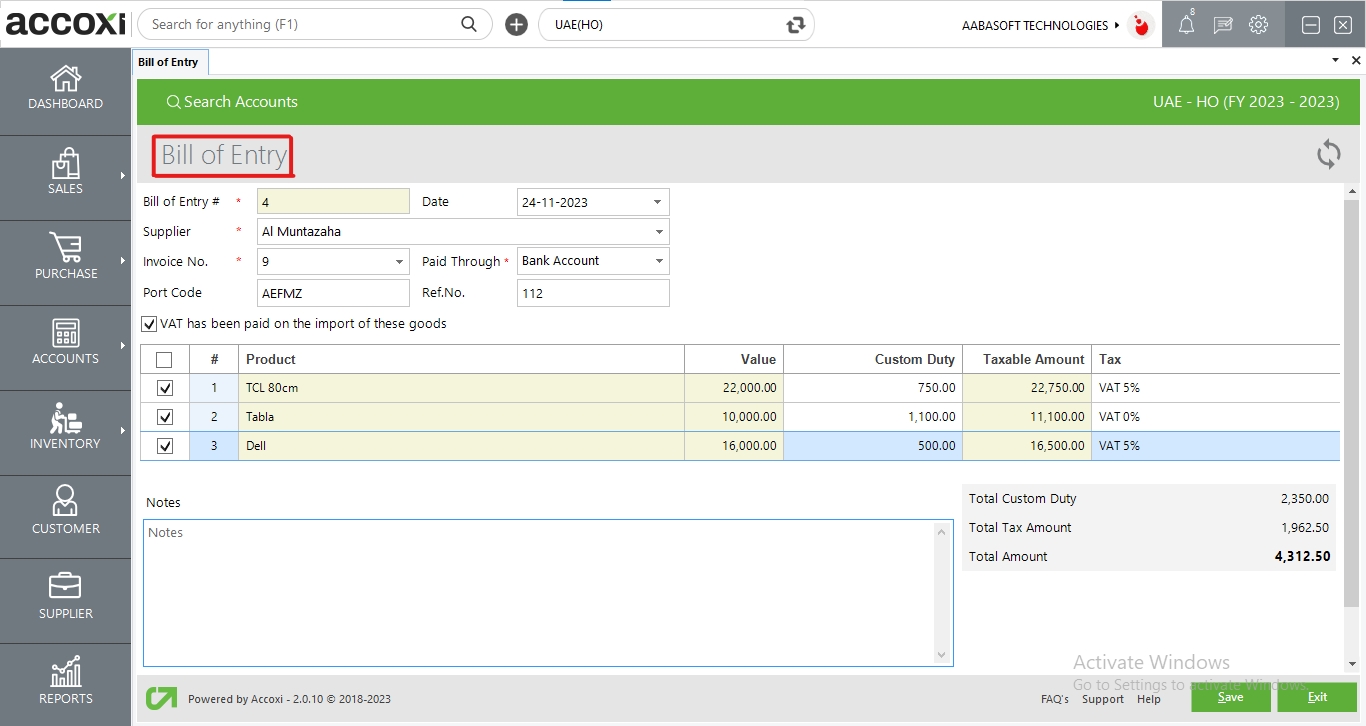
The features of a Bill of Entry typically include:
These features collectively contribute to the accurate documentation and processing of imported goods through customs, ensuring compliance with regulations and facilitating smooth import procedures.
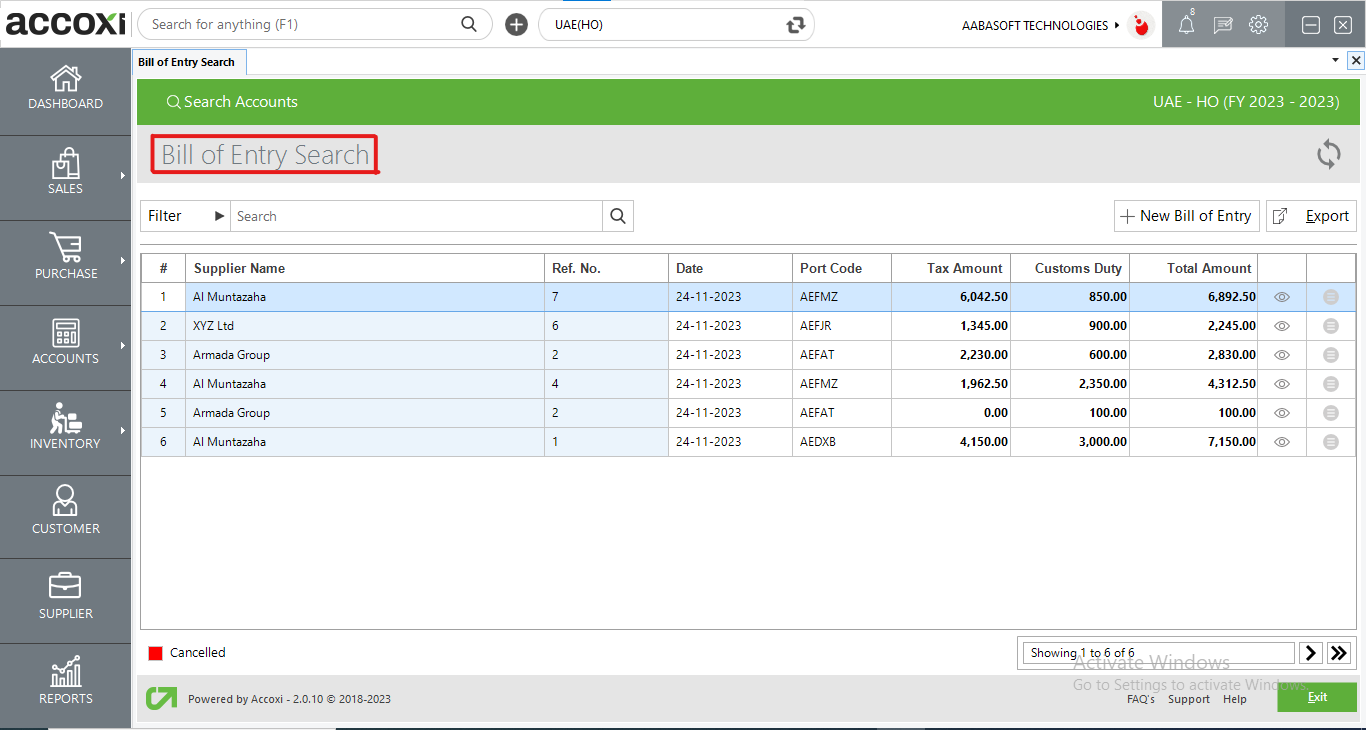
Bill Of Entry Search
|
Field |
Description |
|
Filter |
You can locate a created Bill of Entry either through the search bar or by utilizing the filter option. The filtering conditions encompass Supplier name, Reference number, Date, and Stat |
|
Refresh |
If the most recent data is not displayed, simply click on the refresh icon located at the top right corner of the page to fetch the updated information. |
|
+ New Bill Of Entry |
Clicking on this opens a new creation window, allowing you to input information and create a new entry. |
|
Export |
Data can be exported to Excel format. Click on the export button at the top right corner. Select the file location and click on Save. |
|
View |
Clicking on the view icon opens the Bill of Entry view window, allowing you to access and review the details associated with the specific Bill of Entry. |
|
More |
The "More" option offers additional features, including the ability to view, edit, export to PDF, and print the Bill of Entry. |
|
Pagination |
It manages page navigation and allows the user to set the page size to 10, 20, 50, or 100. By entering the page number in the box and clicking on the Go button, it facilitates jumping to the specified page. |
|
Exit |
If the user wishes to exit from the current page, they can click on the "exit" option. |
|
Field |
Description |
|
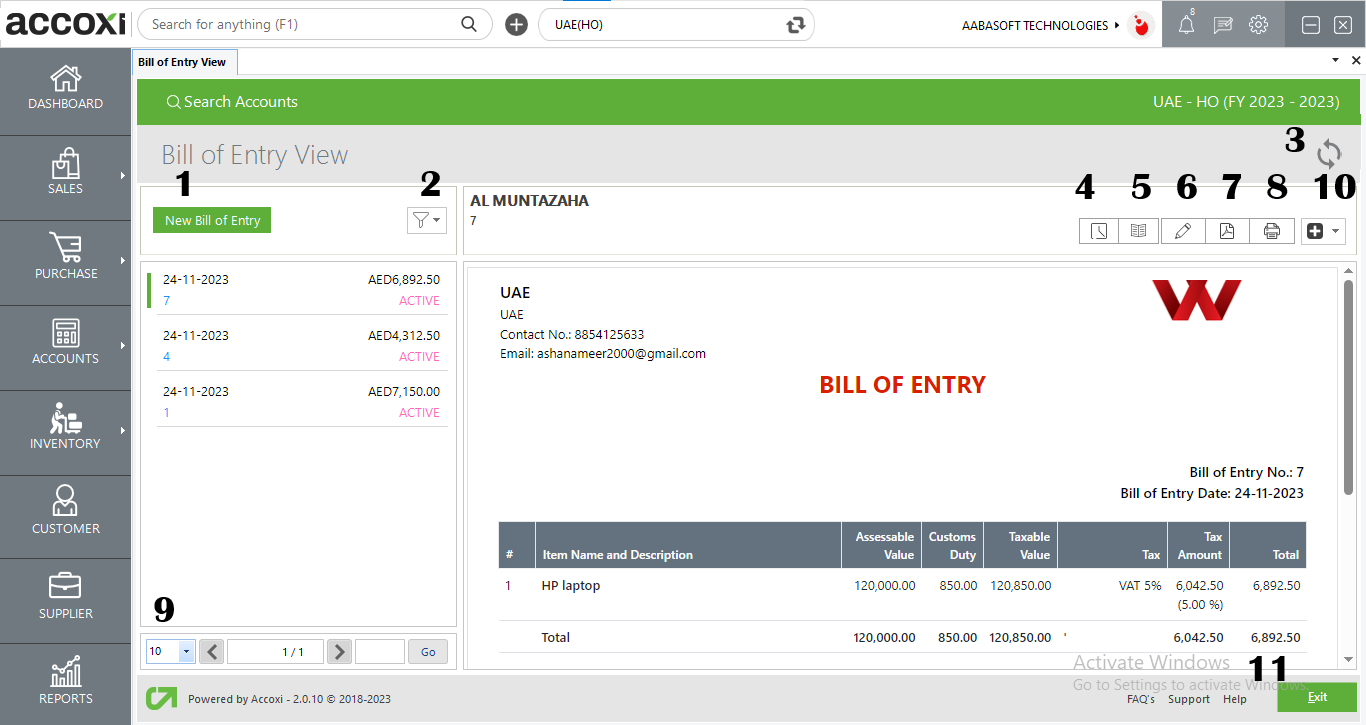
New Bill of Entry |
Clicking on this initiates the creation screen. |
|
Filter |
The filter option offers filtering conditions for both "All" and "Cancelled" transactions. |
|
Refresh |
If the most recent data is not displayed, simply click on the refresh icon located at the top right corner of the page to fetch the updated information. |
|
History |
It displays the history and comments of the transactions made, showcasing all edits and alterations along with the respective dates. Users also have the option to add comments to these changes if desired. |
|
Journal View |
This menu displays the journal view of the transaction, which presents both the debit and credit aspects along with the corresponding amounts. |
|
Edit |
This feature provides the option to make any changes or modifications to the created entry. |
|
Export To PDF |
If you wish to convert the bill of entry into a PDF format, you can choose the "Export to PDF" option. |
|
|
The "Print" menu enables you to print the entry, if a physical copy is needed. |
|
More |
The "More" option includes a feature to cancel the entry. |
|
Pagination |
It manages page navigation and allows the user to set the page size to 10, 20, 50, or 100. By entering the page number in the box and clicking on the Go button, it facilitates jumping to the specified page. |
|
Exit |
If the user wishes to exit from the current page, they can click on the "exit" option. |