Creation and customization of POS counter in Accoxi
Counter mapping is an important form in Accoxi. It is the option to create counter settings for POS billing. User can set the name of counter, machine, printer, print format, paper size etc with this form. Changes that input in counter mapping will effect on POS billing and it provide smooth functioning of POS.
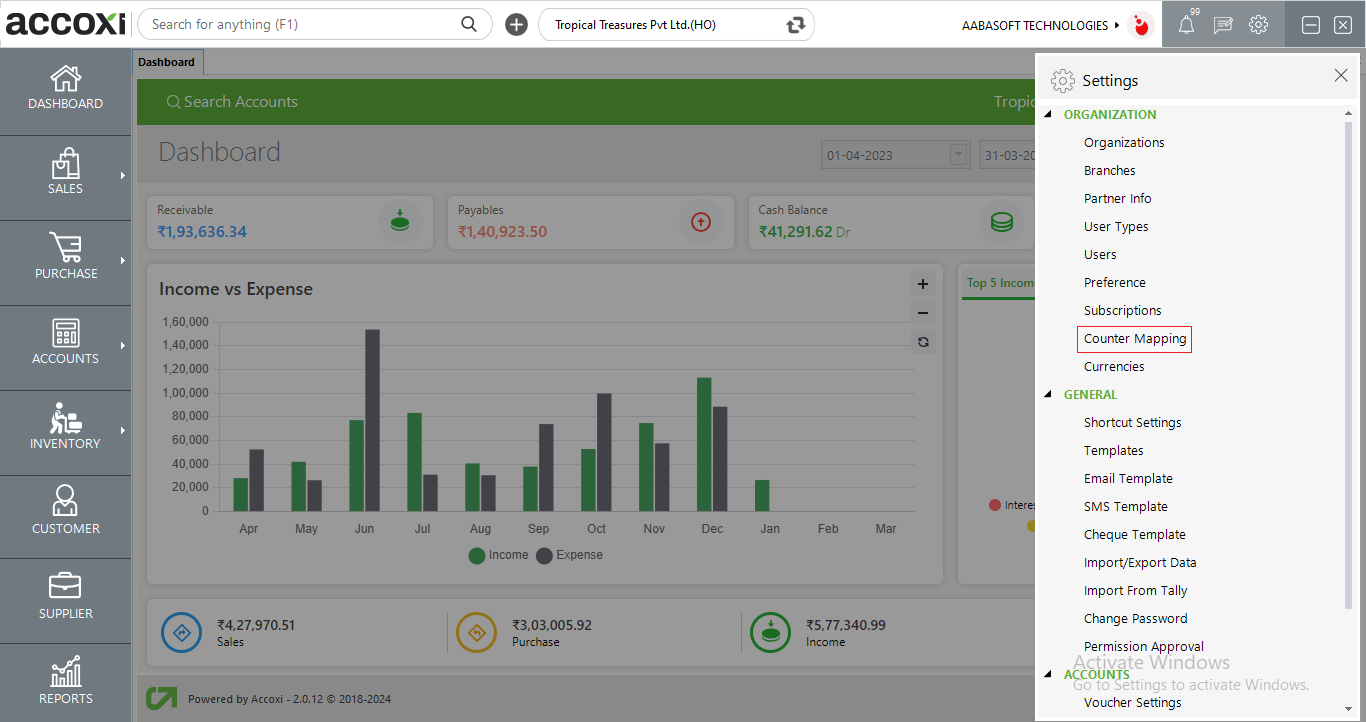
Click on the Settings menu and select the option Counter Mapping
When click on the Counter Mapping option, then it opens to Counter Mapping Search.
Counter Mapping Search
Counter mapping search consists of various menus and it shows the details of counter name, machine name, print name, and print format.
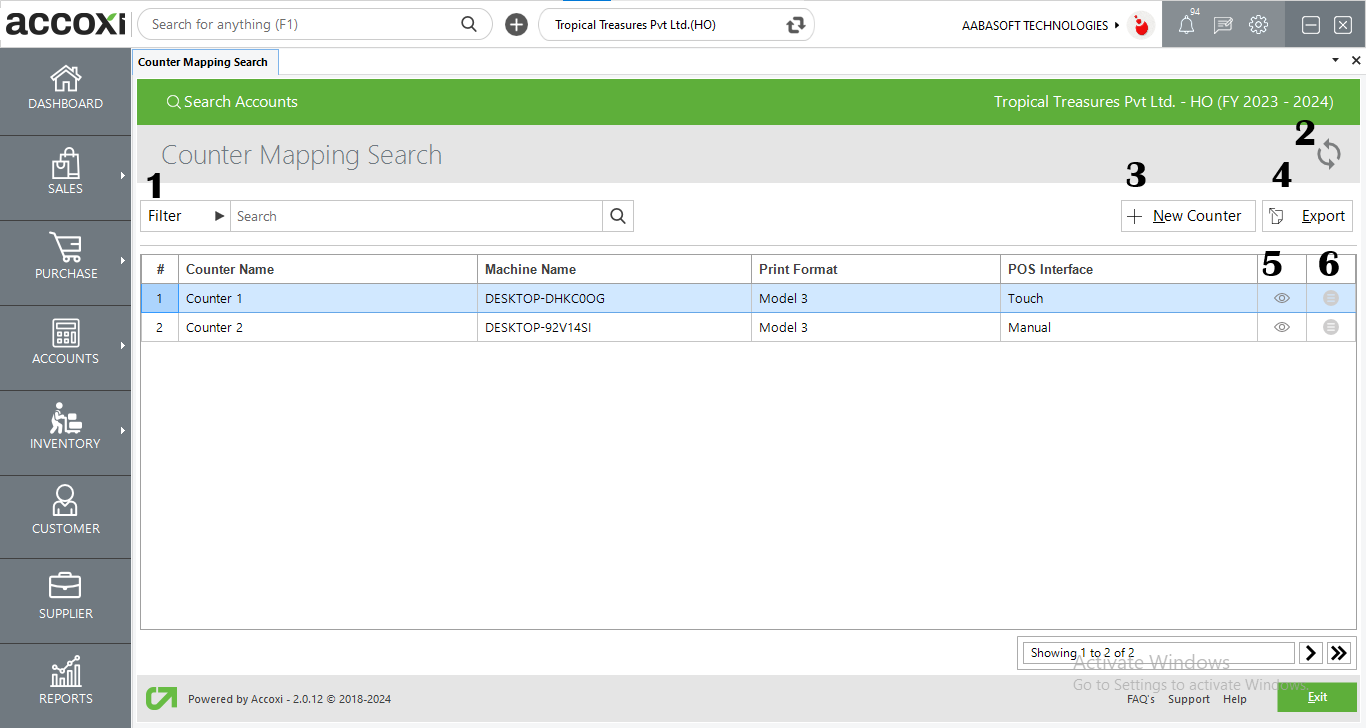
1. Quick Search/Filter
Filter of counter details can be done in two ways-Either user can directly enter the item name into the search bar near filter option or by clicking the filter drop down.
2. Refresh
If the latest data is not displayed, click on the refresh icon on the top right corner of the page to fetch the new data.
3. +New Counter
This menu is used for the purpose of adding a new counter. While clicking on the menu, it opens the module for counter mapping.

|
Fields |
Description |
|
Machine Name |
It shows the name of the machine name that is currently used. |
|
Unique System Code |
It shows the unique system code of the machine. The regenerate option is available on the right side of the machine details to regenerate the machine. |
|
Counter Name |
Enter the name of the counter on this field. |
|
POS Interface |
The user can choose whether the POS interface is Touch or Manual |
|
Template Format |
Choose the template format of POS print |
|
Payment Type |
Here users need to select the bank account for the card payment process in POS. Users can add multiple payment types such as Google pay, phone pay, and set related payment ledgers. There is also an option to set which one needs to be the default payment method. |
|
Active Counter |
Click/mark on the Active option to save the counter as an active counter. If the user may unmark the active option, it saves as an inactive counter. |
|
Enable credit sale |
This option allows users to create credit sales in POS |
|
Enable Item Rate Edit |
In POS, by enabling or disabling this option the users can edit the sales rate. |
|
Update |
After entering the details, click on the update option to save the changes. |
|
Exit |
The exit menu is used to go to the previous page without saving the Counter mapping form. |
4. Export
The details of counter-mapping can be exported to Excel format. Click on the Export button at the top right corner near the +New button. Select the file location and click on save.
5. View
This menu option helps the user to view the created counter-mapping format by clicking the view sign.
6. More Options
More options menu include two additional options and they are Edit and Delete
This menu helps the user to make an edit on created counter-mapping form. By clicking on the menu, a form of the selected item will appear.
If the user wants to delete an item that has already been created, it can be done by using the option Delete.
Yes you can change the counter as Inactive
Yes, you can export the counter data to excel format by using the Export option on Counter mapping search.
Yes, you can delete a counter after created.